
Trajectory Planning & Motion Generation · Lesson 15
Capstone: Plan & Execute a 6DOF Robot Trajectory
Est. 90–120 min
Why
Why this capstone matters
This capstone puts all of Stage 9 together into one pipeline. You will take a task (home → pick → place → home), choose Cartesian or joint-space motion for each segment, give it a smooth time scaling, pick the shortest legal duration, check reach, joint limits, speed, acceleration and final pose error, and only then run it — in the browser and on the 2-servo pen arm.
By the end of this capstone you will be able to: write a complete motion plan; justify each design choice; produce a VALID/INVALID report with reasons; and run a checked cycle on hardware. The arm here is a simplified 2-link planar stand-in for the position part of a 6DOF arm — the same pipeline applies to all six joints.
Concept
The full planning pipeline
The pipeline in eight steps
1. Task → poses
Write the key poses (home, above pick, pick, place…) as tool positions (and orientations on a 6DOF arm). Lesson 5: waypoints.
2. IK for each pose
Check every pose is reachable and pick one IK branch for the whole job (Stage 8).
3. Choose the motion type
Cartesian line/arc where the tool path matters (approach, insert, draw) — Lesson 9. Joint space for free transfers — Lesson 4. Orientation by slerp — Lesson 10.
4. Choose the time scaling
Quintic or S-curve for smooth rest-to-rest; trapezoid when speed matters most — Lessons 7, 8, 11, 12.
5. Choose T
One trial, then the 1/T and 1/T² rule plus a margin — Lesson 13.
6. Synchronise
All joints share one s(t) — Lesson 14.
7. Check everything
Reach, joint limits, speed, acceleration, (jerk), final pose error. Any failure → INVALID with the reason.
8. Execute and verify
Only a VALID plan is streamed to the motors. Measure what really happened.
Which motion type where?
| Segment | Good choice | Why |
|---|---|---|
| Approach / pick / insert | Cartesian line | Tool must move straight, e.g. down onto the part |
| Long transfer in free space | Joint space | Simple and fast; joint speeds stay predictable (no singularity blow-up mid-way) |
| Drawing / welding / gluing | Cartesian line + arc + orientation | The path itself is the job |
| Many points in a row | Via points with cubic or blended segments | Do not stop at each point (Lesson 5) |
Visual
Visualise it: plan → generate → check → play
The integrated workflow: start → target → IK → joint-space or Cartesian → time scaling → generate → checks → play → VALID / INVALID (simplified planar arm).
Interactive · Trajectory capstone (plan & execute · educational 2R)
Workflow: inspect start → set target EE → IK (Stage 8 ik2R) → choose joint-space or Cartesian → Linear/Cubic/Quintic → generate → check vel/acc limits → PVA graphs → play sim → final pose error → Valid/Invalid. Simplified planar FK/IK stand-in for a 6DOF position chain — not industrial analytic 6DOF or hardware streaming (Stage 10 ROS later).
Results panel
- Start EE
- 119.6, 91.4
- Target EE
- 80, 90
- IK target
- ok
- Goal joints
- 13.1°, 83.2°
- Peak |q̇|
- 32.4 °/s
- Peak |q̈|
- 39.8 °/s²
- Final pose err
- 0.000
- Live EE
- 119.6, 91.4
- Verdict
- Invalid
- · Generate a trajectory first
Code lab
Code lab: the capstone planner
capstone.py plans home (8, 10) → pick (14, 4) as a Cartesian line, pick → place (2, 14) as a joint-space move, and place → home as a Cartesian line. Each segment uses a quintic; its T comes from one trial with the Lesson 13 rule plus 10% margin, rounded up to 0.05 s. Then every sample is checked and the final position is compared with the target by FK. Part 2 shows two targets that must be refused. Run python3 capstone.py.
# capstone.py - Stage 9 Lesson 15: plan, check and report a complete trajectory
# 2-link arm (10 cm + 8 cm, elbow-up). Task: home -> pick -> place -> home.
#   segment 1: Cartesian line (tool must go straight down to the pick)
#   segment 2: joint-space move (fast transfer, tool path may curve)
#   segment 3: Cartesian line back home
# Every segment: quintic s(t); T chosen from ONE trial with the 1/T, 1/T^2 rule;
# then a full check: reach, joint limits, speed, acceleration, final pose error.
import math

L1, L2 = 10.0, 8.0
LIM = [(-60.0, 150.0), (0.0, 160.0)]          # joint limits (deg)
VMAX, AMAX = 120.0, 300.0                      # deg/s, deg/s^2
N = 200                                        # samples per segment

def fk(t1, t2):
    a, b = math.radians(t1), math.radians(t1 + t2)
    return L1*math.cos(a) + L2*math.cos(b), L1*math.sin(a) + L2*math.sin(b)

def ik(x, y):
    c2 = (x*x + y*y - L1*L1 - L2*L2) / (2*L1*L2)
    if abs(c2) > 1: return None
    t2 = math.acos(c2)
    t1 = math.atan2(y, x) - math.atan2(L2*math.sin(t2), L1 + L2*math.cos(t2))
    return math.degrees(t1), math.degrees(t2)

def quintic(u): return 10*u**3 - 15*u**4 + 6*u**5

def sample(kind, a, b):
    """Joint samples q_k for s_k = quintic(k/N), k = 0..N, or a problem string."""
    out = []
    if kind == "joint":
        qa, qb = ik(*a), ik(*b)
        if qa is None or qb is None: return "end point out of reach"
    for k in range(N + 1):
        s = quintic(k / N)
        if kind == "line":
            q = ik(a[0] + s*(b[0]-a[0]), a[1] + s*(b[1]-a[1]))
            if q is None: return f"out of reach at s = {s:.2f}"
        else:
            q = tuple(qa[i] + s*(qb[i]-qa[i]) for i in range(2))
        for i in range(2):
            if not LIM[i][0] <= q[i] <= LIM[i][1]:
                return f"joint {i+1} = {q[i]:.1f} deg outside {LIM[i]}"
        out.append(q)
    return out

def peaks(q, T):
    h = T / N
    pv = pa = 0.0
    for i in range(2):
        x = [p[i] for p in q]
        v = [(x[k+1]-x[k]) / h for k in range(N)]
        a = [(v[k+1]-v[k]) / h for k in range(N-1)]
        pv, pa = max(pv, max(map(abs, v))), max(pa, max(map(abs, a)))
    return pv, pa

def plan(name, kind, a, b):
    q = sample(kind, a, b)
    if isinstance(q, str):
        print(f"  {name:22s} INVALID - {q}")
        return None
    v1, a1 = peaks(q, 1.0)                                  # trial at T0 = 1 s
    T = max(v1 / VMAX, math.sqrt(a1 / AMAX))                # shortest legal T
    T = math.ceil(T * 1.1 / 0.05) * 0.05                    # +10% margin, round up to 0.05 s
    pv, pa = peaks(q, T)
    ex, ey = fk(*q[-1])
    err = math.hypot(ex - b[0], ey - b[1])
    ok = pv <= VMAX and pa <= AMAX and err < 0.01
    print(f"  {name:22s} {kind:5s} T = {T:4.2f} s  peak {pv:5.1f} deg/s  {pa:6.1f} deg/s^2  end error {err:.4f} cm  {'VALID' if ok else 'INVALID'}")
    return T if ok else None

HOME, PICK, PLACE = (8.0, 10.0), (14.0, 4.0), (2.0, 14.0)
print("Part 1 - home -> pick -> place -> home")
times = [plan("1 home -> pick", "line", HOME, PICK),
         plan("2 pick -> place", "joint", PICK, PLACE),
         plan("3 place -> home", "line", PLACE, HOME)]
if all(times):
    print(f"  whole trajectory VALID, cycle time {sum(times):.2f} s")

print("\nPart 2 - a target that cannot work")
plan("4 home -> far point", "line", HOME, (19.0, 5.0))
plan("5 home -> behind base", "joint", HOME, (-12.0, -6.0))
Output (run with python3 capstone.py)
Part 1 - home -> pick -> place -> home
  1 home -> pick         line  T = 0.95 s  peak  63.5 deg/s   246.5 deg/s^2  end error 0.0000 cm  VALID
  2 pick -> place        joint T = 1.25 s  peak  96.1 deg/s   236.8 deg/s^2  end error 0.0000 cm  VALID
  3 place -> home        line  T = 0.95 s  peak  72.0 deg/s   246.0 deg/s^2  end error 0.0000 cm  VALID
  whole trajectory VALID, cycle time 3.15 s

Part 2 - a target that cannot work
  4 home -> far point    INVALID - out of reach at s = 0.82
  5 home -> behind base  INVALID - joint 1 = -60.5 deg outside (-60.0, 150.0)
Capstone lab: set start joints and a target, choose joint-space or Cartesian, pick Linear, Cubic or Quintic, set T and limits, generate, read the checks, and play. Try to make it fail on purpose too (simplified planar arm).
Interactive · Trajectory capstone (plan & execute · educational 2R)
Workflow: inspect start → set target EE → IK (Stage 8 ik2R) → choose joint-space or Cartesian → Linear/Cubic/Quintic → generate → check vel/acc limits → PVA graphs → play sim → final pose error → Valid/Invalid. Simplified planar FK/IK stand-in for a 6DOF position chain — not industrial analytic 6DOF or hardware streaming (Stage 10 ROS later).
Results panel
- Start EE
- 119.6, 91.4
- Target EE
- 80, 90
- IK target
- ok
- Goal joints
- 13.1°, 83.2°
- Peak |q̇|
- 32.4 °/s
- Peak |q̈|
- 39.8 °/s²
- Final pose err
- 0.000
- Live EE
- 119.6, 91.4
- Verdict
- Invalid
- · Generate a trajectory first
Real world
Planning pipelines in the real world
- Offline programming: a robot program can be built and checked in simulation (reach, limits, cycle time) before it runs on the real robot.
- Robot languages combine joint moves and linear/circular moves in one program (MoveJ, MoveL, MoveC in ABB RAPID).
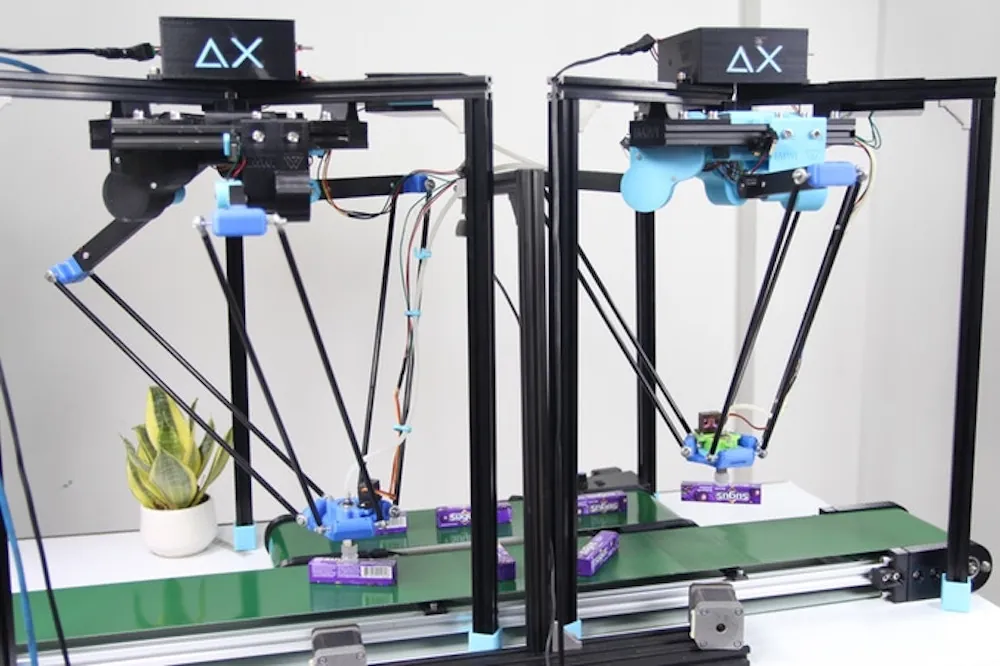
- Pick-and-place lines such as delta robots over conveyors repeat the same planned cycle again and again, so every saved fraction of a second adds up.
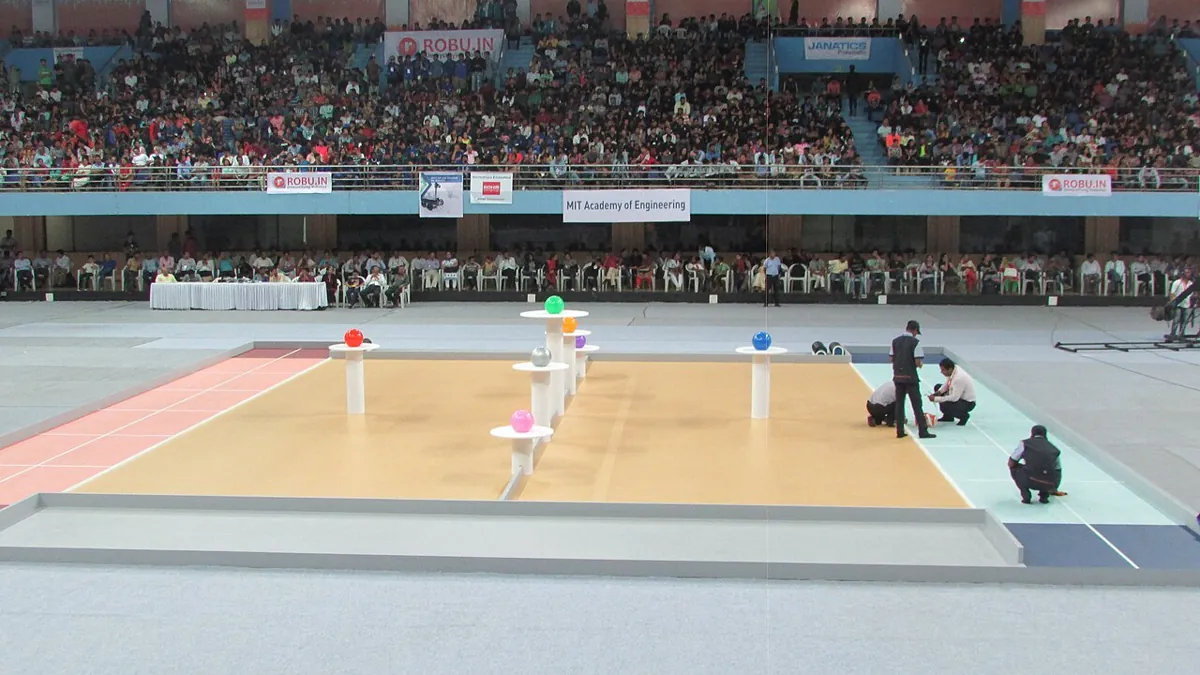
- Student contests like Robocon reward robots that are fast and reliable — a checked plan gives both.
Bench build
Bench build: run the cycle on the pen arm
capstone_pen_arm.ino runs the same three segments with the durations from capstone.py. When you press D2 it checks all segments first (reach, joint limits, joint speed at every 20 ms step) and prints VALID or the reason; only a fully VALID plan moves the arm. It pauses half a second at pick and place.
| From | To | Note |
|---|---|---|
| Shoulder servo signal | D9 | Servo angle = θ₁ + 60° |
| Elbow servo signal | D10 | Servo angle = θ₂ |
| Both servos + and − | Separate 5–6 V supply, 2 A or more | Never the Arduino 5 V pin |
| Supply − | Arduino GND | Common ground |
| Button | D2 ↔ GND | INPUT_PULLUP |
Mark the targets
On chart paper, mark the shoulder axis (0, 0), home (8, 10), pick (14, 4) and place (2, 14) in cm.
Run
Press D2. The Serial Monitor should say “all segments VALID – running”. With the pen down you will see two straight lines and one curved transfer.
Measure
How close does the pen get to each mark? Time a full cycle (planned 3.15 s plus two 0.5 s pauses).
Break it
Change the pick to (19, 5) or shorten a T to 0.4 s and upload. The arm must refuse and stay still.
Your task
Replace the poses with your own task (see the capstone project below), re-plan with
capstone.pyand copy the new T values.
// capstone_pen_arm.ino - Stage 9 Lesson 15: run the planned cycle on the 2-servo pen arm
// home -> pick (Cartesian line) -> place (joint move) -> home (Cartesian line),
// quintic timing, durations from capstone.py. Every segment is checked BEFORE the arm moves
// (reach, joint limits, joint speed); if any check fails, nothing moves.
// Wiring: shoulder servo D9 (servo angle = theta1 + 60), elbow servo D10 (servo angle = theta2).
//         Both servos on a SEPARATE 5-6 V supply (2 A+); supply GND -> Arduino GND. Button D2 -> GND.
#include <Servo.h>

Servo sh, el;
const float L1 = 10.0, L2 = 8.0, SH_OFFSET = 60.0;
const float SH_MIN = -60, SH_MAX = 150, EL_MIN = 0, EL_MAX = 160, V_MAX = 120.0;
const unsigned long DT_MS = 20;

struct Seg { float ax, ay, bx, by, T; bool line; };
const Seg SEGS[3] = {
  { 8, 10, 14, 4, 0.95, true },     // home -> pick
  { 14, 4, 2, 14, 1.25, false },    // pick -> place (joint space)
  { 2, 14, 8, 10, 0.95, true },     // place -> home
};

void writeDeg(Servo &s, float d) { d = constrain(d, 0, 180); s.writeMicroseconds(544 + (int)(d * (2400 - 544) / 180.0)); }
float quintic(float u) { return u * u * u * (10 - 15 * u + 6 * u * u); }

bool ik(float x, float y, float &t1, float &t2) {
  float c2 = (x * x + y * y - L1 * L1 - L2 * L2) / (2 * L1 * L2);
  if (c2 < -1 || c2 > 1) return false;
  t2 = acos(c2);
  t1 = atan2(y, x) - atan2(L2 * sin(t2), L1 + L2 * cos(t2));
  t1 = degrees(t1); t2 = degrees(t2);
  return true;
}

// joint angles of segment g at progress s; false if unreachable
bool jointsAt(const Seg &g, float s, float &t1, float &t2) {
  if (g.line) return ik(g.ax + s * (g.bx - g.ax), g.ay + s * (g.by - g.ay), t1, t2);
  float a1, a2, b1, b2;
  if (!ik(g.ax, g.ay, a1, a2) || !ik(g.bx, g.by, b1, b2)) return false;
  t1 = a1 + s * (b1 - a1); t2 = a2 + s * (b2 - a2);
  return true;
}

bool check(const Seg &g, int idx) {
  int n = (int)(g.T * 1000 / DT_MS);
  float p1 = 0, p2 = 0;
  for (int k = 0; k <= n; k++) {
    float t1, t2;
    if (!jointsAt(g, quintic((float)k / n), t1, t2)) { Serial.print(F("seg ")); Serial.print(idx); Serial.println(F(": out of reach")); return false; }
    if (t1 < SH_MIN || t1 > SH_MAX || t2 < EL_MIN || t2 > EL_MAX) { Serial.print(F("seg ")); Serial.print(idx); Serial.println(F(": joint limit")); return false; }
    if (k > 0) {
      float sp = max(fabs(t1 - p1), fabs(t2 - p2)) / (DT_MS / 1000.0);
      if (sp > V_MAX) { Serial.print(F("seg ")); Serial.print(idx); Serial.println(F(": joint speed")); return false; }
    }
    p1 = t1; p2 = t2;
  }
  return true;
}

void play(const Seg &g) {
  unsigned long t0 = millis();
  while (true) {
    float u = (millis() - t0) / 1000.0 / g.T;
    if (u > 1) u = 1;
    float t1, t2;
    if (jointsAt(g, quintic(u), t1, t2)) { writeDeg(sh, t1 + SH_OFFSET); writeDeg(el, t2); }
    if (u >= 1) break;
    delay(DT_MS);
  }
}

void goHome() {
  float t1, t2;
  ik(SEGS[0].ax, SEGS[0].ay, t1, t2);
  writeDeg(sh, t1 + SH_OFFSET); writeDeg(el, t2);   // quick move at power-up
}

void setup() {
  Serial.begin(115200);
  pinMode(2, INPUT_PULLUP);
  sh.attach(9); el.attach(10);
  goHome();
  Serial.println(F("Press D2 to check and run home -> pick -> place -> home"));
}

void loop() {
  if (digitalRead(2) != LOW) return;
  bool ok = true;
  for (int i = 0; i < 3; i++) ok = ok && check(SEGS[i], i + 1);
  if (!ok) { Serial.println(F("INVALID - not moving")); }
  else {
    Serial.println(F("all segments VALID - running"));
    for (int i = 0; i < 3; i++) { play(SEGS[i]); delay(500); }   // short pause at pick and place
    Serial.println(F("cycle done"));
  }
  while (digitalRead(2) == LOW) delay(10);
}
Debugging
Capstone debugging checklist
| Symptom | Likely cause | Lesson to revisit |
|---|---|---|
| INVALID: out of reach mid-path | Cartesian line leaves the workspace | 9 — move the path inward or use a joint move |
| INVALID: joint limit | Wrong IK branch or pose too far | 2, 9 — change branch or pose |
| INVALID: speed/acceleration | T too short | 11, 13 — stretch T |
| Arm wobbles at stops | Acceleration jumps | 12 — quintic or S-curve |
| Pen misses the marks by a fixed amount | Servo horn offsets or link lengths | Stage 8 calibration |
| Joints arrive at different times | Not synchronised | 14 — shared s(t) |
Think
Think about it
Think
Your capstone cycle is VALID but 30% too slow for the task. List three changes, in the order you would try them, and say which Stage 9 lesson each comes from.
Experiment
Capstone lab
About 60 minutes with capstone.py and the capstone lab; the pen-arm run takes 30 more minutes.
Experiment
Capstone lab
You will need
- `capstone.py` and Python 3
- Trajectory capstone lab (in your browser)
- Optional: 2-servo pen arm, separate 5–6 V 2 A supply, button, sketch pen, chart paper
Steps
- Run `capstone.py`. Copy the VALID report into your notebook.
- Make segment 2 a Cartesian line instead of a joint move. Is it still VALID? What changes in T?
- Lower AMAX to 150. Recompute the cycle time.
- In the capstone lab, plan a reachable target with joint-space and Quintic. Generate, read the checks, play.
- Now make it fail on purpose: target outside the reach, then T too small. Read the reasons.
- Optional: run `capstone_pen_arm.ino`, measure the pen marks and the cycle time.
Interactive · Trajectory capstone (plan & execute · educational 2R)
Workflow: inspect start → set target EE → IK (Stage 8 ik2R) → choose joint-space or Cartesian → Linear/Cubic/Quintic → generate → check vel/acc limits → PVA graphs → play sim → final pose error → Valid/Invalid. Simplified planar FK/IK stand-in for a 6DOF position chain — not industrial analytic 6DOF or hardware streaming (Stage 10 ROS later).
Results panel
- Start EE
- 119.6, 91.4
- Target EE
- 80, 90
- IK target
- ok
- Goal joints
- 13.1°, 83.2°
- Peak |q̇|
- 32.4 °/s
- Peak |q̈|
- 39.8 °/s²
- Final pose err
- 0.000
- Live EE
- 119.6, 91.4
- Verdict
- Invalid
- · Generate a trajectory first
A trajectory is only as good as its checks. The same pipeline — poses, motion type, timing, T, synchronisation, checks, execution — works for the 2-link arm and for a 6DOF industrial arm.
Knowledge check
Check your understanding
Knowledge check
1. What does a trajectory add to a set of IK poses?
2. For moving the gripper straight down onto a part, use…
3. For a long transfer in free space, a good choice is…
4. Before calling a plan VALID you should check…
5. Doubling T for the same shape changes peak joint speed by…
6. Why did the line towards (19, 5) fail?
7. This capstone’s arm model is…
Mini assignment
Capstone project
Mini assignment
Capstone project: your own pick-and-place
Design, check and run a complete trajectory for a task of your choice: for example placing three sweets in a box, drawing your initials, or sorting coloured blocks.
Deliverables
- Task description and a labelled sketch of all poses (in cm).
- Table: segment, motion type (joint or Cartesian), time scaling, T, reason for each choice.
- The VALID report from your modified `capstone.py`, plus one INVALID case you fixed and how.
- Cycle time, and one improvement that cuts it by at least 10% (with the new report).
- Optional: a video or photo of the pen arm running your plan, with measured errors at each mark.
- One paragraph: what would change for a real 6DOF arm (orientation, wrist joints, collisions)?
Do this, step by step
- Run
python3 capstone.pyand read the Part 1 report for home → pick → place → home. - Read Part 2 and write which check failed for each of the two INVALID moves (reach for the far point, joint 1 limit for behind the base).
- Replace the poses with your own task (in cm, inside the reach) and run until the report says VALID.
- Change one segment’s time and show the new cycle time and peaks; aim for at least 10% faster.
- Optional bench: run
capstone_pen_arm.inoand measure the error at each mark on the paper.
Stuck? Hints, one at a time
- Use joint moves for big free moves and Cartesian lines only where the tool must go straight (approach and retreat).
- Every sample must pass reach, joint limits, speed and acceleration — not just the final pose.
- If a line fails at reach, move the point closer or split the move with a waypoint.
Challenges (pick by level)
- 🟢 Easy: Write the 8 pipeline steps from memory with one example each.
- 🟢 Easy: For your task, mark which segments must be Cartesian and why.
- 🟡 Medium: Add a jerk check to
capstone.py(Lesson 12) and report peak jerk per segment. - 🟠 Hard-ish: Add a circle obstacle (Lesson 2) and refuse any segment where a link touches it.
- 🔴 Hard: Replace the stops at pick and place with via points so the arm flows through them (Lesson 5), and compare cycle times.
- ⚫ Research: Read *Modern Robotics* §9.5 Summary and list which parts of this pipeline it covers and which belong to motion planning (Chapter 10).
Next step
🎉 You have finished Stage 9 — Trajectory Planning. Next, carry this planning pipeline into the following stage, where trajectories meet real controllers and software.
Look back: Lesson 14: Multi-Joint Synchronization. Next: Stage 10 L01: Why Robots Need ROS 2. Related: Stage 13 — Perception, Planning & Manipulation.
Sources
- Modern Robotics (Lynch & Park) — book home page and free PDF — Ch. 9 trajectory generation: path + time scaling, straight lines in joint and task space (§9.2.1), polynomial, trapezoidal and S-curve time scalings (§9.2.2), via points (§9.3); Ch. 10 motion planning (C-space obstacles).
- ABB RAPID summary — Motion (RobotStudio course page) — MoveJ, MoveL and MoveC in one robot program.
- Wikipedia — Motion planning — finding a valid path from start to goal.
- Arduino — Servo library —
writeMicroseconds()for the capstone run. - Photos: Wikimedia Commons (credits under each image).
Self-attested for now — keep artifacts in your lab notebook.
Complete
Today's goal
0 of 1 done today
Mark this lesson complete when you have worked the experiment, knowledge check, and assignment (even roughly).