
ROS 2 & Robot Software Architecture (Fundamentals) · Lesson 01
Why Robots Need ROS 2
Est. 45–60 min
Why
Why this lesson matters
Think of a big Indian wedding. The caterer, the decorator, the DJ, the photographer and the pandit-ji all work together, but none of them walks into the others’ work and changes it. They coordinate through a few agreed channels — the family WhatsApp group, the event schedule, the stage manager. If the DJ falls sick, a new DJ joins the same group and the wedding goes on. A robot needs the same thing for its software: many separate programs, each doing one job, talking through agreed, named channels. ROS 2 (Robot Operating System 2) is the most widely used open-source toolkit for exactly this.
By the end of this lesson you will be able to: explain why a single big program breaks down as a robot grows; say what ROS 2 is (and what it is not); name the main ideas — nodes, topics, services, actions, parameters — that the rest of this stage teaches; run a plain-Python simulation that shows coupling versus named topics; and read your first real ROS 2 node that publishes a shoulder angle from a potentiometer.
Concept
The software problem every robot hits
A robot is many programs, not one
Even a desk arm has many jobs running at the same time: reading joint sensors, reading a camera, finding objects, solving IK, planning trajectories, running a PID loop per joint, checking the emergency stop, logging and showing a dashboard. Some must run 500 times a second (control), some 30 times a second (camera), some only when a user clicks. Often different people write them, in different languages, and some even run on different computers — a Raspberry Pi on the robot and a laptop on the table.
| Way of building | How the parts talk | What goes wrong as the robot grows |
|---|---|---|
| One big program (monolith) | Direct function calls inside one process | Change one part and others break; one crash stops everything; hard to split across computers |
| Separate programs + home-made sockets | Every pair invents its own protocol | N programs need up to N×(N−1)/2 custom links; no standard tools to inspect them |
| Middleware (ROS 2) | Named topics, services and actions with typed messages | Parts are swapped, restarted or moved to another machine without editing the others |
So what exactly is ROS 2?
Despite the name, ROS 2 is not an operating system like Linux or Windows. It is a set of software libraries and tools that runs on top of an operating system (for the current long-term release, ROS 2 Jazzy Jalisco, the main platform is Ubuntu 24.04). Its heart is middleware — the “nervous system” layer that lets separate programs, called nodes, find each other and exchange data.
- Node — one program (or part of one) that does one logical job, e.g.
camera_driver,ik_solver,joint_controller. - Topic — a named channel such as
/joint_states. Publishers send messages; any number of subscribers receive them. Nobody has to know who is on the other side. - Service — a quick question-and-answer call: “Gripper, open now” → “Done”.
- Action — a long job with progress updates and the option to cancel: “Move to the tray” → “40 %… 80 %… arrived”.
- Parameter — a setting you can change without editing code, like
max_speed_deg_s: 60. - Message type — the agreed shape of the data, e.g.
sensor_msgs/msg/JointState, so both sides understand each other exactly.
Underneath, ROS 2 uses DDS (Data Distribution Service), an industry standard for publish/subscribe communication, through a layer called RMW (ROS MiddleWare interface). The official docs list eProsima Fast DDS as the default, with Eclipse Cyclone DDS and others also supported. DDS gives ROS 2 distributed discovery — there is no central “master” program that everything depends on — and Quality of Service (QoS) settings for unreliable networks. You will meet QoS in Lesson 14.
Your nodes (Python with rclpy, C++ with rclcpp)
        │   publish / subscribe / call / send goals
  ROS client library (rcl)
        │
  RMW interface (rmw)  ← choose Fast DDS, Cyclone DDS, …
        │
  DDS / RTPS on the network
        │
  Operating system (Ubuntu 24.04 for Jazzy) + hardware
Why ROS 2 and not ROS 1?
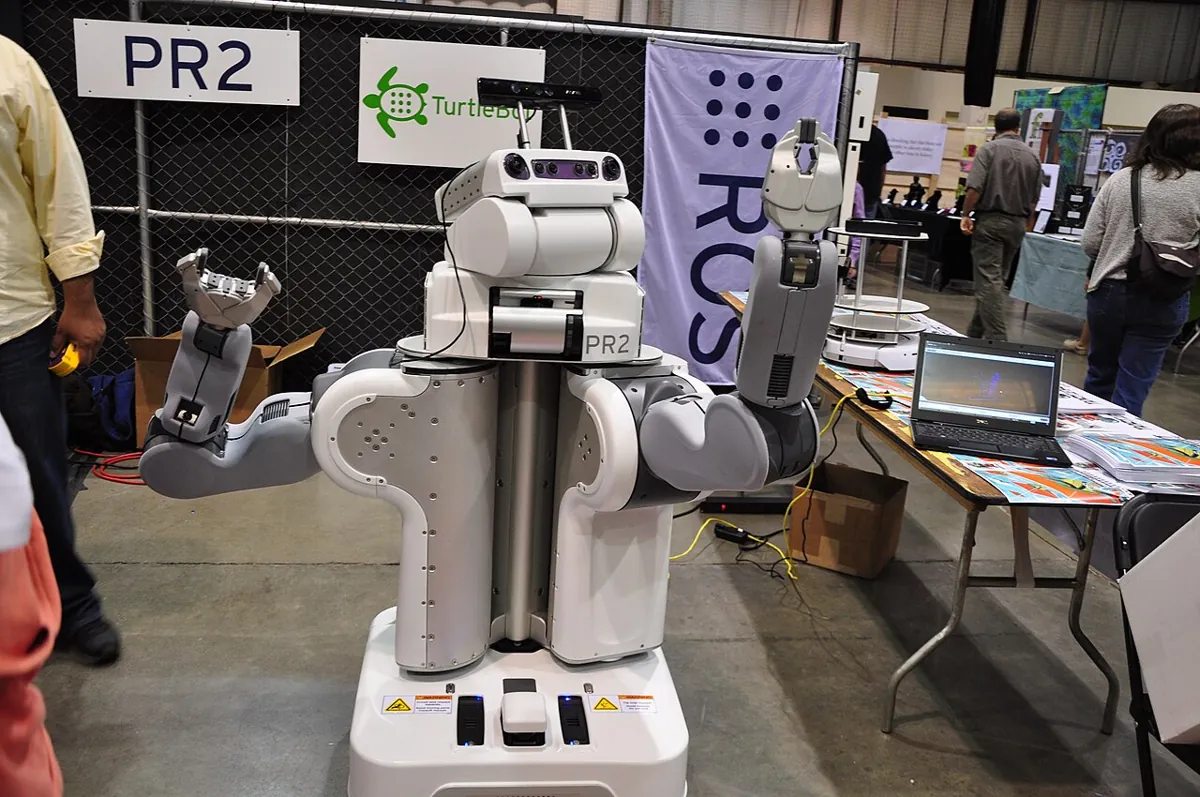
The original ROS started in 2007 for one research robot with a powerful on-board computer and good Wi-Fi. The ROS 2 design article “Why ROS 2?” explains that people then wanted things the first design did not plan for: teams of multiple robots, small embedded computers and microcontrollers as first-class members, real-time control, poor networks (bad Wi-Fi, even ground-to-space links) and production products, not just lab prototypes. Rather than risk breaking ROS 1 for everyone, the team built ROS 2 as a new set of packages on modern libraries like DDS.
Visual
Visualise it: direct wiring versus middleware
Explore why middleware sits between robot modules. In direct wiring every module knows every other; with ROS 2 they only know topic names and message types.
Interactive · ROS 2 architecture explorer
ROS 2 communication simulator — educational only (not a live ROS 2 runtime)

Code lab
Code lab: feel the coupling problem (no ROS needed)
monolith_vs_nodes.py is a tiny simulation of the idea — plain Python, runs on any laptop. Part 1 builds Arjun’s monolith: the planner holds the camera object and calls its method directly. Part 2 builds the same robot as separate “nodes” that only share topic names on a little message bus. Then it swaps the camera and adds a crashing module. Run it with python3 monolith_vs_nodes.py.
"""
monolith_vs_nodes.py — Stage 10 · L01 (plain Python 3, no ROS needed)

A tiny, honest *simulation* of the idea behind ROS 2. It is NOT ROS 2.
Part 1: a "monolith" arm program where every part calls the others directly.
Part 2: the same parts talking through named topics on a little message bus,
        the way ROS 2 nodes publish and subscribe.
We then swap the camera and crash one module, and see what survives.
"""


# ---------------- Part 1: the monolith ----------------
class UsbCamera:
    def read_object_x_cm(self):
        return 12.0


class Planner:
    def __init__(self, camera):
        self.camera = camera            # the planner holds the camera object itself

    def target(self):
        x = self.camera.read_object_x_cm()   # direct call: planner must know the camera's API
        return {"shoulder_deg": 30 + 2.5 * x}


class DepthCamera:
    # New camera from a different vendor: different method name and units (mm)
    def get_depth_point_mm(self):
        return (120.0, 0.0, 300.0)


def run_monolith(camera):
    planner = Planner(camera)
    return planner.target()


print("PART 1 — monolith (direct calls)")
print("  USB camera   ->", run_monolith(UsbCamera()))
try:
    print("  Depth camera ->", run_monolith(DepthCamera()))
except AttributeError as e:
    print("  Depth camera -> CRASH:", e)
print("  Lesson: swapping one sensor broke the planner, because the planner")
print("  was hard-wired to one camera's function name and units.\n")


# ---------------- Part 2: named topics on a bus ----------------
class Bus:
    """A toy publish/subscribe bus: topic name -> list of callbacks."""
    def __init__(self):
        self.subs = {}
        self.log = []

    def subscribe(self, topic, callback):
        self.subs.setdefault(topic, []).append(callback)

    def publish(self, topic, msg):
        self.log.append((topic, msg))
        for cb in self.subs.get(topic, []):
            try:
                cb(msg)
            except Exception as e:          # one bad subscriber must not stop the others
                print(f"    [bus] a subscriber of {topic} failed: {e!r} (others keep running)")


bus = Bus()


def usb_camera_node():
    bus.publish("/object_x_cm", 12.0)


def depth_camera_node():
    x_mm, _, _ = (120.0, 0.0, 300.0)
    bus.publish("/object_x_cm", x_mm / 10.0)   # the *driver* converts to the agreed unit


def planner_node(x_cm):
    bus.publish("/shoulder_target_deg", 30 + 2.5 * x_cm)


def controller_node(deg):
    print(f"    controller: moving shoulder to {deg:.1f} deg")


def logger_node(deg):
    print(f"    logger:     recorded target {deg:.1f} deg")


bus.subscribe("/object_x_cm", planner_node)
bus.subscribe("/shoulder_target_deg", controller_node)
bus.subscribe("/shoulder_target_deg", logger_node)

print("PART 2 — nodes talking over named topics")
print("  with the USB camera node:")
usb_camera_node()
print("  swap in the depth camera node (planner code unchanged):")
depth_camera_node()


def broken_display_node(deg):
    raise RuntimeError("display unplugged")


bus.subscribe("/shoulder_target_deg", broken_display_node)
print("  add a display node that crashes:")
usb_camera_node()

print("\n  Messages seen on the bus:")
for topic, msg in bus.log:
    print(f"    {topic:<22} {msg}")

print("\nSUMMARY")
print("  monolith: 1 sensor swap -> planner crashed")
print("  topics:   1 sensor swap -> 0 changes in planner, controller, logger")
print("  topics:   1 crashing module -> controller and logger still got every target")
Output (run with python3 monolith_vs_nodes.py)
PART 1 — monolith (direct calls)
  USB camera   -> {'shoulder_deg': 60.0}
  Depth camera -> CRASH: 'DepthCamera' object has no attribute 'read_object_x_cm'
  Lesson: swapping one sensor broke the planner, because the planner
  was hard-wired to one camera's function name and units.

PART 2 — nodes talking over named topics
  with the USB camera node:
    controller: moving shoulder to 60.0 deg
    logger:     recorded target 60.0 deg
  swap in the depth camera node (planner code unchanged):
    controller: moving shoulder to 60.0 deg
    logger:     recorded target 60.0 deg
  add a display node that crashes:
    controller: moving shoulder to 60.0 deg
    logger:     recorded target 60.0 deg
    [bus] a subscriber of /shoulder_target_deg failed: RuntimeError('display unplugged') (others keep running)

  Messages seen on the bus:
    /object_x_cm           12.0
    /shoulder_target_deg   60.0
    /object_x_cm           12.0
    /shoulder_target_deg   60.0
    /object_x_cm           12.0
    /shoulder_target_deg   60.0

SUMMARY
  monolith: 1 sensor swap -> planner crashed
  topics:   1 sensor swap -> 0 changes in planner, controller, logger
topics: 1 crashing module -> controller and logger still got every targetTry it: toggle “direct wiring” and “middleware”, then swap one module. Count how many other modules need changes in each layout.
Interactive · ROS 2 architecture explorer
ROS 2 communication simulator — educational only (not a live ROS 2 runtime)
Your first real ROS 2 node
Here is what the same idea looks like in real ROS 2 Python (rclpy). The node shoulder_angle_node publishes the shoulder angle as a std_msgs/msg/Float64 on the topic shoulder_angle_deg, 20 times a second. It uses exactly the calls from the official Jazzy publisher tutorial: create_publisher, create_timer, publish, rclpy.spin. With no hardware it publishes a fake sweep; give it a serial port and it reads the potentiometer sketch below. Do not worry about every line yet — Lessons 3–5 explain nodes, topics and messages in detail.
"""
shoulder_angle_node.py — Stage 10 · L01 — your first real ROS 2 node (rclpy)

Publishes the shoulder angle (degrees) on the topic /shoulder_angle_deg
as std_msgs/msg/Float64, 20 times a second.

  * If a serial port is given, it reads lines like "angle:73.4" sent by
    pot_angle_sensor.ino (a potentiometer on an Arduino — no motors).
  * If not, it publishes a slow fake sweep so you can test without hardware.

Written against the ROS 2 Jazzy rclpy API (same calls as the official
"Writing a simple publisher and subscriber (Python)" tutorial).
Run (after `source /opt/ros/jazzy/setup.bash`):
    python3 shoulder_angle_node.py                               # fake sweep
    python3 shoulder_angle_node.py --ros-args -p port:=/dev/ttyACM0   # real pot
Watch it from a second terminal:
    ros2 topic echo /shoulder_angle_deg
"""
import math

import rclpy
from rclpy.node import Node
from std_msgs.msg import Float64


class ShoulderAngleNode(Node):

    def __init__(self):
        super().__init__('shoulder_angle_node')
        self.declare_parameter('port', '')           # '' means: no hardware, fake sweep
        self.declare_parameter('baud', 115200)
        self.publisher_ = self.create_publisher(Float64, 'shoulder_angle_deg', 10)
        self.timer = self.create_timer(0.05, self.timer_callback)   # 20 Hz
        self.t = 0.0
        self.serial = None

        port = self.get_parameter('port').value
        if port:
            import serial                            # pip/apt package: pyserial
            baud = self.get_parameter('baud').value
            self.serial = serial.Serial(port, baud, timeout=0.01)
            self.get_logger().info(f'Reading angles from {port} at {baud} baud')
        else:
            self.get_logger().info('No port given: publishing a fake 30-120 deg sweep')

    def read_angle(self):
        if self.serial is None:
            self.t += 0.05
            return 75.0 + 45.0 * math.sin(0.5 * self.t)   # gentle fake sweep
        line = self.serial.readline().decode(errors='ignore').strip()
        if not line.startswith('angle:'):
            return None                               # half line or noise: skip it
        try:
            return float(line.split(':', 1)[1])
        except ValueError:
            return None

    def timer_callback(self):
        angle = self.read_angle()
        if angle is None:
            return
        msg = Float64()
        msg.data = angle
        self.publisher_.publish(msg)
        self.get_logger().debug(f'shoulder = {angle:.1f} deg')


def main(args=None):
    rclpy.init(args=args)
    node = ShoulderAngleNode()
    try:
        rclpy.spin(node)
    except KeyboardInterrupt:
        pass
    finally:
        node.destroy_node()
        rclpy.try_shutdown()


if __name__ == '__main__':
main()# Terminal 1
source /opt/ros/jazzy/setup.bash
python3 shoulder_angle_node.py
# Terminal 2
source /opt/ros/jazzy/setup.bash
ros2 node list # → /shoulder_angle_node
ros2 topic list # → /shoulder_angle_deg, /parameter_events, /rosout
ros2 topic echo /shoulder_angle_deg
ros2 topic hz /shoulder_angle_deg # should be close to 20 HzReal world
ROS 2 in the real world
- Research labs and colleges: ROS is used on wheeled robots, legged humanoids, industrial arms, drones, boats and self-driving car research platforms — so a student who knows ROS 2 can walk into most robotics labs and read their code.
- Products: the ROS 2 design article lists manufacturing, agricultural and commercial cleaning robots among ROS-based products. Sensor and gripper makers ship ROS 2 driver packages so integrators connect parts instead of writing glue.
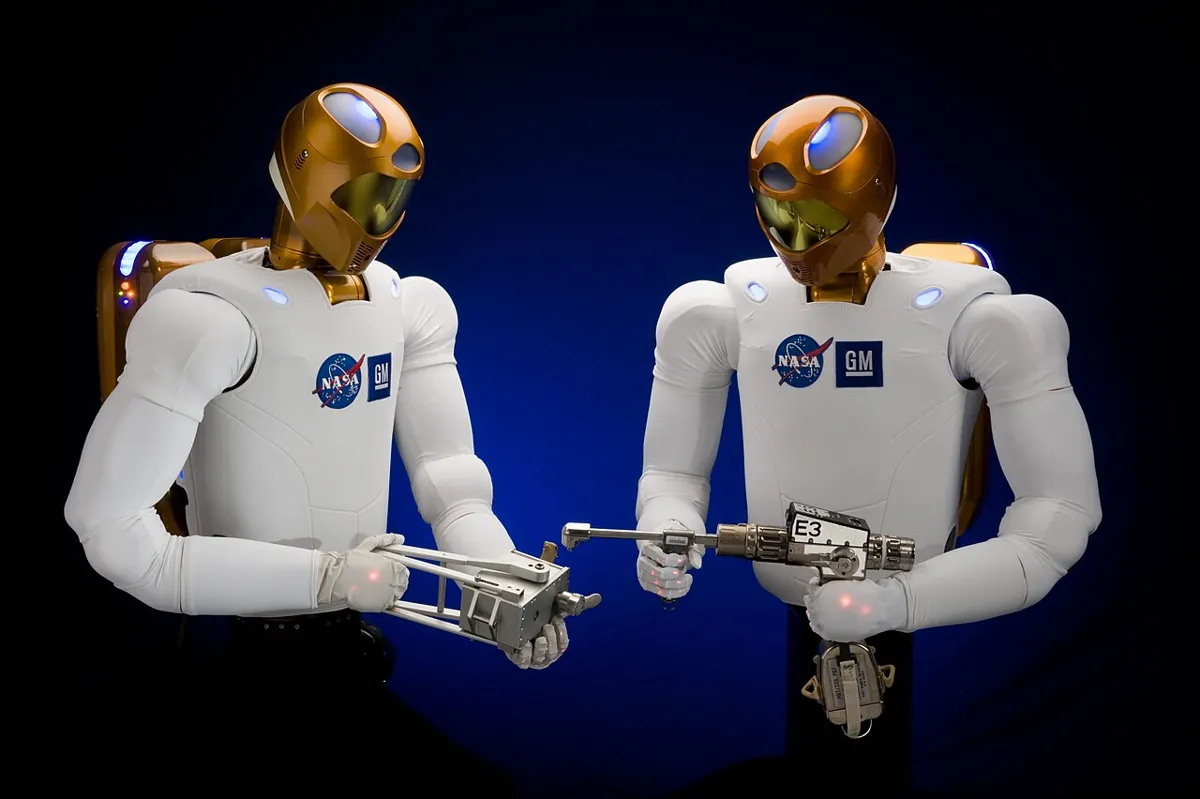
- Space: NASA’s Robonaut 2 humanoid, built with General Motors and flown to the International Space Station, is named in the original “Why ROS 2?” article as a ROS user.
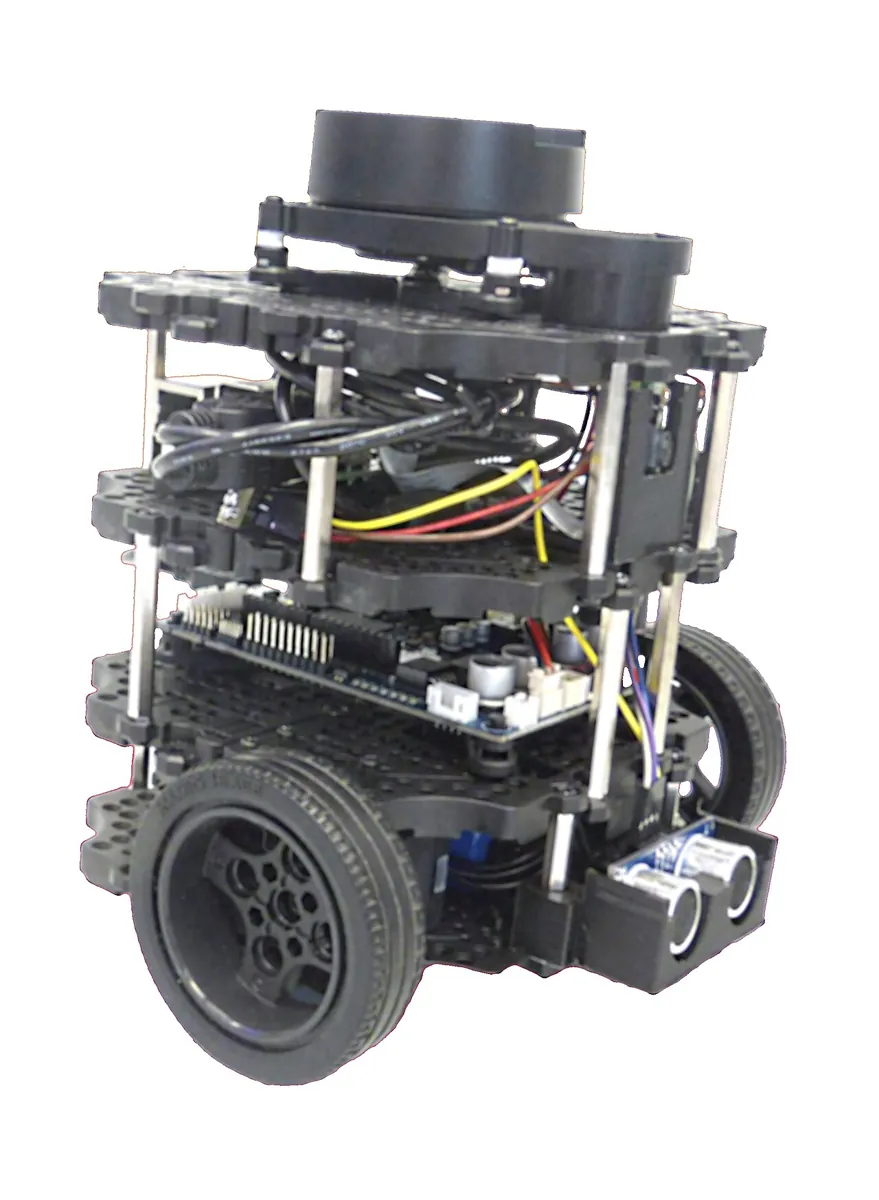
- Education: small platforms like TurtleBot3 come with ROS 2 packages out of the box, so a class can start with mapping and navigation on day one.
Bench build
Bench build: a potentiometer becomes a ROS 2 topic
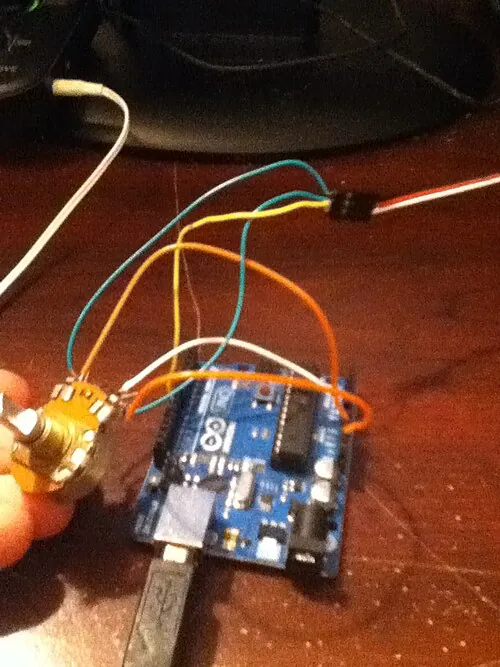
Robots meet ROS 2 through driver nodes: small programs that talk to one piece of hardware and publish its data on a standard topic. Here the “hardware” is a 10 kΩ potentiometer on an Arduino UNO. The sketch sends lines like angle:73.4 over USB; shoulder_angle_node.py reads them and publishes /shoulder_angle_deg. If you mount the pot on your Stage 6 shoulder joint, it becomes a real joint sensor. This build drives no motors — it only reads.
| From | To | Note |
|---|---|---|
| Pot outer leg 1 | Arduino 5V | The pot only carries a tiny current (about 0.5 mA) |
| Pot outer leg 2 | Arduino GND | — |
| Pot middle leg (wiper) | Arduino A0 | Voltage 0–5 V → analogRead 0–1023 |
| Arduino USB | Laptop / Raspberry Pi running ROS 2 | Usually appears as /dev/ttyACM0 or /dev/ttyUSB0 on Linux |
Upload the sketch
Open
pot_angle_sensor.ino, upload to the UNO and open Serial Monitor at 115200 baud. Turn the knob — you should seeangle:lines change.Close Serial Monitor
Only one program can hold the serial port. Close the Arduino IDE monitor before starting the ROS 2 node.
Give your user access to the port
On Ubuntu, add yourself to the
dialoutgroup (sudo usermod -aG dialout $USER) and log out and in again, or the node gets “Permission denied”.Start the node with the port
python3 shoulder_angle_node.py --ros-args -p port:=/dev/ttyACM0Watch the topic
In a second terminal:
ros2 topic echo /shoulder_angle_deg. Turn the knob and watch the numbers follow your hand.
/*
  pot_angle_sensor.ino — Stage 10 · L01
  A "sensor driver" in its simplest form: read a 10 kΩ potentiometer on A0
  (fixed to your shoulder joint, or just turned by hand) and send
  "angle:<degrees>" lines over USB serial, 20 times a second.
  shoulder_angle_node.py turns these lines into a ROS 2 topic.

  Wiring: pot outer legs -> 5V and GND, middle leg (wiper) -> A0.
  No motors are connected or powered by this sketch.
*/

const int POT_PIN = A0;
const float MIN_DEG = 0.0;      // angle at one end of the pot's travel
const float MAX_DEG = 270.0;    // many rotary pots turn about 270 degrees — check yours
const unsigned long PERIOD_MS = 50;   // 20 Hz

unsigned long lastSend = 0;
float filtered = -1;

void setup() {
  Serial.begin(115200);
}

void loop() {
  unsigned long now = millis();
  if (now - lastSend < PERIOD_MS) return;
  lastSend = now;

  int raw = analogRead(POT_PIN);                       // 0..1023
  float deg = MIN_DEG + (MAX_DEG - MIN_DEG) * raw / 1023.0;
  if (filtered < 0) filtered = deg;
  filtered = 0.8 * filtered + 0.2 * deg;               // small low-pass to calm noise

  Serial.print("angle:");
  Serial.println(filtered, 1);
}
Debugging
Debugging your first ROS 2 setup
| Symptom | Likely cause | Fix |
|---|---|---|
ros2: command not found | ROS 2 environment not sourced in this terminal | Run source /opt/ros/jazzy/setup.bash (add it to ~/.bashrc once you are comfortable) |
ModuleNotFoundError: No module named 'rclpy' | Running a Python that is not the system one ROS 2 was installed for (e.g. a conda env) | Use the system python3 after sourcing ROS 2, or deactivate conda |
ros2 topic list shows nothing from the other laptop | Different ROS_DOMAIN_ID, firewall, or not on the same network | Same ROS_DOMAIN_ID on both, same Wi-Fi/LAN, allow multicast |
Permission denied: /dev/ttyACM0 | User not in the dialout group | sudo usermod -aG dialout $USER, then log out and in |
| Topic exists but no numbers appear | Serial Monitor still open, or wrong baud | Close the IDE monitor; baud 115200 on both sides |
| Angle jumps between two values | Loose wiper wire or noisy pot | Check the A0 wire; the sketch already low-passes, you can make 0.8 → 0.9 |
Think
Think about it
Think
Arjun says, “ROS 2 sounds heavy. For my two-servo pen plotter I’ll keep one Arduino sketch.” Is he right? When is ROS 2 worth it, and when is it overkill?
Experiment
Try it in the lab
About 30 minutes with Python and the browser explorer (and the optional potentiometer bench).
Experiment
Coupling versus named channels
You will need
- `monolith_vs_nodes.py` and Python 3
- ROS 2 architecture explorer (in your browser)
- Notebook and pencil
- Optional: a computer with ROS 2 Jazzy (Ubuntu 24.04), Arduino UNO, 10 kΩ potentiometer, jumper wires
Steps
- Run `monolith_vs_nodes.py` and copy the SUMMARY lines into your notebook.
- Add a third camera class to Part 1 with a method `get_x_inches()`. How many lines of the planner must change to support it?
- Now add the same camera as a node in Part 2 that converts inches to cm (× 2.54) and publishes on `/object_x_cm`. How many lines of the planner changed this time?
- Add a new subscriber node on `/shoulder_target_deg` that warns if the target is above 150°. Did you need to touch the controller?
- In the architecture explorer, swap one module in “direct wiring” and then in “middleware” mode. Write one sentence on the difference.
- Optional: run `shoulder_angle_node.py` and use `ros2 topic hz` to check it publishes at about 20 Hz.
Interactive · ROS 2 architecture explorer
ROS 2 communication simulator — educational only (not a live ROS 2 runtime)
With direct calls, every new part means editing old parts. With named topics, a new part only needs to publish or subscribe on the agreed name and message type — the rest of the robot does not change. That is the single biggest reason robots use ROS 2.
Knowledge check
Check your understanding
Knowledge check
1. ROS 2 is best described as…
2. The main pain ROS 2 addresses is…
3. In ROS 2, a program that does one logical job and talks to others is called a…
4. What does ROS 2 use underneath for discovery and transport?
5. Which of these was a reason given for building ROS 2?
6. Which ROS 2 release is the long-term version this stage uses, supported until May 2029?
7. Your ROS 2 node will soon command servos. How should they be powered?
Mini assignment
Hands-on assignment
Mini assignment
Why-ROS 2 design note for your arm
Write a one-page note that convinces your team (or your teacher) whether your Stage 6 arm should move to ROS 2 — with a node diagram.
Deliverables
- A list of every software job your arm does (sensing, IK, trajectory, control, UI, logging…) and how often each must run.
- A hand-drawn diagram of those jobs as nodes, with arrows labelled by topic names you invent (e.g. `/joint_states`, `/target_pose`).
- Two concrete “what if” cases from your own lab — e.g. swapping a camera, adding a second computer — and what would break today.
- Output of `monolith_vs_nodes.py` after your inches-camera change, with the line counts from the experiment.
- Which ROS 2 release you will install and why (Jazzy vs Humble), based on your computer’s Ubuntu version.
- Optional: a screenshot of `ros2 topic echo /shoulder_angle_deg` with your potentiometer.
Do this, step by step
- Run
python3 monolith_vs_nodes.pyand copy the SUMMARY lines into your notebook. - List every software job of your Stage 6 arm (sensing, IK, trajectory, control, UI, logging) with how often it runs (Hz).
- Draw those jobs as boxes (nodes) and label each arrow with a topic name such as
/joint_statesor/target_pose. - Add the inches camera from the experiment in both parts and write down how many planner lines changed each time.
- Check your Ubuntu version (
lsb_release -a): 24.04 → Jazzy, 22.04 → Humble. Write your choice and one reason.
Stuck? Hints, one at a time
- Count only the lines you had to edit in the planner — new camera code does not count.
- With topics, the new camera just publishes on an agreed name; the planner never learns which camera is behind it.
- Jazzy is supported until May 2029 and Humble until May 2027 — pick the one that matches your Ubuntu.
Challenges (pick by level)
- 🟢 Easy: In one line each, define node, topic, service, action and parameter using an example from a hospital, a railway station or a restaurant kitchen.
- 🟢 Easy: Install ROS 2 Jazzy (or use a lab PC) and get
demo_nodes_cpp talkeranddemo_nodes_py listenertalking. - 🟡 Medium: Extend the toy bus so
publish()refuses messages whose type does not match the first message seen on that topic. Why does real ROS 2 insist on message types? - 🟠 Hard-ish: Change
shoulder_angle_node.pyto publish in radians on a second topicshoulder_angle_rad. Which unit do standard ROS messages such as JointState use? (Hint: look up REP 103.) - 🔴 Hard: Run the talker on one laptop and the listener on another on the same Wi-Fi. Then set different
ROS_DOMAIN_IDvalues and explain what changed. - ⚫ Research: Read the ROS 2 design article “Why ROS 2?” and the 2022 *Science Robotics* paper by Macenski et al. Summarise three design decisions and the problem each one solves.
Next step
You now know why robots need ROS 2. In Lesson 2 — ROS 2 Architecture Overview you will open the box and see its layers — client libraries, rcl, RMW and DDS — and how a message actually travels from one node to another.
Look back: Stage 9 L15: Capstone — Plan & Execute a Trajectory. Next: Lesson 2: ROS 2 Architecture Overview. Related: Stage 9 — Trajectory Planning, Stage 3 — Linux & Dev Environment.
Sources
- ROS 2 design — “Why ROS 2?” (Brian Gerkey) — ROS history with the PR2, new use cases (multi-robot, embedded, real-time, non-ideal networks, production), move to DDS, Robonaut 2 mention.
- ROS 2 Jazzy docs — Releases — Jazzy (23 May 2024, EOL May 2029), Humble (EOL May 2027), Lyrical Luth (22 May 2026). Text read from the docs source in ros2/ros2_documentation.
- ROS 2 Jazzy docs — Nodes — a node is a participant in the ROS graph; each node should do one logical thing; topics, services, actions, parameters; distributed discovery.
- ROS 2 Jazzy docs — Different ROS 2 middleware vendors — DDS/RTPS, RMW interface, Fast DDS default, Cyclone DDS.
- ROS 2 Jazzy docs — Writing a simple publisher and subscriber (Python) —
create_publisher,create_timer,rclpy.spinused inshoulder_angle_node.py. - ROS 2 Jazzy docs — Ubuntu install (deb packages) — the
demo_nodes_cpp talker/demo_nodes_py listenerinstall test. - Macenski et al., “Robot Operating System 2: Design, architecture, and uses in the wild”, Science Robotics 7(66), 2022 — reference paper cited by the design article.
- ROS 2 Jazzy docs — The ROS_DOMAIN_ID — nodes on the same domain discover each other; default domain ID 0.
- ROS blog — ROS 1 Noetic goes End-of-Life 2025-05-31 and Open Robotics Discourse — ROS Noetic End-of-Life: May 31, 2025 — ROS 1 end of life.
- REP 103 — Standard Units of Measure and Coordinate Conventions — ROS uses SI units; angles in radians.
- Photos: Wikimedia Commons (credits under each image).
Self-attested for now — keep artifacts in your lab notebook.
Complete
Today's goal
0 of 1 done today
Mark this lesson complete when you have worked the experiment, knowledge check, and assignment (even roughly).