
Robot Perception, Planning & Manipulation · Lesson 16
Capstone — Vision-Guided Collision-Free Pick & Place
Est. 2–3 hours
Why
Why this capstone matters
This capstone joins the whole stage into one working system. The camera sees the tray (Lessons 1–3). Calibration turns pixels into centimetres on the desk (Lesson 3). Detection builds the world model of objects and obstacles (Lessons 2 and 4). A task order is chosen and re-planned (Lesson 5). For each object, a grasp check (Lesson 12), inverse kinematics and a collision-checked joint path (Lessons 6–10) are planned. The UNO executes with limits and grasp verification (Lessons 11, 13–15), and the pipeline reports honestly what it did and did not do.
You will first run the complete planner in Python on a small synthetic camera image, so you can see every stage and every failure reason. Then you will build the bench version: the same planner on your PC, sending simple commands to an UNO that drives a 2-link arm with a lift and a gripper.
Concept
The full stack: see, model, plan, act, verify
1. The capstone pipeline
| # | Stage | What it produces | Failure it must report |
|---|---|---|---|
| 1 | Calibrate | pixel → cm mapping from two known markers | markers not found / mapping check fails |
| 2 | Detect | blobs: colour, centre, size | nothing detected |
| 3 | World model | objects to move + obstacles to avoid | object too close to an obstacle |
| 4 | Grasp check | fits the gripper? | too wide → needs a human |
| 5 | IK | joint angles (two solutions: elbow one way or the other) | unreachable or no collision-free solution |
| 6 | Path | collision-checked joint path, direct or via HOME | no clear path |
| 7 | Execute + verify | J / D / G / U / O commands, OK or ERR from the UNO | closed on air, slip, joint limit, stop |
| 8 | Re-plan | second pass for skipped objects | still impossible → report and stop |
2. From pixels to centimetres
With the camera looking straight down at a flat desk, a simple linear mapping is enough for a first version: measure two markers on the desk with a ruler, note their pixel positions, and compute centimetres per pixel and the offset. The script prints a check — marker 2 converted back must land exactly where you measured it. If your camera is tilted, the mapping is no longer linear and you need a full camera calibration with a camera model and lens distortion (see the Computer Vision stage).
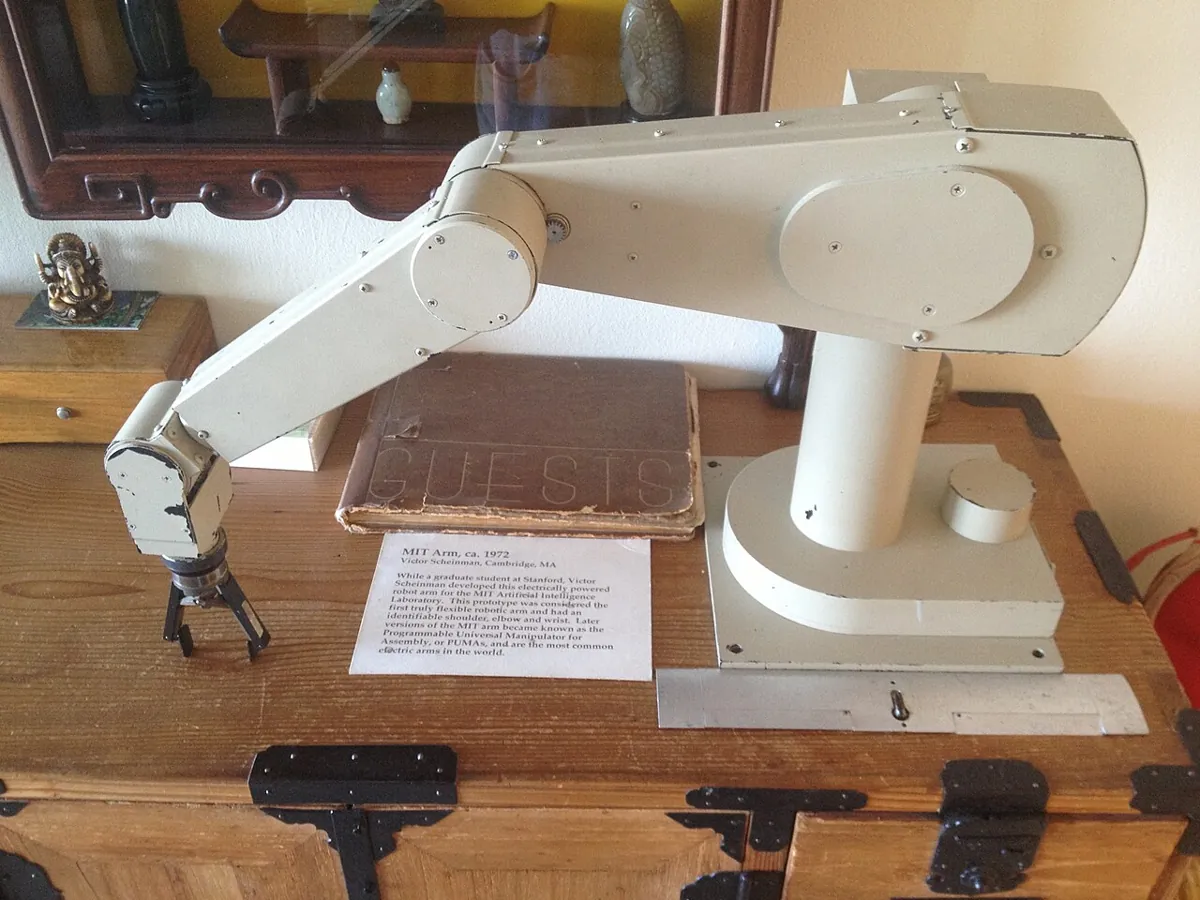
3. Two IK solutions, one collision check
A planar 2-link arm can usually reach a point in two ways: with the elbow bent one way or the other. The planner computes both, throws away any that break joint limits or put a link into an obstacle, and then checks the joint path by sampling 60 points between the start and goal angles. If the direct path is blocked, it tries going through a folded HOME pose first. Other objects count as obstacles until they have been picked — which is why the order of picking matters.
4. Honest reporting
The capstone is judged on two things: what it placed correctly, and how clearly it explains what it did not place. “B at (19.0, −5.5): no collision-free IK solution” tells a human exactly where to look. “Done” when the tray is still full is a failure, even if no part broke.
Visual
Visualise it: the capstone pipeline
Detect → pose → world → grasp → IK → path → execute → verify, with a success or failure reason at every stage. (Educational simulation — not an industrial planner.)
Capstone · Vision-guided collision-free pick & place · Educational

Ready — run Detect → … → Execute. Educational pipeline only. · grasp A
Educational browser pipeline — not industrial RRT / IK / grasp / collision. Reuses Stage 8 ik2R + Stage 9 syncedJoints. Bridges Stages 8–12.
Code lab
Code lab: the whole planner, end to end
capstone_pick_place.py uses a tiny synthetic camera image: each character is one pixel (R and B are blocks, X is the tall bottle, M are the two calibration markers). The arm is a planar 2-link arm with its base at (0, 0), links of 15 cm and 12 cm, joint limits −90° to 90° (hobby servos), a gripper that opens to 4 cm, and 1.5 cm of padding around obstacles. Red goes to the bin at (6, 19), blue to (6, −19). All numbers are examples — replace them with your own measurements.
"""Stage 13 capstone - vision-guided, collision-free pick & place (plain Python, no libraries).

Pipeline:  image -> calibrate pixels to cm -> detect blobs -> world model
           -> grasp check -> IK (2 solutions) -> collision-checked joint path -> commands
A tiny synthetic top-down "camera image" stands in for a real camera, so the
whole pipeline runs anywhere. All sizes are EXAMPLE numbers.
Arm: planar 2-link, base at world (0, 0), L1 = 15 cm, L2 = 12 cm, top-down gripper.
"""
import math

IMAGE = [  # 1 character = 1 pixel. R/B = red/blue blocks, X = obstacle, M = calibration marker
    "M..............................M",
    "..RRR...........................",
    "..RRR...........................",
    "..RRR......RRR..................",
    "...........RRR......BBB.........",
    "...........RRR......BBB.........",
    "....................BBB.........",
    "................................",
    "....................XXXX........",
    "....................XXXX........",
    "....................XXXX........",
    "....................XXXX........",
    "................................",
    "..........................BBBBBB",
    "..........................BBBBBB",
    "..........................BBBBBB",
    "..........................BBBBBB",
    "..........................BBBBBB",
]
# The two markers are at known world points (measured with a ruler on the desk):
MARKERS_PX = [(0, 0), (31, 0)]           # (u, v) pixels
MARKERS_CM = [(24.0, 15.5), (24.0, -15.5)]  # (x, y) cm  - camera looks straight down
CM_PER_PX_V = 1.0                        # rows: measured once with a ruler

L1, L2 = 15.0, 12.0
GRIPPER_MAX_CM = 4.0
PAD = 1.5                                # padding around obstacles (cm)
BINS = {'R': (6.0, 19.0), 'B': (6.0, -19.0)}  # where each colour goes
HOME = (0.0, 90.0)                       # shoulder, elbow (deg) - folded, safe


# ---------- 1. calibration ----------
(u0, v0), (u1, v1) = MARKERS_PX
(x0, y0), (x1, y1) = MARKERS_CM
cm_per_px_u = (y1 - y0) / (u1 - u0)       # u (columns) maps to world y


def px_to_cm(u, v):
    return (x0 - (v - v0) * CM_PER_PX_V, y0 + (u - u0) * cm_per_px_u)


# ---------- 2. detection ----------
def blobs(image):
    seen, out = set(), []
    for v, row in enumerate(image):
        for u, ch in enumerate(row):
            if ch in 'RBX' and (u, v) not in seen:
                stack, pix = [(u, v)], []
                seen.add((u, v))
                while stack:
                    a, b = stack.pop(); pix.append((a, b))
                    for da, db in ((1, 0), (-1, 0), (0, 1), (0, -1)):
                        na, nb = a + da, b + db
                        if 0 <= nb < len(image) and 0 <= na < len(image[0]) and (na, nb) not in seen and image[nb][na] == ch:
                            seen.add((na, nb)); stack.append((na, nb))
                us = [p[0] for p in pix]; vs = [p[1] for p in pix]
                cu, cv = sum(us) / len(us), sum(vs) / len(vs)
                w_px, h_px = max(us) - min(us) + 1, max(vs) - min(vs) + 1
                out.append(dict(kind=ch, px=(cu, cv), pos=px_to_cm(cu, cv),
                                size=(h_px * CM_PER_PX_V, w_px * abs(cm_per_px_u))))
    return out


# ---------- 3. IK + collision ----------
def ik(x, y):
    r2 = x * x + y * y
    c = (r2 - L1 * L1 - L2 * L2) / (2 * L1 * L2)
    if abs(c) > 1:
        return []
    sols = []
    for s in (1, -1):
        e = s * math.acos(c)
        sh = math.atan2(y, x) - math.atan2(L2 * math.sin(e), L1 + L2 * math.cos(e))
        sols.append((math.degrees(sh), math.degrees(e)))
    return sols


def ok_limits(q):
    return -90 <= q[0] <= 90 and -90 <= q[1] <= 90   # hobby servos: servo angle = joint + 90


def links(q):
    a, b = math.radians(q[0]), math.radians(q[0] + q[1])
    p1 = (L1 * math.cos(a), L1 * math.sin(a))
    p2 = (p1[0] + L2 * math.cos(b), p1[1] + L2 * math.sin(b))
    return [((0.0, 0.0), p1), (p1, p2)]


def seg_dist(p, a, b):
    ax, ay = a; bx, by = b; px, py = p
    dx, dy = bx - ax, by - ay
    t = max(0.0, min(1.0, ((px - ax) * dx + (py - ay) * dy) / (dx * dx + dy * dy or 1)))
    return math.hypot(px - ax - t * dx, py - ay - t * dy)


def collides(q, obstacles):
    for (cx, cy), r in obstacles:
        for a, b in links(q):
            if seg_dist((cx, cy), a, b) < r + PAD:
                return True
    return False


def path_clear(qa, qb, obstacles, steps=60):
    for i in range(steps + 1):
        t = i / steps
        q = (qa[0] + t * (qb[0] - qa[0]), qa[1] + t * (qb[1] - qa[1]))
        if collides(q, obstacles):
            return False
    return True


def plan(q_from, goal_xy, obstacles):
    """Try each IK solution, direct first, then via HOME. Returns (q_goal, path) or (None, reason)."""
    sols = [q for q in ik(*goal_xy) if ok_limits(q) and not collides(q, obstacles)]
    if not sols:
        return None, 'no collision-free IK solution'
    for q in sorted(sols, key=lambda q: abs(q[0] - q_from[0]) + abs(q[1] - q_from[1])):
        if path_clear(q_from, q, obstacles):
            return q, [q]
    for q in sols:
        if path_clear(q_from, HOME, obstacles) and path_clear(HOME, q, obstacles):
            return q, [HOME, q]
    return None, 'no clear path'


# ---------- run the pipeline ----------
print('1. Calibration')
print(f'   columns: {cm_per_px_u:+.2f} cm per pixel (world y), rows: {CM_PER_PX_V:.2f} cm per pixel (world x)')
print(f'   check: marker 2 pixel {MARKERS_PX[1]} -> {px_to_cm(*MARKERS_PX[1])} cm (expected {MARKERS_CM[1]})\n')

world = blobs(IMAGE)
objects = [b for b in world if b['kind'] in 'RB']
obstacles = []
print('2. Detection -> world model')
for b in world:
    x, y = b['pos']
    print(f"   {b['kind']} at pixel ({b['px'][0]:4.1f}, {b['px'][1]:4.1f}) -> ({x:5.1f}, {y:5.1f}) cm, size {b['size'][0]:.0f} x {b['size'][1]:.0f} cm")
    if b['kind'] == 'X':
        obstacles.append(((x, y), max(b['size']) / 2 * math.sqrt(2)))
for o in objects:  # objects are obstacles for each other while not being picked
    o['as_obstacle'] = (o['pos'], max(o['size']) / 2)
print(f'   {len(objects)} objects, {len(obstacles)} obstacle(s)\n')

print('3. Plan and "execute": nearest first, then re-plan what was skipped')
q = HOME
done, commands = 0, []
for pass_no in (1, 2):
    print(f'   pass {pass_no}')
    progress = False
    for o in sorted(objects, key=lambda o: math.hypot(*o['pos'])):
        if o.get('done') or o.get('never'):
            continue
        name = f"{o['kind']} at ({o['pos'][0]:.1f}, {o['pos'][1]:.1f})"
        width = min(o['size'])
        if width > GRIPPER_MAX_CM:
            print(f'     {name}: SKIP - {width:.0f} cm wide, gripper opens {GRIPPER_MAX_CM:.0f} cm (needs a human)')
            o['never'] = True
            continue
        others = obstacles + [p['as_obstacle'] for p in objects if p is not o and not p.get('done')]
        q_pick, path = plan(q, o['pos'], others)
        if q_pick is None:
            print(f'     {name}: SKIP - pick: {path}')
            continue
        q_place, path2 = plan(q_pick, BINS[o['kind']], others)
        if q_place is None:
            print(f'     {name}: SKIP - place: {path2}')
            continue
        via1 = ' via HOME' if len(path) > 1 else ''
        via2 = ' via HOME' if len(path2) > 1 else ''
        print(f'     {name}: pick q=({q_pick[0]:.0f}, {q_pick[1]:.0f}){via1}; place in bin {o["kind"]} q=({q_place[0]:.0f}, {q_place[1]:.0f}){via2}')
        for qq in path:
            commands.append(f'J {qq[0]:.0f} {qq[1]:.0f}')
        commands += ['D', 'G', 'U']
        for qq in path2:
            commands.append(f'J {qq[0]:.0f} {qq[1]:.0f}')
        commands += ['D', 'O', 'U']
        o['done'] = True
        q = q_place
        done += 1
        progress = True
    if not progress:
        break
left = [o for o in objects if not o.get('done')]
print(f'   -> {done} of {len(objects)} objects placed; left for a human: ' + ', '.join(f"{o['kind']} at ({o['pos'][0]:.1f}, {o['pos'][1]:.1f})" for o in left) + '\n')

print('4. Commands for the UNO executor (first object)')
first = commands[:commands.index('U', commands.index('O')) + 1] if commands else []
print('   ' + ' | '.join(first))

print('\n5. What if we pad obstacles by 4.5 cm instead of 1.5 cm?')
PAD = 4.5
target = [o for o in objects if o['kind'] == 'R'][-1]
q_pick, path = plan(HOME, target['pos'], obstacles)
print(f"   {target['kind']} at ({target['pos'][0]:.1f}, {target['pos'][1]:.1f}): " + ('reachable' if q_pick else f'blocked - {path}'))
Output (run with python3 capstone_pick_place.py)
1. Calibration
   columns: -1.00 cm per pixel (world y), rows: 1.00 cm per pixel (world x)
   check: marker 2 pixel (31, 0) -> (24.0, -15.5) cm (expected (24.0, -15.5))

2. Detection -> world model
   R at pixel ( 3.0,  2.0) -> ( 22.0,  12.5) cm, size 3 x 3 cm
   R at pixel (12.0,  4.0) -> ( 20.0,   3.5) cm, size 3 x 3 cm
   B at pixel (21.0,  5.0) -> ( 19.0,  -5.5) cm, size 3 x 3 cm
   X at pixel (21.5,  9.5) -> ( 14.5,  -6.0) cm, size 4 x 4 cm
   B at pixel (28.5, 15.0) -> (  9.0, -13.0) cm, size 5 x 6 cm
   4 objects, 1 obstacle(s)

3. Plan and "execute": nearest first, then re-plan what was skipped
   pass 1
     B at (9.0, -13.0): SKIP - 5 cm wide, gripper opens 4 cm (needs a human)
     B at (19.0, -5.5): SKIP - pick: no collision-free IK solution
     R at (20.0, 3.5): SKIP - pick: no clear path
     R at (22.0, 12.5): pick q=(11, 41); place in bin R q=(36, 86)
   pass 2
     B at (19.0, -5.5): SKIP - pick: no collision-free IK solution
     R at (20.0, 3.5): pick q=(46, -83); place in bin R q=(36, 86)
   -> 2 of 4 objects placed; left for a human: B at (19.0, -5.5), B at (9.0, -13.0)

4. Commands for the UNO executor (first object)
   J 11 41 | D | G | U | J 36 86 | D | O | U

5. What if we pad obstacles by 4.5 cm instead of 1.5 cm?
R at (20.0, 3.5): blocked - no clear pathTry it: run the capstone pipeline in the browser and watch each stage report success or a failure reason. Change the scene and see which stage fails first. (Educational simulation — not an industrial planner.)
Capstone · Vision-guided collision-free pick & place · Educational
Ready — run Detect → … → Execute. Educational pipeline only. · grasp A
Educational browser pipeline — not industrial RRT / IK / grasp / collision. Reuses Stage 8 ik2R + Stage 9 syncedJoints. Bridges Stages 8–12.
Bench build: the UNO as an honest executor
capstone_executor.ino keeps the UNO simple and strict. It accepts five commands — J <shoulder> <elbow>, D, U, G, O — and answers OK or ERR <reason> to each. It refuses joint angles outside −90° to 90° (servo = joint + 90), refuses to swing the arm while the gripper is down, moves both joints together in small steps so the motion stays close to the planned joint path, closes the jaw until the FSR reaches HOLD and checks for slip with a small test lift. A stop button freezes everything until the board is reset. Your PC program sends one command, waits for OK, and stops the plan at the first ERR.
| Part | Connection | Note |
|---|---|---|
| Shoulder servo | signal → D9 | joint 0° = servo 90° pointing along +x (towards the tray) |
| Elbow servo | signal → D10 | joint 0° = servo 90° = arm straight |
| Lift servo | signal → D11 | LIFT_UP / LIFT_DOWN measured with the gripper empty |
| Gripper servo | signal → D6 | JAW_OPEN / JAW_CLOSED measured on your gripper |
| Servo supply | red → +5–6 V, brown → supply GND | separate supply sized for four servos; supply GND joined to UNO GND |
| FSR on a jaw pad | UNO 5 V → FSR → A1 → 10 kΩ → GND | HOLD from Lesson 11 |
| Stop button | D3 → button → GND | INPUT_PULLUP; freezes until reset |
| USB webcam | to the PC, looking straight down | fixed mount; do not move it after calibrating |
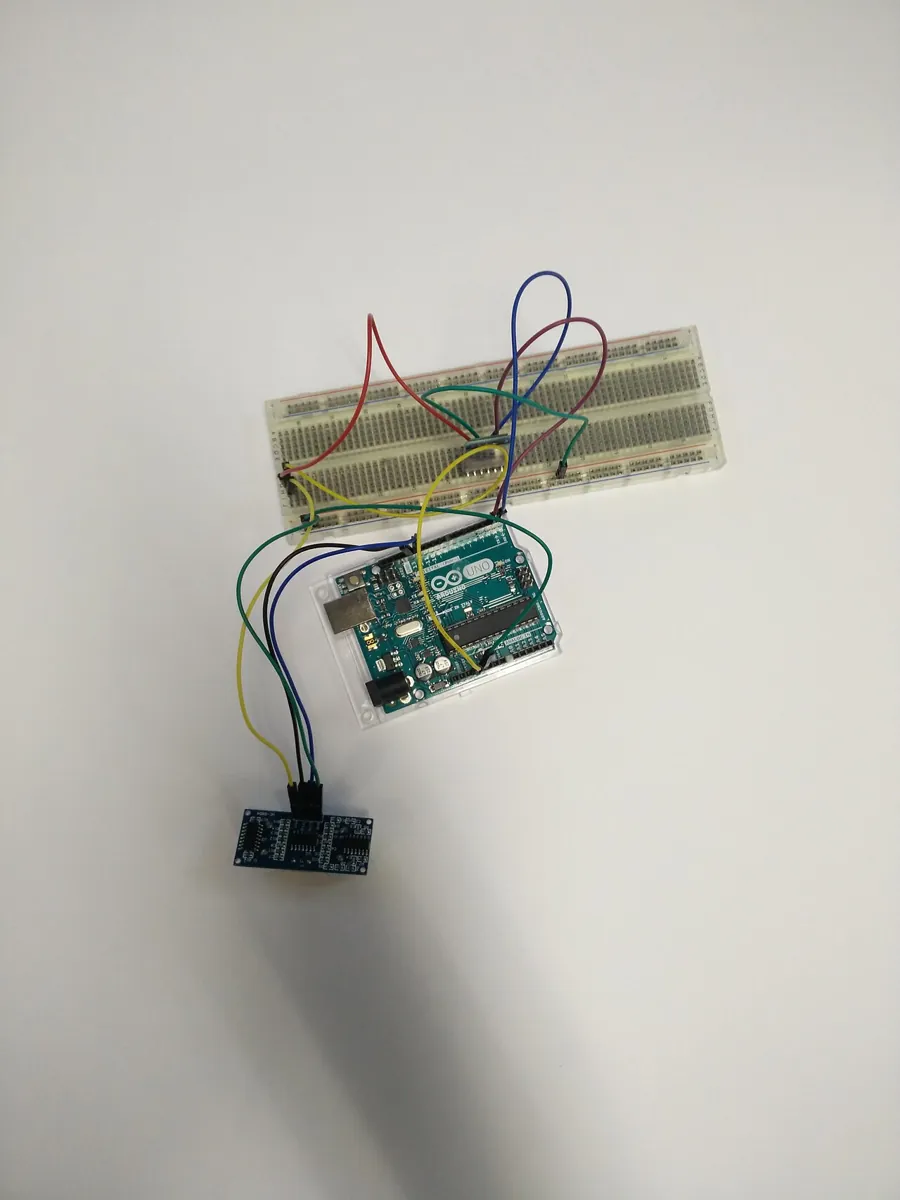
// Stage 13 - Lesson 16 (capstone): command executor for a 2-link arm (Arduino UNO)
// The PC runs perception + planning (capstone_pick_place.py) and sends simple commands.
// The UNO checks limits, moves smoothly, verifies the grasp and answers OK / ERR.
//   J <shoulder> <elbow>   joint angles in degrees, each -90..90 (same limits as the planner)
//   D / U                  lower / raise the gripper (lift servo)
//   G                      close until the FSR says HOLD, then test-lift and verify
//   O                      open
// Wiring:
//   Shoulder servo D9, Elbow servo D10, Lift servo D11, Jaw servo D6
//   Servo power: separate 5-6 V supply (NOT the UNO 5V pin), grounds joined
//   FSR on a jaw pad: 5V -> FSR -> A1 -> 10k -> GND
//   Stop button D3 -> GND (INPUT_PULLUP): stops the queue, opens nothing, holds position
// A hobby servo turns about 0..180 deg, so servo = joint + 90. Commands outside
// -90..90 are refused here - keep the planner limits the same as YOUR arm's.
// All angles and thresholds are EXAMPLE values.
#include <Servo.h>

const int SH_PIN = 9, EL_PIN = 10, LIFT_PIN = 11, JAW_PIN = 6, FSR_PIN = A1, STOP_PIN = 3;
const int LIFT_UP = 40, LIFT_DOWN = 120;
const int JAW_OPEN = 100, JAW_CLOSED = 30;
const int HOLD = 300;

Servo sh, el, lift, jaw;
int shPos = 90, elPos = 90 + 90, liftPos = LIFT_UP, jawPos = JAW_OPEN;  // start folded (elbow joint +90)
bool stopped = false;

bool stopPressed() { return digitalRead(STOP_PIN) == LOW; }

// move one servo smoothly; returns false if the stop button was pressed
bool ease(Servo &s, int &pos, int target, int msPerDeg) {
  while (pos != target) {
    if (stopPressed()) { stopped = true; return false; }
    pos += (target > pos) ? 1 : -1;
    s.write(pos);
    delay(msPerDeg);
  }
  return true;
}

void reply(const __FlashStringHelper *msg) { Serial.println(msg); }

void doJoints(int shoulderDeg, int elbowDeg) {
  int s = shoulderDeg + 90, e = elbowDeg + 90;
  if (s < 0 || s > 180 || e < 0 || e > 180) { reply(F("ERR joint limit")); return; }
  if (liftPos != LIFT_UP) { reply(F("ERR lift first (U)")); return; }   // never swing low
  // move both joints together in small steps so the path stays close to the planned one
  while (shPos != s || elPos != e) {
    if (stopPressed()) { stopped = true; reply(F("ERR stopped")); return; }
    if (shPos != s) { shPos += (s > shPos) ? 1 : -1; sh.write(shPos); }
    if (elPos != e) { elPos += (e > elPos) ? 1 : -1; el.write(elPos); }
    delay(15);
  }
  reply(F("OK"));
}

void doGrasp() {
  while (analogRead(FSR_PIN) < HOLD) {
    if (stopPressed()) { stopped = true; reply(F("ERR stopped")); return; }
    if (jawPos <= JAW_CLOSED) { reply(F("ERR closed on air")); return; }
    jawPos--; jaw.write(jawPos); delay(15);
  }
  int before = analogRead(FSR_PIN);
  if (!ease(lift, liftPos, liftPos - 3, 20)) { reply(F("ERR stopped")); return; }
  delay(300);
  int after = analogRead(FSR_PIN);
  if (after < before * 0.7) { reply(F("ERR slip")); return; }
  reply(F("OK"));
}

void setup() {
  Serial.begin(115200);
  pinMode(STOP_PIN, INPUT_PULLUP);
  sh.attach(SH_PIN); el.attach(EL_PIN); lift.attach(LIFT_PIN); jaw.attach(JAW_PIN);
  sh.write(shPos); el.write(elPos); lift.write(liftPos); jaw.write(jawPos);
  Serial.println(F("capstone_executor ready: J s e | D | U | G | O"));
}

void loop() {
  if (stopped) {
    if (Serial.available()) { Serial.read(); reply(F("ERR stopped - reset the board")); }
    return;
  }
  if (!Serial.available()) return;
  char c = Serial.read();
  switch (c) {
    case 'J': { int s = Serial.parseInt(); int e = Serial.parseInt(); doJoints(s, e); break; }
    case 'D': if (ease(lift, liftPos, LIFT_DOWN, 12)) reply(F("OK")); else reply(F("ERR stopped")); break;
    case 'U': if (ease(lift, liftPos, LIFT_UP, 12)) reply(F("OK")); else reply(F("ERR stopped")); break;
    case 'G': doGrasp(); break;
    case 'O': jaw.write(JAW_OPEN); jawPos = JAW_OPEN; delay(300); reply(F("OK")); break;
    default: break;   // ignore spaces and newlines
  }
}capstone_executor ready: J s e | D | U | G | O
J 11 41
OK
D
OK
G
OK
U
OK
J 36 86
OK
D
OK
O
OK
U
OK
J 120 0
ERR joint limitDebugging
| Symptom | Likely cause | Fix |
|---|---|---|
| Arm goes to the right angle but the wrong place | calibration or link lengths wrong | Re-measure markers, L1, L2; check joint zero directions |
| Placed several cm off | servo zero not at joint 0° | Adjust the horn / add a per-servo offset |
| Arm sweeps the bottle | padding too small, or bottle size measured from a bad blob | Increase PAD; check the detection printout |
| Many “no clear path” | pick order, or padding too big | Re-plan in passes; choose padding from measured error |
ERR joint limit for planned moves | planner limits differ from the sketch | Use the same limits in both |
ERR closed on air | detection or calibration offset | Check the pixel → cm mapping on a known point |
| UNO resets during moves | servos on UNO 5 V, or weak supply | Separate, bigger supply; grounds joined |
Real world
Vision-guided picking in the real world
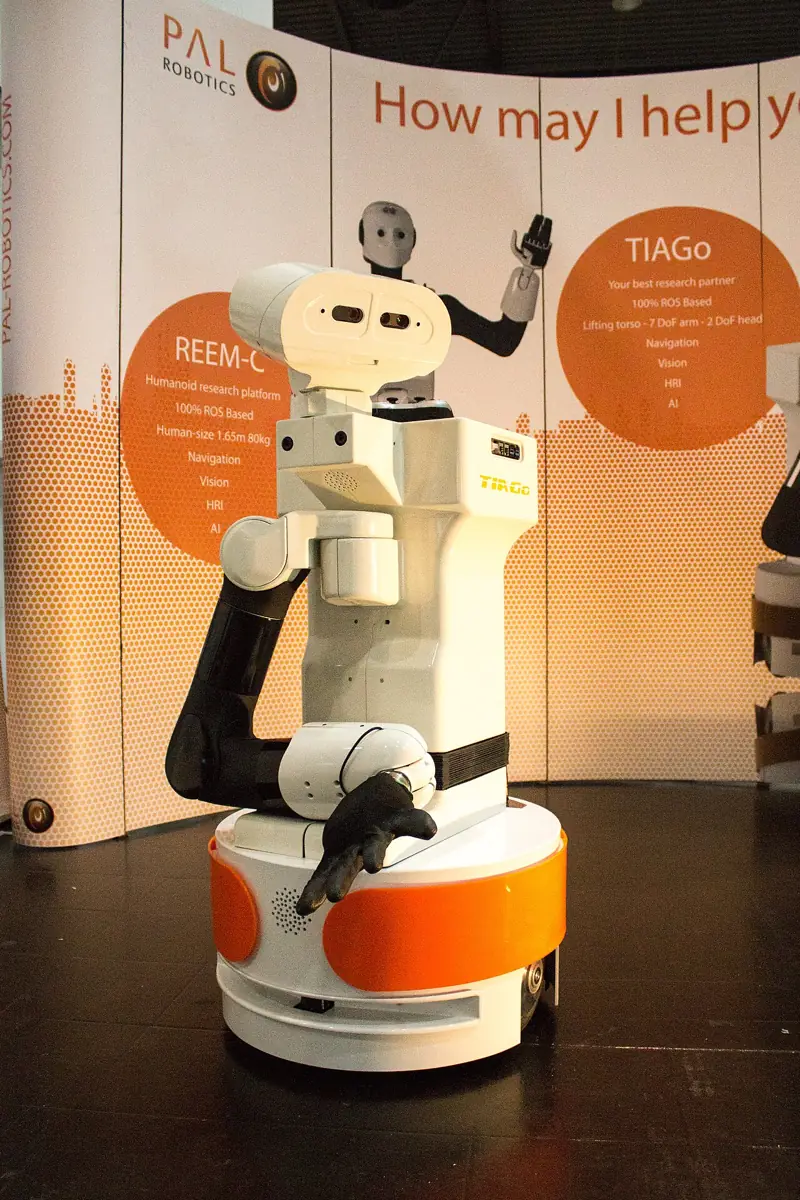
- Service robots: mobile manipulators like TIAGo (above) combine cameras, a world model and an arm to pick objects in home-style tasks.
- Factories and warehouses: cameras find parts or boxes, planners choose grasps and paths, and cells log what was done (Lessons 14–15).
- MoveIt Task Constructor: the whole pick-and-place task is planned as stages before execution, and failures are shown per stage.
- Your lab: webcam + Python planner + UNO executor — small, but the same structure, and honest about what it cannot do.
Think
Think about it
Think
The blue block behind the bottle can never be reached by your 2-link arm. Without moving the bottle by hand, what could a smarter system do?
Experiment
Build it in the lab
About 2–3 hours, in a pair or a small team. A PC with Python 3 and a fixed USB webcam looking straight down; an Arduino UNO with shoulder, elbow, lift and gripper servos on their own supply, an FSR with a 10 kΩ resistor, a stop button; small red and blue blocks, one too-big box, a tall bottle and two bins.
Experiment
Build and run the full capstone
You will need
- `capstone_pick_place.py` (Python 3, no libraries)
- Capstone interactive (in your browser)
- Arduino UNO, four SG90/MG90-class servos, separate 5–6 V supply, FSR, 10 kΩ resistor, push button, jumper wires
- USB webcam on a fixed stand, two paper markers, ruler, blocks, a box, a bottle, two bins
Steps
- Build the arm and measure L1, L2, the joint zero directions and the joint limits. Put them in BOTH the script and the sketch.
- Mount the webcam, place the two markers, measure their desk positions and update MARKERS_PX / MARKERS_CM. Check the mapping on a third point with a ruler.
- Turn your camera image into the character grid (threshold red, blue and dark pixels — or type a grid by hand for the first test).
- Run the planner. For every object, write down: placed, or the exact reason it was skipped.
- Send the commands for the first object by hand in the Serial Monitor. Measure where the block lands in the bin.
- Automate the sending (one command, wait for OK, stop on ERR) and run the whole tray. Then move the bottle and run again.
Capstone · Vision-guided collision-free pick & place · Educational
Ready — run Detect → … → Execute. Educational pipeline only. · grasp A
Educational browser pipeline — not industrial RRT / IK / grasp / collision. Reuses Stage 8 ik2R + Stage 9 syncedJoints. Bridges Stages 8–12.
A working capstone does not place everything. It places what it can safely place, and explains the rest in words a human can act on.
Knowledge check
Check your understanding
Knowledge check
1. Why does the script check marker 2 after calibrating?
2. Why was the big blue box skipped?
3. Why did the red block at (20.0, 3.5) fail in pass 1 but succeed in pass 2?
4. A planar 2-link arm can usually reach a point with…
5. Why does the UNO refuse `J` while the gripper is down?
6. The planner allows elbow angles up to 150° but the sketch refuses anything beyond 90°. What happens?
7. Increasing obstacle padding from 1.5 cm to 4.5 cm…
8. Which is the most professional final report?
Mini assignment
Capstone assignment
Mini assignment
Stage 13 capstone: sort the tray
Build a vision-guided, collision-free pick-and-place cell that sorts red and blue blocks into bins, never touches the obstacle, and reports honestly.
Deliverables
- A photo or sketch of your cell with all measurements (links, markers, bins, padding).
- Your calibration check: a third point measured with a ruler vs the script’s value.
- The planner printout for your real tray, and the final report of a full run (placed, skipped with reasons).
- A table of 10 placed blocks: distance from the bin centre (mm).
- A short video (or a step-by-step log) of one complete run, including one honest “needs a human”.
- One page: the biggest source of error in your cell, and what you would change first.
Do this, step by step
- Run
capstone_pick_place.pyand read the final report (placed and skipped, with reasons). - Put your marker positions in
MARKERS_CMand check a third point with a ruler. - Change
IMAGE,BINSandPADto match your tray and run the planner again. - Bench: servos on their own supply, grounds joined, stop button on pin 3; upload
capstone_executor.inoand do one full run. - Log 10 placed blocks: distance from the bin centre in mm.
Stuck? Hints, one at a time
- If every position is off by the same amount, your markers in
MARKERS_CMdo not match the real desk. Re-measure them first. - A block wider than
GRIPPER_MAX_CM(4 cm) must be skipped with a reason, not forced. - If one IK solution hits the obstacle, try the other elbow before reporting “no collision-free IK”.
Challenges (pick by level)
- 🟢 Beginner: Run the script, then move the bottle in the character grid (change the X positions). Which objects become reachable?
- 🟡 Intermediate: Add a third colour and a third bin. Add a check that a bin is not full (count what was placed).
- 🟠 Advanced: Replace the character grid with a real webcam frame: threshold the colours with OpenCV and build the grid (or the blob list) automatically.
- 🔴 Expert: Add a “move the obstacle first” task plan: if the bottle is marked graspable and a free spot exists, plan bottle → spot, block → bin, bottle → back.
- ⚫ Research: Compare your two-pass re-planning with planning the whole task at once, as MoveIt Task Constructor does. When can planning everything up front find a solution that greedy, one-object-at-a-time planning misses?
Stage 13 complete — next step
Congratulations — you have finished Stage 13: Perception, Planning & Manipulation. Your robot can see, build a world model, plan collision-free motions, grasp, place and report honestly. Next comes Stage 14 — Advanced Robotics / Reinforcement Learning, where robots start to learn behaviours from experience instead of only following the plans you write.
Look back: Lesson 15: Manipulation Pipeline. Next: Stage 14 — Advanced Robotics & Reinforcement Learning. Related: Stage 14 — Advanced Robotics & RL.
Sources
- MoveIt — Pick and Place with MoveIt Task Constructor — a full pick-and-place task built from stages and planned before execution.
- Arduino Servo library (GitHub) — controlling RC hobby servos.
- Photos: Wikimedia Commons (credits under each image).
Self-attested for now — keep artifacts in your lab notebook.
Complete
Today's goal
0 of 1 done today
Mark this lesson complete when you have worked the experiment, knowledge check, and assignment (even roughly).