
Computer Vision for Robotics (Vision Foundations) · Lesson 03
Images, Pixels & Color Spaces
Est. 50–65 min
Why
Why this lesson matters
Think of a sabziwala sorting tomatoes. Ripe ones are red, raw ones green, and it does not matter whether the cart is in the sun or under the shop’s shade — he still sorts them correctly. He is reading the hue (which colour) and ignoring the brightness. A robot can do the same, but only if we store colour in the right way. That is what colour spaces are about.
In Lesson 2 the camera turned light into a grid of pixels. In this lesson you open that grid in Python: its shape and data type, how to read one pixel, why OpenCV says B, G, R, why adding two bright pixels can give a *dark* one, how grayscale is calculated, and how HSV separates colour from brightness so a colour detector survives a lighting change. On the bench, an RGB LED shows that every colour you see on a screen is really just three numbers.
Concept
An image is a box of numbers
1. Shape, dtype and size
In OpenCV-Python an image is a NumPy array. A colour photo has shape (rows, columns, 3) — height first, then width, then the 3 colour channels. Each value is a uint8: a whole number from 0 to 255. A 640 × 480 colour frame is 480 × 640 × 3 = 921,600 numbers, almost 1 MB. At 30 frames a second that is about 27.6 MB of numbers every second — one reason robots often work on smaller or grey images.
| Image | NumPy shape | Values |
|---|---|---|
| Colour (OpenCV) | (480, 640, 3) | B, G, R, each 0–255, uint8 |
| Grayscale | (480, 640) | one brightness value 0–255 |
Binary mask (from cv.inRange) | (480, 640) | 0 = no, 255 = yes |
| HSV (OpenCV, 8-bit) | (480, 640, 3) | H 0–179, S 0–255, V 0–255 |
2. Reading a pixel: img[row, col] = img[v, u]
Pixel coordinates from Lesson 2 are (u, v): u across (column), v down (row). NumPy indexes the other way round: img[v, u]. Mixing these up is the second most common beginner bug after BGR. Remember it as “row first, like reading a book: which line, then which letter”.
3. RGB/BGR: mixing light
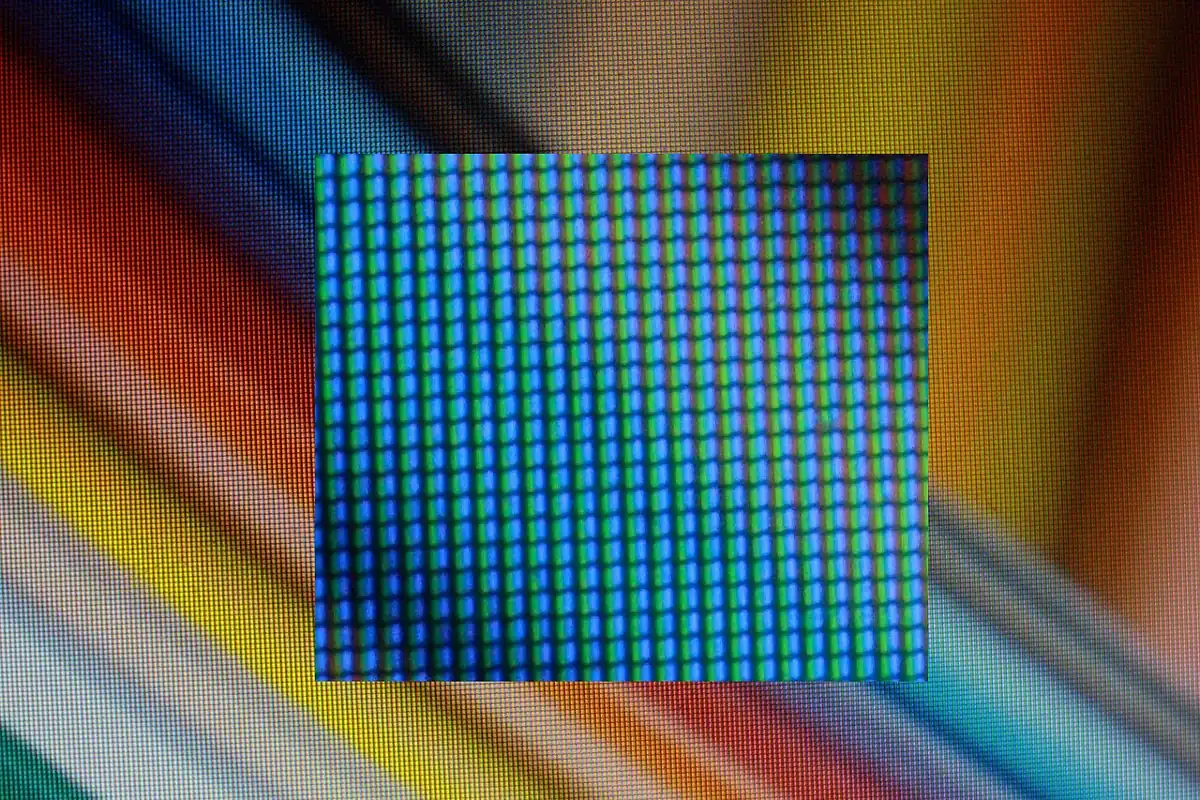
A screen pixel is three tiny lights — red, green and blue. Mix them and you get every other colour: red + green = yellow, all three full = white, all off = black. A camera stores colour the same way. OpenCV keeps the order B, G, R; most other libraries (matplotlib, PIL, web pages) use R, G, B. To convert, use cv.cvtColor(img, cv.COLOR_BGR2RGB) or simply reverse the last axis img[:, :, ::-1].
4. Grayscale: one number for brightness
OpenCV’s documented formula is Y = 0.299·R + 0.587·G + 0.114·B. Green gets the biggest weight because our eyes are most sensitive to it. Grayscale is great for shapes and edges (Lessons 4–6) and is 3× smaller — but it throws colour away. In the code lab a red block and a blue block become almost the same grey (88 vs 86).
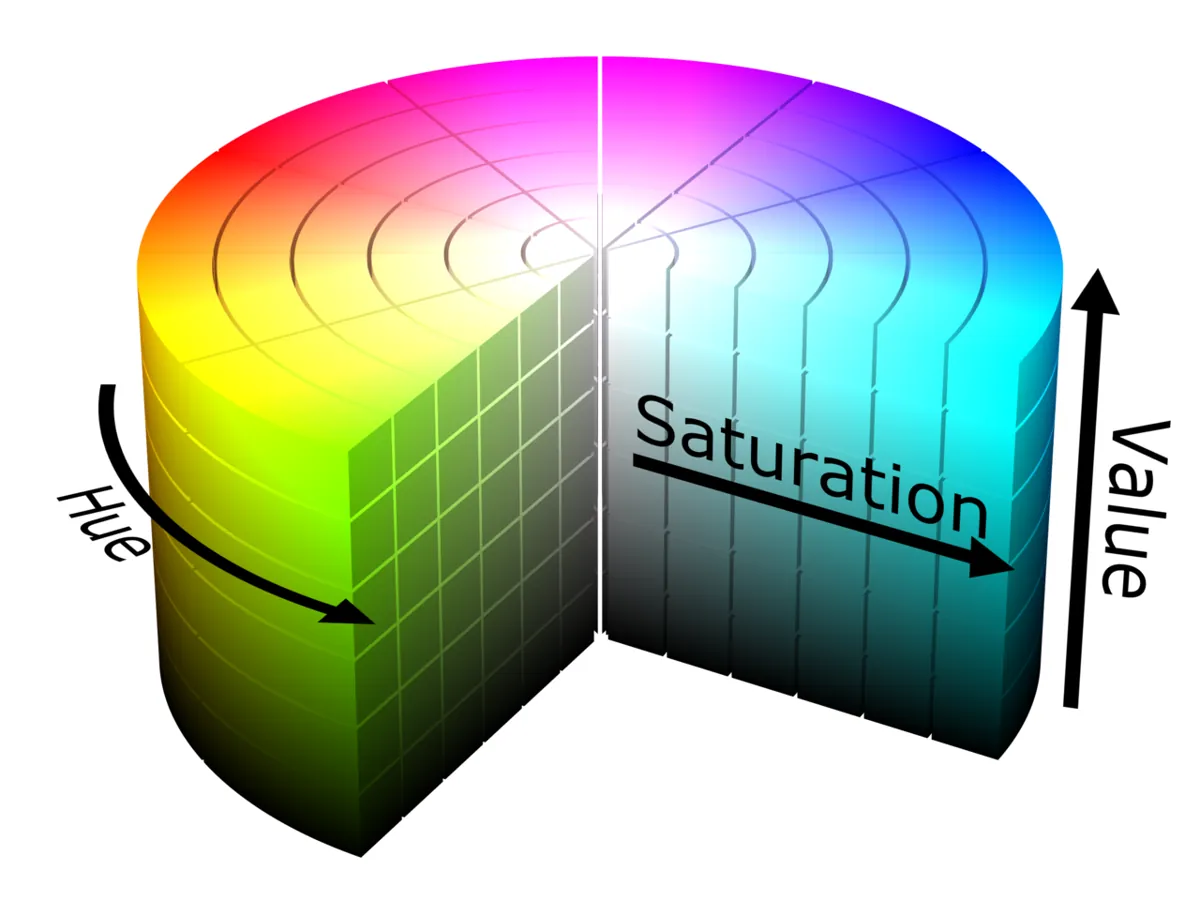
5. HSV: colour separated from brightness
H — Hue
Which colour, as an angle around a circle: red → yellow → green → cyan → blue → magenta → back to red. OpenCV stores the angle divided by 2, so H is 0–179 in 8-bit images.
S — Saturation
How pure the colour is, 0–255. A bright red block is high; white, grey and black are near 0.
V — Value
How bright, 0–255 (V = the largest of R, G, B). Dimming the lights mostly lowers V and leaves H and S nearly the same.
Visual
Visualise it: slide through RGB and HSV
Educational colour-space lab: the same colour as RGB and as HSV (H in degrees, S and V in percent — the common “paint program” scale, not OpenCV’s). Halve R, G and B together and see which numbers change. (Browser sim, not OpenCV.)
Interactive · Color space lab · Educational


H°
357
S%
82
V%
86
Demo “red marker” HSV gate: miss — try a red-ish RGB.
HSV often makes colored markers easier to gate than raw RGB under mild lighting changes. Educational only.
Code lab
Code lab: inside the pixel grid
pixels_and_color.py draws a small 160 × 120 “photo” of the lab table with four 20 × 20 blocks (red, green, blue, yellow) — no camera needed — and walks through seven checks: shape, indexing, uint8 overflow, grayscale, HSV values, the red wrap-around and a 50% lighting drop. It saves the picture so you can click on it with the HSV picker. Run python3 pixels_and_color.py.
"""
pixels_and_color.py — Stage 11 Lesson 3: an image is a NumPy array.

Builds a small synthetic top-down "photo" of the lab table (no camera needed) and shows:
  shape/dtype/size, img[row, col] indexing, BGR order, uint8 overflow vs cv.add,
  grayscale formula, BGR -> HSV values, the red hue wrap-around, and why HSV
  survives a lighting change better than a fixed BGR threshold.
Run:  python3 pixels_and_color.py      (needs numpy + opencv-python)
"""
import numpy as np
import cv2 as cv

H, W = 120, 160
img = np.zeros((H, W, 3), dtype=np.uint8)
img[:] = (150, 180, 200)                       # light wood table (B, G, R)
blocks = {                                     # name: (row, col, BGR colour)
    "red":    (30, 30, (40, 40, 200)),
    "green":  (30, 100, (60, 170, 60)),
    "blue":   (80, 30, (190, 90, 40)),
    "yellow": (80, 100, (40, 210, 230)),
}
for name, (r, c, bgr) in blocks.items():
    img[r:r + 20, c:c + 20] = bgr

print("1. What the robot really gets")
print(f"   shape={img.shape} (rows, cols, channels)  dtype={img.dtype}  size={img.size} numbers")
print(f"   a 640x480 colour frame would be {480*640*3:,} bytes; 30 of them per second = {480*640*3*30/1e6:.1f} MB/s")

print("\n2. Indexing is img[row, col] = img[v, u]  (NOT x, y)")
v, u = 40, 40
print(f"   pixel at u={u}, v={v}: BGR = {tuple(int(x) for x in img[v, u])}  <- red block, R is LAST")
print(f"   same pixel as RGB for matplotlib/PIL: {tuple(int(x) for x in img[v, u][::-1])}")

print("\n3. uint8 wraps around; cv.add saturates")
a = np.full((2, 2), 200, np.uint8); b = np.full((2, 2), 100, np.uint8)   # two tiny images
print(f"   numpy  a + b      = {int((a + b)[0, 0])}   (wraps around: 300 - 256)")
print(f"   cv.add(a, b)      = {int(cv.add(a, b)[0, 0])}   (saturates at 255)")

print("\n4. Grayscale: Y = 0.299 R + 0.587 G + 0.114 B")
gray = cv.cvtColor(img, cv.COLOR_BGR2GRAY)
for name, (r, c, (B, G, R)) in blocks.items():
    by_hand = 0.299 * R + 0.587 * G + 0.114 * B
    print(f"   {name:6s}: by hand {by_hand:6.1f}   cv.cvtColor {int(gray[r + 5, c + 5]):3d}")
print("   red (≈88) and blue (≈86) end up almost the same grey - colour is lost")

print("\n5. HSV in OpenCV: H 0-179 (degrees/2), S 0-255, V 0-255")
hsv = cv.cvtColor(img, cv.COLOR_BGR2HSV)
for name, (r, c, _) in blocks.items():
    h, s, val = (int(x) for x in hsv[r + 5, c + 5])
    print(f"   {name:6s}: H={h:3d} S={s:3d} V={val:3d}")
print("   pure green BGR (0,255,0) ->", cv.cvtColor(np.uint8([[[0, 255, 0]]]), cv.COLOR_BGR2HSV)[0, 0].tolist())

print("\n6. Red sits at BOTH ends of the hue circle")
for bgr in [(0, 0, 255), (20, 0, 255), (0, 20, 255)]:
    hh = int(cv.cvtColor(np.uint8([[bgr]]), cv.COLOR_BGR2HSV)[0, 0, 0])
    print(f"   BGR {bgr} -> H = {hh}")
print("   so a red mask needs two ranges: H 0-10 OR H 170-179")

print("\n7. Lights dimmed to 50%: fixed BGR threshold vs HSV range")
dim = (img.astype(np.float32) * 0.5).astype(np.uint8)
def count_red_bgr(im):            # "R > 150 and G < 100 and B < 100"
    return int(np.count_nonzero((im[:, :, 2] > 150) & (im[:, :, 1] < 100) & (im[:, :, 0] < 100)))
def count_red_hsv(im):
    hv = cv.cvtColor(im, cv.COLOR_BGR2HSV)
    m = cv.inRange(hv, (0, 100, 50), (10, 255, 255)) | cv.inRange(hv, (170, 100, 50), (179, 255, 255))
    return int(np.count_nonzero(m))
for label, im in (("normal", img), ("dim 50%", dim)):
    print(f"   {label:8s}: BGR rule finds {count_red_bgr(im):3d} px   HSV rule finds {count_red_hsv(im):3d} px   (block = 400 px)")
print("   dimming lowers V but keeps H and S, so the HSV rule still works")

cv.imwrite("pixels_and_color_table.png", img)
print("\nsaved pixels_and_color_table.png - open it with hsv_picker.py")
Output (run with python3 pixels_and_color.py, tested with opencv-python 5.0)
1. What the robot really gets
   shape=(120, 160, 3) (rows, cols, channels)  dtype=uint8  size=57600 numbers
   a 640x480 colour frame would be 921,600 bytes; 30 of them per second = 27.6 MB/s

2. Indexing is img[row, col] = img[v, u]  (NOT x, y)
   pixel at u=40, v=40: BGR = (40, 40, 200)  <- red block, R is LAST
   same pixel as RGB for matplotlib/PIL: (200, 40, 40)

3. uint8 wraps around; cv.add saturates
   numpy  a + b      = 44   (wraps around: 300 - 256)
   cv.add(a, b)      = 255   (saturates at 255)

4. Grayscale: Y = 0.299 R + 0.587 G + 0.114 B
   red   : by hand   87.8   cv.cvtColor  88
   green : by hand  124.6   cv.cvtColor 125
   blue  : by hand   86.4   cv.cvtColor  86
   yellow: by hand  196.6   cv.cvtColor 197
   red (≈88) and blue (≈86) end up almost the same grey - colour is lost

5. HSV in OpenCV: H 0-179 (degrees/2), S 0-255, V 0-255
   red   : H=  0 S=204 V=200
   green : H= 60 S=165 V=170
   blue  : H=110 S=201 V=190
   yellow: H= 27 S=211 V=230
   pure green BGR (0,255,0) -> [60, 255, 255]

6. Red sits at BOTH ends of the hue circle
   BGR (0, 0, 255) -> H = 0
   BGR (20, 0, 255) -> H = 178
   BGR (0, 20, 255) -> H = 2
   so a red mask needs two ranges: H 0-10 OR H 170-179

7. Lights dimmed to 50%: fixed BGR threshold vs HSV range
   normal  : BGR rule finds 400 px   HSV rule finds 400 px   (block = 400 px)
   dim 50% : BGR rule finds   0 px   HSV rule finds 400 px   (block = 400 px)
   dimming lowers V but keeps H and S, so the HSV rule still works

saved pixels_and_color_table.png - open it with hsv_picker.py
Try it: move the R, G, B sliders and watch H, S and V. Then halve all three sliders together (like dimming the light) — H and S stay put, only V drops. Note: this sim shows H in degrees (0–360) and S, V in percent; divide H by 2 and multiply S, V by 2.55 to get OpenCV numbers. (Educational browser sim.)
Interactive · Color space lab · Educational
H°
357
S%
82
V%
86
Demo “red marker” HSV gate: miss — try a red-ish RGB.
HSV often makes colored markers easier to gate than raw RGB under mild lighting changes. Educational only.
hsv_picker.py — click a colour, get a ready range
Guessing HSV ranges is slow. hsv_picker.py shows the camera (or a photo); click on your block and it prints the BGR, HSV and grey values at that pixel plus a suggested cv.inRange range — split into two ranges automatically for reds. A second window shows the live mask so you can see if the range catches the block and nothing else. It refuses to suggest a hue range for low-saturation pixels like a white table. The --at u v option prints the same report without any window, which is handy on a laptop without a display or over SSH on a Raspberry Pi.
"""
hsv_picker.py — Stage 11 Lesson 3: click a colour, get its BGR + HSV + a ready-made range.

  python3 hsv_picker.py                       # webcam: click on an object, q = quit
  python3 hsv_picker.py --image photo.png     # same on a saved photo
  python3 hsv_picker.py --image photo.png --at 40 40   # no window: print values at u=40, v=40

The suggested range follows the OpenCV "Changing Colorspaces" tutorial:
  lower = [H-10, 100, 100], upper = [H+10, 255, 255]   (H in 0..179 in OpenCV)
Reds near H=0 or H=179 get two ranges because red wraps around the hue circle.
"""
import argparse

import cv2 as cv
import numpy as np


def describe(bgr_img, u, v):
    b, g, r = (int(x) for x in bgr_img[v, u])
    h, s, val = (int(x) for x in cv.cvtColor(np.uint8([[[b, g, r]]]), cv.COLOR_BGR2HSV)[0, 0])
    gray = int(round(0.299 * r + 0.587 * g + 0.114 * b))
    print(f"(u={u}, v={v})  BGR=({b},{g},{r})  HSV=({h},{s},{val})  gray={gray}")
    if s < 80:
        print("  low saturation: white/grey/black - use V (brightness), not hue")
        return None
    lo, hi = h - 10, h + 10
    ranges = []
    if lo < 0:
        ranges = [((0, 100, 100), (hi, 255, 255)), ((180 + lo, 100, 100), (179, 255, 255))]
    elif hi > 179:
        ranges = [((lo, 100, 100), (179, 255, 255)), ((0, 100, 100), (hi - 180, 255, 255))]
    else:
        ranges = [((lo, 100, 100), (hi, 255, 255))]
    for a, b2 in ranges:
        print(f"  suggested cv.inRange(hsv, {a}, {b2})")
    return ranges


def mask_for(bgr_img, ranges):
    hsv = cv.cvtColor(bgr_img, cv.COLOR_BGR2HSV)
    m = np.zeros(hsv.shape[:2], np.uint8)
    for a, b in ranges:
        m |= cv.inRange(hsv, np.array(a), np.array(b))
    return m


def interactive(get_frame):
    state = {"frame": None, "ranges": None}

    def on_click(event, x, y, flags, param):
        if event == cv.EVENT_LBUTTONDOWN and state["frame"] is not None:
            state["ranges"] = describe(state["frame"], x, y)

    cv.namedWindow("image (click a colour)")
    cv.setMouseCallback("image (click a colour)", on_click)
    while True:
        frame = get_frame()
        if frame is None:
            break
        state["frame"] = frame
        cv.imshow("image (click a colour)", frame)
        if state["ranges"]:
            m = mask_for(frame, state["ranges"])
            cv.imshow("mask", m)
            cv.setWindowTitle("mask", f"mask: {np.count_nonzero(m)} px match")
        if cv.waitKey(30) == ord("q"):
            break
    cv.destroyAllWindows()


if __name__ == "__main__":
    ap = argparse.ArgumentParser()
    ap.add_argument("--image")
    ap.add_argument("--cam", type=int, default=0)
    ap.add_argument("--at", nargs=2, type=int, metavar=("U", "V"))
    a = ap.parse_args()
    if a.image:
        img = cv.imread(a.image)
        if img is None:
            raise SystemExit(f"could not read {a.image}")
        if a.at:
            r = describe(img, *a.at)
            if r:
                print(f"  pixels matching in the whole image: {np.count_nonzero(mask_for(img, r))}")
        else:
            interactive(lambda: img.copy())
    else:
        cap = cv.VideoCapture(a.cam)
        if not cap.isOpened():
            raise SystemExit("Cannot open camera")
        def grab():
            ok, f = cap.read()
            return f if ok else None
        interactive(grab)
cap.release()python3 pixels_and_color.py # also saves pixels_and_color_table.png
python3 hsv_picker.py --image pixels_and_color_table.png --at 40 40
# (u=40, v=40) BGR=(40,40,200) HSV=(0,204,200) gray=88
# suggested cv.inRange(hsv, (0, 100, 100), (10, 255, 255))
# suggested cv.inRange(hsv, (170, 100, 100), (179, 255, 255))
# pixels matching in the whole image: 400
python3 hsv_picker.py # webcam: click your real blockBench build: an RGB LED is one pixel you can program
rgb_led_mixer.ino drives a common-cathode RGB LED with three PWM pins. Type rgb 255 120 0 to mix light by hand, hsv 30 255 255 to choose a colour the OpenCV way (H 0–179), or sweep to walk the whole hue circle. For every colour it also prints the B, G, R order OpenCV would use, so the BGR habit becomes automatic. The HSV → RGB conversion inside the sketch is the standard one, using the same 0–179 hue scale as OpenCV 8-bit images.
| Part | Connection | Note |
|---|---|---|
| RGB LED (common cathode) | longest leg → GND | common-anode LED: long leg → 5 V and set COMMON_ANODE = true |
| 220 Ω resistor ×3 | D9 → red, D10 → green, D11 → blue | one resistor per colour — never skip them |
| Current | about (5 V − LED voltage) / 220 Ω ≈ 10–14 mA per colour | small LED loads only; this is why a GPIO can drive it |
| Motors, servos, LED strips | never from a GPIO | separate supply, grounds joined, driver or MOSFET in between |
// rgb_led_mixer.ino — Stage 11 Lesson 3: colour is three numbers.
// A common-cathode RGB LED mixes red, green and blue light, exactly like one screen pixel.
// Type in the Serial Monitor (115200 baud, "Newline"):
//   rgb 255 120 0     -> set R, G, B (0..255) directly
//   hsv 30 255 255    -> set hue 0..179 (OpenCV scale), saturation, value 0..255
//   sweep             -> walk the hue circle once (red -> yellow -> green -> blue -> red)
// Wiring: D9 -> 220R -> red leg, D10 -> 220R -> green leg, D11 -> 220R -> blue leg,
//         longest leg (common cathode) -> GND. Ohm's law: (5 V - ~2-3 V LED) / 220 R = roughly 10-14 mA per colour,
//         small enough for a GPIO pin ONLY because of the resistors. Never drive motors, servos or LED strips from a GPIO.
// (Common-anode LED? Connect the long leg to 5V and set COMMON_ANODE to true.)

const int PIN_R = 9, PIN_G = 10, PIN_B = 11;
const bool COMMON_ANODE = false;

void writeRGB(int r, int g, int b) {
  r = constrain(r, 0, 255); g = constrain(g, 0, 255); b = constrain(b, 0, 255);
  if (COMMON_ANODE) { r = 255 - r; g = 255 - g; b = 255 - b; }
  analogWrite(PIN_R, r);
  analogWrite(PIN_G, g);
  analogWrite(PIN_B, b);
}

// HSV -> RGB using the same hue scale as OpenCV 8-bit images (H 0..179 = degrees / 2).
void hsvToRgb(int h, int s, int v, int &r, int &g, int &b) {
  float H = (h % 180) * 2.0;            // back to 0..358 degrees
  float S = s / 255.0, V = v / 255.0;
  float C = V * S;
  float X = C * (1 - fabs(fmod(H / 60.0, 2) - 1));
  float m = V - C;
  float rf, gf, bf;
  if (H < 60)       { rf = C; gf = X; bf = 0; }
  else if (H < 120) { rf = X; gf = C; bf = 0; }
  else if (H < 180) { rf = 0; gf = C; bf = X; }
  else if (H < 240) { rf = 0; gf = X; bf = C; }
  else if (H < 300) { rf = X; gf = 0; bf = C; }
  else              { rf = C; gf = 0; bf = X; }
  r = (rf + m) * 255; g = (gf + m) * 255; b = (bf + m) * 255;
}

void show(int r, int g, int b) {
  writeRGB(r, g, b);
  Serial.print("R="); Serial.print(r);
  Serial.print(" G="); Serial.print(g);
  Serial.print(" B="); Serial.print(b);
  Serial.print("   (OpenCV would print BGR = ");
  Serial.print(b); Serial.print(","); Serial.print(g); Serial.print(","); Serial.print(r);
  Serial.println(")");
}

void setup() {
  pinMode(PIN_R, OUTPUT); pinMode(PIN_G, OUTPUT); pinMode(PIN_B, OUTPUT);
  Serial.begin(115200);
  Serial.println("commands: rgb R G B | hsv H S V | sweep");
  show(0, 0, 0);
}

void loop() {
  if (!Serial.available()) return;
  String cmd = Serial.readStringUntil(' ');
  cmd.trim();
  if (cmd == "rgb") {
    int r = Serial.parseInt(), g = Serial.parseInt(), b = Serial.parseInt();
    show(r, g, b);
  } else if (cmd == "hsv") {
    int h = Serial.parseInt(), s = Serial.parseInt(), v = Serial.parseInt();
    int r, g, b;
    hsvToRgb(h, s, v, r, g, b);
    Serial.print("H="); Serial.print(h); Serial.print(" S="); Serial.print(s);
    Serial.print(" V="); Serial.print(v); Serial.print(" -> ");
    show(r, g, b);
  } else if (cmd.startsWith("sweep")) {
    for (int h = 0; h < 180; h += 15) {
      int r, g, b;
      hsvToRgb(h, 255, 255, r, g, b);
      Serial.print("H="); Serial.print(h); Serial.print(" -> ");
      show(r, g, b);
      delay(600);
    }
  }
  while (Serial.available() && (Serial.peek() == '\n' || Serial.peek() == '\r')) Serial.read();
}Debugging
| Symptom | Likely cause | Fix |
|---|---|---|
| Colours look swapped when shown with matplotlib | BGR image shown as RGB | cv.cvtColor(img, cv.COLOR_BGR2RGB) before plt.imshow |
IndexError or wrong pixel | used img[u, v] instead of img[v, u] | Row (v) first, then column (u) |
| Brightened image has black blotches | uint8 wrap-around | Use cv.add/cv.convertScaleAbs, or work in int16/float then clip |
| Red mask catches only half the block | one range for red | Use two ranges: H 0–10 OR H 170–179 |
| Mask also catches the table or skin | S or V lower limits too low | Raise the S minimum; check with the picker on the false areas |
| HSV range copied from a website does nothing | H 0–360 / S, V 0–100 scale | Convert: H/2, S×2.55, V×2.55 |
| LED colours are wrong or inverted | common-anode LED with common-cathode code | Set COMMON_ANODE = true and move the long leg to 5 V |
Real world
Colour in real machines
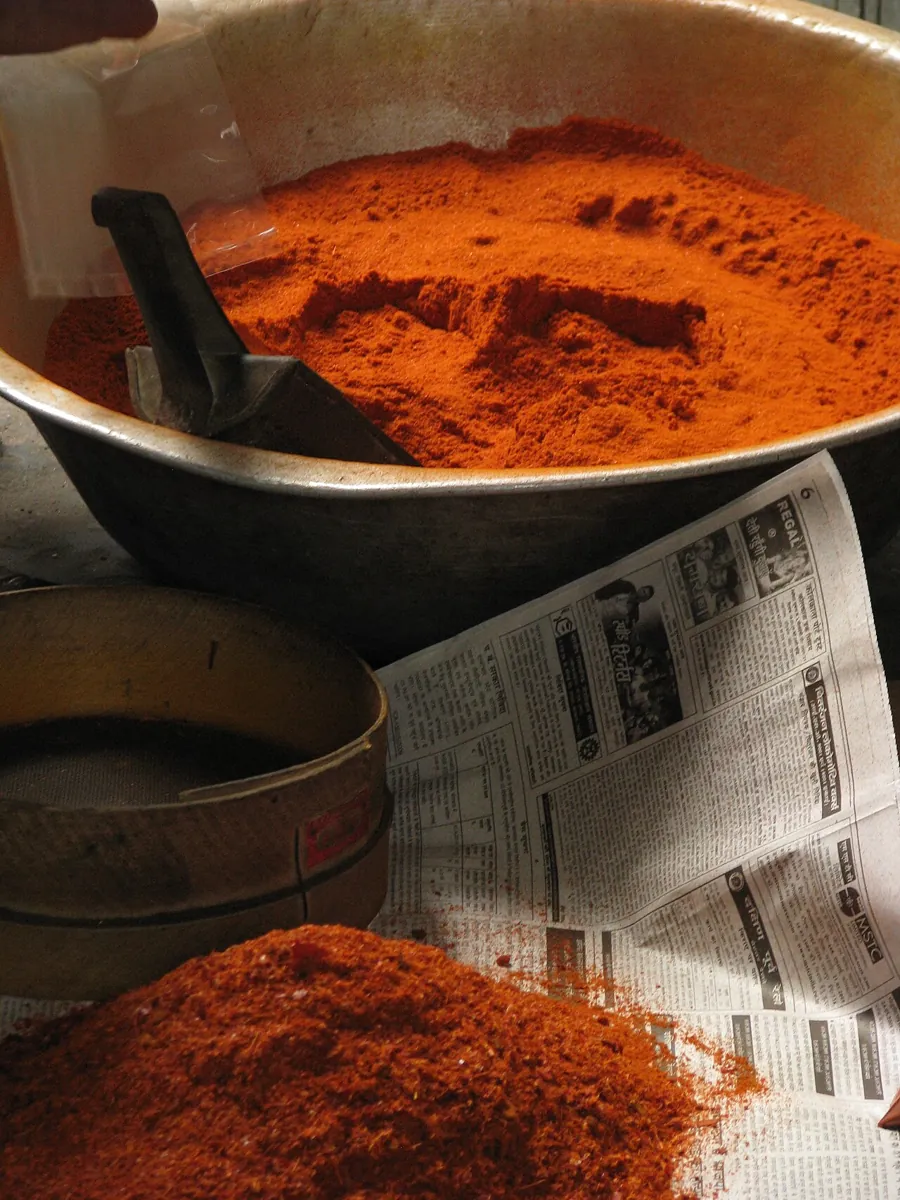
- Food and spice processing: colour sorting machines use cameras to spot wrong-coloured grains or pieces on a moving belt. They keep their own steady lighting inside — the same lesson as Part 7: control the light, then judge the colour.
- Ripeness checking: red vs green hue is a simple first test for tomatoes and chillies — exactly the H ranges you found in the code lab.
- Screens and cameras: every pixel on your phone is three sub-pixels; every camera pixel is stored as three numbers. Colour spaces like HSV are just a smarter way of writing the same three numbers.
- Your pick-and-place arm: a coloured block on a plain table, an HSV mask and two ranges for red — that is the core of Lesson 10 and of the Stage 11 capstone.
Think
Think about it
Think
You want to pick a white block from a light-grey table. Will an HSV hue range work? What would you use instead?
Experiment
Try it in the lab
About 50 minutes. Python part needs NumPy and OpenCV; camera part needs a webcam and two or three coloured objects; bench part needs an Arduino UNO, an RGB LED and three 220 Ω resistors.
Experiment
Colour that survives the lights
You will need
- `pixels_and_color.py`, `hsv_picker.py` (opencv-python, numpy)
- A webcam, coloured blocks or bottle caps, a desk lamp
- Colour-space lab (in your browser)
- Bench: Arduino UNO, RGB LED, 3 × 220 Ω resistors, jumper wires
Steps
- Run `pixels_and_color.py`. Change the dim factor in Part 7 from 0.5 to 0.3, then 0.15. When does the HSV rule also fail, and which limit (S or V) stops it?
- Add an orange block (BGR around (30, 120, 240)). Predict its hue before running.
- Run `hsv_picker.py` on your webcam. Record H, S, V for each object with the lamp ON and OFF.
- Build a mask for one object from the suggested range. Count how many pixels match with the lamp ON and OFF.
- In the colour-space lab, make yellow from R and G (H ≈ 60° there = 30 in OpenCV), then halve R and G together. Which of H, S, V changed?
- Bench: run `rgb_led_mixer.ino`, try `sweep`, then make the same colour with `rgb` and with `hsv`.
Interactive · Color space lab · Educational
H°
357
S%
82
V%
86
Demo “red marker” HSV gate: miss — try a red-ish RGB.
HSV often makes colored markers easier to gate than raw RGB under mild lighting changes. Educational only.
B, G, R all change when the light changes. H stays nearly the same and S changes a little; V carries most of the lighting change. That is why colour detection is done in HSV.
Knowledge check
Check your understanding
Knowledge check
1. A 640 × 480 colour image in OpenCV has shape…
2. To read the pixel at column u = 100, row v = 50 you write…
3. NumPy uint8: 200 + 100 = ?
4. In OpenCV’s grayscale formula, which channel has the largest weight?
5. In OpenCV 8-bit HSV, hue ranges from…
6. Why does a red mask usually need two ranges?
7. The lights dim to half. Which HSV value changes most?
8. Why does the RGB LED need a resistor on each colour?
Mini assignment
Hands-on assignment
Mini assignment
A colour table for your lab blocks
Measure the real HSV ranges of the blocks your arm will pick, under the lights of your own lab.
Deliverables
- A table: object, H/S/V with lamp ON, H/S/V with lamp OFF, final `inRange` range(s).
- Screenshots of the mask for each object (ON and OFF) with the matching pixel count.
- One paragraph: which object was hardest to separate and why (low saturation? close hue to the table?).
- Output of `pixels_and_color.py` with your own extra block added.
- Optional (bench): a photo of the RGB LED showing yellow, cyan and magenta made with `rgb` commands.
Do this, step by step
- Run
hsv_picker.pyon each block with the lamp ON and write its H, S, V. - Switch the lamp OFF and record H, S, V again for the same spots.
- Pick one
inRangerange per block that covers both readings; take a mask screenshot and pixel count for each. - Add your own extra block to
pixels_and_color.py, predict its hue, then run it. - Write which block was hardest to separate and why (low S, or H close to the table).
Stuck? Hints, one at a time
- OpenCV hue runs from 0 to 179 (degrees divided by 2), so yellow is about 30, not 60.
- Red sits at both ends of the hue range — you may need two ranges (near 0 and near 179) joined with
cv.bitwise_or. - Keep the lower S and V limits loose enough for the lamp-OFF readings; the H range should stay narrow.
Challenges (pick by level)
- 🟢 Beginner: Print the B, G, R and H, S, V of every block in
pixels_and_color.pyas a neat table. - 🟡 Intermediate: Make
hsv_picker.pytake the median HSV of a 5 × 5 patch around the click instead of one pixel. Why is this better on a real camera? - 🟠 Advanced: Write
count_colours(img)that returns how many pixels are red, green, blue and yellow, using HSV ranges, and test it at light levels 1.0, 0.5 and 0.3. - 🔴 Expert: Add trackbars (
cv.createTrackbar) for H min/max, S min and V min to the picker and save the final range to a JSON file the later lessons can load. - ⚫ Research: Compare HSV with the CIE L*a*b* colour space (also in
cv.cvtColor). Which one separates your blocks better under a warm (yellow) bulb? Show numbers and cite sources.
Next step
You can now read pixels and colours. Real camera images are noisy and unevenly lit, though. In Lesson 4 — Image Preprocessing you will clean them up with grayscale, blur and thresholding so later steps see clear shapes instead of speckles.
Sources
- OpenCV 4.x — Changing Colorspaces (Python tutorial) —
cv.cvtColor,COLOR_BGR2GRAY/COLOR_BGR2HSV, HSV ranges H [0,179] S [0,255] V [0,255],cv.inRange, green → [60, 255, 255], [H−10,100,100]…[H+10,255,255] rule. - OpenCV 4.x — Color conversions — Y = 0.299R + 0.587G + 0.114B; RGB → HSV formulas (V = max, S, H) and H/2 for 8-bit images; Bayer pattern note.
- OpenCV 4.x — Getting Started with Videos (Python) —
VideoCapture,read(), converting each frame withcv.cvtColor, used by the webcam mode ofhsv_picker.py. - Wikipedia — Bayer filter — why each camera pixel stores three colour numbers after demosaicing (half green, quarter red, quarter blue sensor sites).
- Photos: Wikimedia Commons (credits under each image).
Look back: Lesson 2: How Cameras See the World. Next: Lesson 4: Image Preprocessing. Related: Stage 11 — Computer Vision, Stage 13 — Perception, Planning & Manipulation.
Self-attested for now — keep artifacts in your lab notebook.
Complete
Today's goal
0 of 1 done today
Mark this lesson complete when you have worked the experiment, knowledge check, and assignment (even roughly).