
Computer Vision for Robotics (Vision Foundations) · Lesson 01
Why Robots Need Vision
Est. 45–60 min
Why
Why this lesson matters
Think of a cook in a dark kitchen during a power cut. She knows exactly where her own hands are — she can touch her nose with her eyes closed. But she cannot find the salt dabba if someone moved it. The moment the inverter light comes on, she sees the dabba and picks it up in one go. A robot arm is the same. Encoders and potentiometers tell it about its own body. A camera tells it about the world — where the block is, whether it is there at all, whether a hand is in the way.
Stages 7–10 made the arm accurate, smooth and well organised. Stage 11 makes it aware. In this first lesson you will compare a blind arm and a seeing arm in a small Python simulation, look through a real webcam with OpenCV and see that the robot gets only numbers, and build a two-sensor Arduino board that shows the difference between body sense and world sense.
Concept
Body sense vs world sense
1. Two kinds of sensing
| Proprioception (body sense) | Exteroception (world sense) | |
|---|---|---|
| Question it answers | “Where are my joints? How fast am I moving?” | “What is around me? Where is the object?” |
| Sensors on our arm | servo/pot angles, encoders, IMU | camera, depth camera, ultrasonic, light sensor |
| In ROS 2 (Stage 10) | /joint_states | image topics, point clouds, /target_pose |
| If it is missing | the arm cannot control its own motion | the arm moves perfectly to the wrong place |
2. What a camera really gives a robot
We see a red block. The robot gets a grid of numbers. A colour image of 640 × 480 pixels is 480 rows × 640 columns × 3 colour values, each from 0 to 255. Nothing in that grid says “block”. Computer vision is the work of turning that grid into a useful answer: “red block, centre at (23.8 cm, 9.8 cm), sure enough to pick”.
3. The vision pipeline you will build in Stage 11
Capture
The camera gives a frame: an array of pixels (Lessons 2–3).
Clean up
Grayscale, blur and threshold remove noise and lighting changes (Lesson 4).
Find
Edges, shapes, features, colours or a trained detector find the object in pixels (Lessons 5–11).
Measure
Calibration, depth and pose turn pixels into centimetres and angles in the robot’s frame (Lessons 12–15).
Act
IK, trajectories and the ROS 2 system from Stages 8–10 move the arm to the object (Lesson 16 capstone).
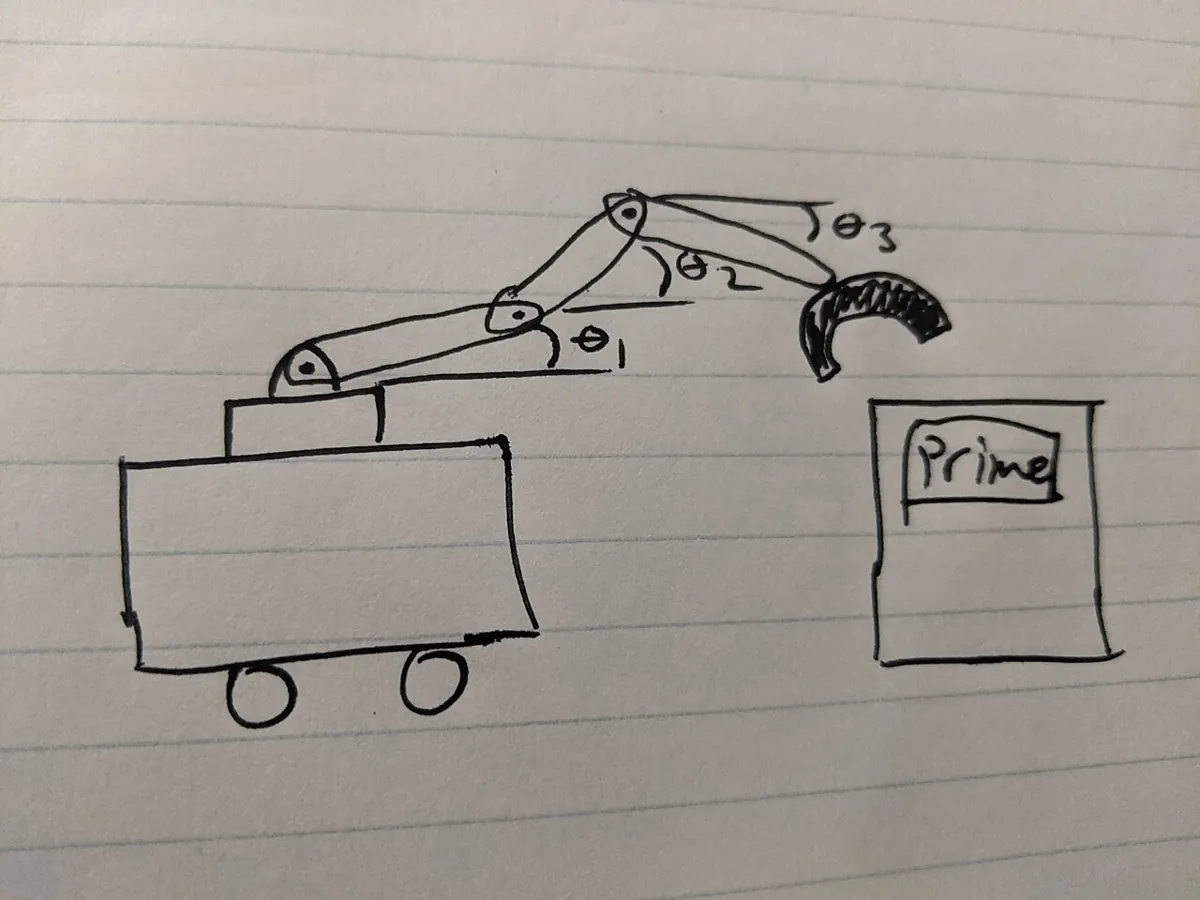
Visual
Visualise it: a robot sees numbers first
Educational pixel explorer: a synthetic scene, its (u, v) coordinates and RGB values — robots see numbers first. (A browser sim, not OpenCV.)
Interactive · Image pixel explorer · Educational


Hover the synthetic camera image. Robots see numbers, not “red block” — until algorithms assign meaning.
u
—
v
—
R
—
G
—
B
—
Browser canvas educational sim — not OpenCV.js / not a live camera pipeline.
Code lab
Code lab: a blind arm vs a seeing arm
blind_vs_seeing_arm.py needs only Python and NumPy. It makes a tiny top-down “camera image” (64 × 48 pixels, 0.5 cm per pixel) of a light-wood table with a red block. The blind arm goes to the spot it was taught. The seeing arm finds the red pixels, takes their centre, converts pixels to centimetres and goes there. Five situations are tested, including a missing block and dim lights. Run python3 blind_vs_seeing_arm.py.
"""blind_vs_seeing_arm.py - Stage 11 L01: why a robot arm needs a camera.

Two arms try to pick a red block from a table:
  BLIND arm  - goes to the spot it remembers (perfect kinematics, no camera)
  SEEING arm - looks at a top-down camera image, finds red pixels, then goes there
The camera image is a tiny synthetic picture made with NumPy (no OpenCV needed).
Camera model is deliberately simple: looking straight down, 0.5 cm per pixel,
pixel (0, 0) = table corner (0, 0). Real cameras need calibration (later lessons).
"""
import numpy as np

W, H = 64, 48            # image size in pixels (u across, v down)
CM_PER_PX = 0.5          # 64 px x 0.5 = 32 cm wide table view
GRIP_TOL_CM = 1.5        # gripper can only absorb this much error
REMEMBERED = (20.0, 10.0)  # where the block was when we "taught" the arm, cm


def make_image(block_cm=None, light=1.0):
    """Light-wood table, optional 3 x 3 cm red block centred at block_cm."""
    img = np.zeros((H, W, 3), dtype=np.float32)
    img[:, :] = (200, 170, 130)                       # table colour (R, G, B)
    if block_cm is not None:
        u0, v0 = int(block_cm[0] / CM_PER_PX), int(block_cm[1] / CM_PER_PX)
        img[v0 - 3:v0 + 3, u0 - 3:u0 + 3] = (210, 30, 30)  # 6 x 6 px = 3 x 3 cm
    return np.clip(img * light, 0, 255).astype(np.uint8)


def find_red(img):
    """Return (u, v) centroid of 'red' pixels, or None. A fixed threshold, on purpose."""
    r, g, b = img[:, :, 0].astype(int), img[:, :, 1].astype(int), img[:, :, 2].astype(int)
    mask = (r > 150) & (g < 80) & (b < 80)
    if mask.sum() < 10:                     # fewer than 10 pixels = not a block
        return None, int(mask.sum())
    vs, us = np.nonzero(mask)
    return (us.mean(), vs.mean()), int(mask.sum())


def ascii_view(img, step=4):
    rows = []
    for v in range(0, H, step):
        row = ''
        for u in range(0, W, step // 2):
            r, g, b = img[v, u]
            row += '#' if r > 150 and g < 80 and b < 80 else '.'
        rows.append('    ' + row)
    return '\n'.join(rows)


def try_pick(name, block_cm, light=1.0, show=False):
    print(f'\n=== {name} ===')
    img = make_image(block_cm, light)
    if show:
        print('  what the camera sees (# = red pixel):')
        print(ascii_view(img))
        print(f'  raw numbers at pixel (u=40, v=20): RGB = {tuple(int(x) for x in img[20, 40])}')
    # blind arm
    if block_cm is None:
        print(f'  BLIND : closes gripper at {REMEMBERED} cm on empty air -> MISS (and it does not know)')
    else:
        err = np.hypot(block_cm[0] - REMEMBERED[0], block_cm[1] - REMEMBERED[1])
        verdict = 'PICK OK' if err <= GRIP_TOL_CM else 'MISS'
        print(f'  BLIND : goes to {REMEMBERED} cm, block is {block_cm} cm, error {err:.1f} cm -> {verdict}')
    # seeing arm
    c, n = find_red(img)
    if c is None:
        print(f'  SEEING: only {n} red pixels found -> "no block seen", refuses to move')
        return
    x, y = c[0] * CM_PER_PX, c[1] * CM_PER_PX
    err = np.hypot(x - block_cm[0], y - block_cm[1])
    print(f'  SEEING: {n} red pixels, centroid (u={c[0]:.1f}, v={c[1]:.1f}) px'
          f' -> ({x:.1f}, {y:.1f}) cm, error {err:.1f} cm -> '
          + ('PICK OK' if err <= GRIP_TOL_CM else 'MISS'))


if __name__ == '__main__':
    try_pick('1. Block exactly where it was taught', (20.0, 10.0), show=True)
    try_pick('2. Cleaner moved the block 4 cm', (24.0, 10.0))
    try_pick('3. Block placed somewhere new', (8.0, 18.0), show=True)
    try_pick('4. Block missing', None)
    try_pick('5. Same block, lights dimmed to 40%', (20.0, 10.0), light=0.4)
Output (run with python3 blind_vs_seeing_arm.py)
=== 1. Block exactly where it was taught ===
  what the camera sees (# = red pixel):
    ................................
    ................................
    ................................
    ................................
    ................................
    ...................###..........
    ................................
    ................................
    ................................
    ................................
    ................................
    ................................
  raw numbers at pixel (u=40, v=20): RGB = (210, 30, 30)
  BLIND : goes to (20.0, 10.0) cm, block is (20.0, 10.0) cm, error 0.0 cm -> PICK OK
  SEEING: 36 red pixels, centroid (u=39.5, v=19.5) px -> (19.8, 9.8) cm, error 0.4 cm -> PICK OK

=== 2. Cleaner moved the block 4 cm ===
  BLIND : goes to (20.0, 10.0) cm, block is (24.0, 10.0) cm, error 4.0 cm -> MISS
  SEEING: 36 red pixels, centroid (u=47.5, v=19.5) px -> (23.8, 9.8) cm, error 0.4 cm -> PICK OK

=== 3. Block placed somewhere new ===
  what the camera sees (# = red pixel):
    ................................
    ................................
    ................................
    ................................
    ................................
    ................................
    ................................
    ................................
    ................................
    .......###......................
    ................................
    ................................
  raw numbers at pixel (u=40, v=20): RGB = (200, 170, 130)
  BLIND : goes to (20.0, 10.0) cm, block is (8.0, 18.0) cm, error 14.4 cm -> MISS
  SEEING: 36 red pixels, centroid (u=15.5, v=35.5) px -> (7.8, 17.8) cm, error 0.4 cm -> PICK OK

=== 4. Block missing ===
  BLIND : closes gripper at (20.0, 10.0) cm on empty air -> MISS (and it does not know)
  SEEING: only 0 red pixels found -> "no block seen", refuses to move

=== 5. Same block, lights dimmed to 40% ===
  BLIND : goes to (20.0, 10.0) cm, block is (20.0, 10.0) cm, error 0.0 cm -> PICK OK
SEEING: only 0 red pixels found -> "no block seen", refuses to moveTry it: hover over the scene and read the (u, v) position and the RGB numbers. Meaning is not in the numbers yet — your code has to find it.
Interactive · Image pixel explorer · Educational
Hover the synthetic camera image. Robots see numbers, not “red block” — until algorithms assign meaning.
u
—
v
—
R
—
G
—
B
—
Browser canvas educational sim — not OpenCV.js / not a live camera pipeline.
first_look.py — look through a real camera
This script follows the official OpenCV “Getting Started with Videos” tutorial: cv.VideoCapture(0) opens the first camera, cap.isOpened() checks it, and cap.read() returns (ok, frame) for every frame. Once a second it prints the frame’s shape, the B, G, R values at the centre and the average brightness. Press s to save a snapshot and q to quit. With --image photo.jpg it gives the same report for a saved photo, so you can practise without a camera.
"""first_look.py - Stage 11 L01: your robot's first look through a real camera (OpenCV).

  python3 first_look.py              # live webcam (device 0); keys: s = save snapshot, q = quit
  python3 first_look.py --image x.jpg   # same report for a saved photo (no camera needed)
Install:  pip install opencv-python
Prints what the robot really gets: an array of numbers (height x width x 3, in B, G, R order).
"""
import sys

import cv2 as cv


def report(frame):
    h, w = frame.shape[:2]
    b, g, r = frame[h // 2, w // 2]
    gray = cv.cvtColor(frame, cv.COLOR_BGR2GRAY)
    print(f'shape={frame.shape} dtype={frame.dtype} '
          f'centre BGR=({b},{g},{r}) mean brightness={gray.mean():.1f}/255')


def draw_crosshair(frame):
    h, w = frame.shape[:2]
    cv.line(frame, (w // 2 - 15, h // 2), (w // 2 + 15, h // 2), (0, 255, 0), 1)
    cv.line(frame, (w // 2, h // 2 - 15), (w // 2, h // 2 + 15), (0, 255, 0), 1)


def from_image(path):
    frame = cv.imread(path)          # returns None if the file cannot be read
    if frame is None:
        sys.exit(f'Cannot read {path}')
    report(frame)


def from_camera(index=0):
    cap = cv.VideoCapture(index)
    if not cap.isOpened():
        sys.exit('Cannot open camera - is another app using it? Try index 1.')
    print('size:', cap.get(cv.CAP_PROP_FRAME_WIDTH), 'x', cap.get(cv.CAP_PROP_FRAME_HEIGHT))
    n = 0
    while True:
        ok, frame = cap.read()
        if not ok:
            print("Can't receive frame. Exiting ...")
            break
        n += 1
        if n % 30 == 0:              # print about once a second at 30 fps
            report(frame)
        shown = frame.copy()
        draw_crosshair(shown)
        cv.imshow('first look (s = save, q = quit)', shown)
        key = cv.waitKey(1) & 0xFF
        if key == ord('s'):
            cv.imwrite('snapshot.png', frame)
            print('saved snapshot.png')
        elif key == ord('q'):
            break
    cap.release()
    cv.destroyAllWindows()


if __name__ == '__main__':
    if len(sys.argv) == 3 and sys.argv[1] == '--image':
        from_image(sys.argv[2])
    else:
from_camera()pip install opencv-python numpy
python3 first_look.py # webcam: s = save, q = quit
python3 first_look.py --image snapshot.png
# example line you will see (values depend on your room and camera):
# shape=(480, 640, 3) dtype=uint8 centre BGR=(30,30,210) mean brightness=173.9/255Bench build: body sense and world sense on one Arduino
A potentiometer stands in for a joint encoder — it only knows its own angle. A light-dependent resistor (photocell) is a one-pixel camera — it knows nothing about the joint but notices when your hand casts a shadow. The photocell uses the voltage-divider method from the Adafruit photocell guide: one end to 5 V, the other end to the analog pin and a 10 kΩ resistor to ground, so more light gives a higher reading.
| Part | Connection | Note |
|---|---|---|
| 10 kΩ potentiometer | ends → 5 V and GND, wiper → A0 | the “joint encoder” |
| Photocell (LDR) | 5 V → LDR → A1 | the “one-pixel camera” |
| 10 kΩ resistor | A1 → resistor → GND | pull-down; use 1 kΩ in very bright rooms |
| On-board LED | D13 (built in) | lights when a shadow falls on the LDR |
| Servos / motors | not used here | if added later: separate 5–6 V supply, grounds joined, never from a GPIO |
// body_and_world.ino - Stage 11 L01: "body sense" vs "world sense" on one Arduino UNO.
//   A0: 10 k potentiometer  = a joint encoder stand-in (proprioception: where is MY joint?)
//   A1: photocell (LDR) + 10 k resistor to GND = a one-pixel "camera" (exteroception: what is OUT THERE?)
//   D13: on-board LED lights when a hand/object shadows the LDR.
// Wiring (all low-current, safe on the Arduino 5 V pin):
//   pot ends -> 5 V and GND, wiper -> A0
//   5 V -> LDR -> A1 -> 10 k resistor -> GND   (Adafruit "pull-down" divider: brighter = higher reading)
// No motors here. If you later add a servo, power it from a separate supply, grounds joined.
const int POT_PIN = A0;
const int LDR_PIN = A1;
int baseline = 0;

void setup() {
  Serial.begin(115200);
  pinMode(LED_BUILTIN, OUTPUT);
  long sum = 0;
  for (int i = 0; i < 32; i++) { sum += analogRead(LDR_PIN); delay(10); }
  baseline = sum / 32;                       // room light at power-on, keep the sensor uncovered
  Serial.print(F("baseline light = ")); Serial.println(baseline);
}

void loop() {
  int pot = analogRead(POT_PIN);             // 0..1023
  int light = analogRead(LDR_PIN);           // 0..1023
  float jointDeg = pot * (180.0 / 1023.0);   // pretend 0-180 deg joint, like a servo
  bool shadow = light < baseline * 6 / 10;   // 40% darker than the start = something in front
  digitalWrite(LED_BUILTIN, shadow ? HIGH : LOW);
  Serial.print(F("joint_deg=")); Serial.print(jointDeg, 1);
  Serial.print(F(" light=")); Serial.print(light);
  Serial.println(shadow ? F(" OBJECT?") : F(""));
  delay(100);
}Debugging
| Symptom | Likely cause | Fix |
|---|---|---|
| “Cannot open camera” | another app (video call, browser tab) is using it, or wrong index | Close other apps; try cv.VideoCapture(1); test with your system camera app |
| Window opens but stays black | lens cover, or camera still starting | Remove the cover; skip the first few frames |
| Red object shows a high first number | you are reading B, G, R as R, G, B | Remember OpenCV order is B, G, R |
cv.imshow error on a server or WSL | no display available | Use --image mode or save frames with cv.imwrite |
| LDR reading stuck near 0 or 1023 | resistor missing or wired to the wrong rail | Check: 5 V → LDR → A1 → 10 kΩ → GND |
OBJECT? flickers all the time | tube-light flicker or baseline taken while covered | Keep the LDR uncovered during reset; average more readings |
Real world
Vision in real robots
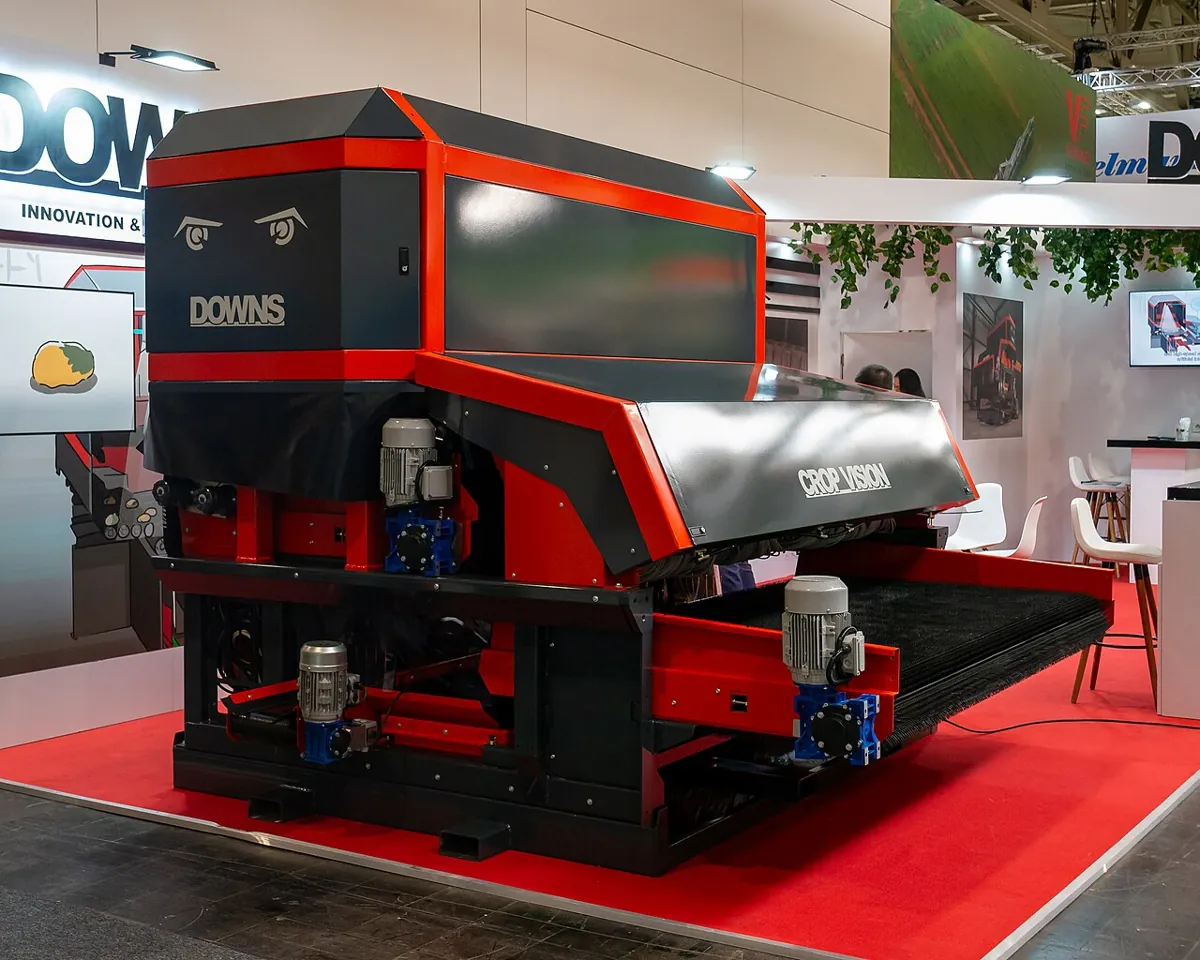
- Farm produce sorting: optical sorters such as the DOWNS CropVision use industrial cameras and an AI algorithm to look at the whole surface (360°) of every potato on the belt and send it to one of three exits — keep, second quality or waste — picking out clods, stones and cut, cracked or spoiled potatoes without a human checking each one.
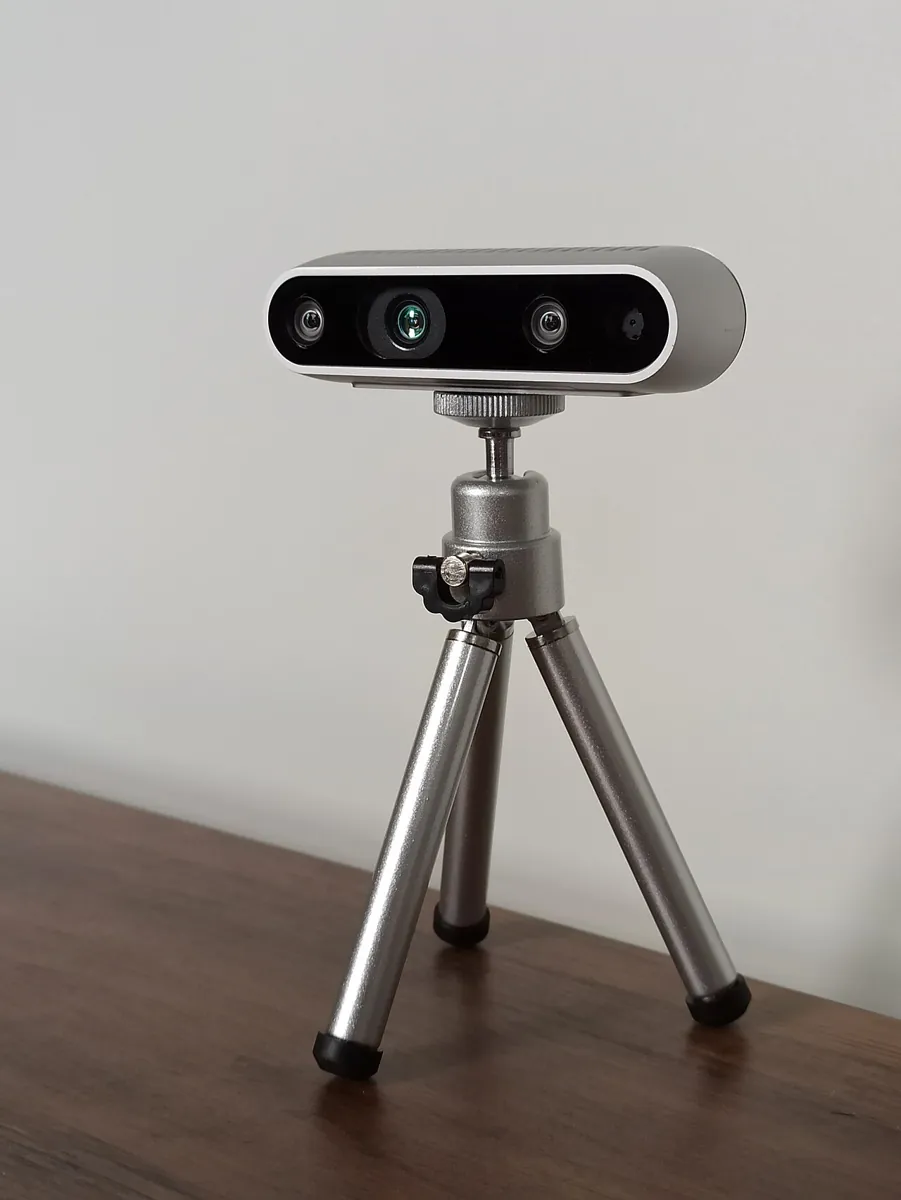
- Depth cameras for robots: small RGB-D cameras like the Intel RealSense D435 add a depth value to each pixel, so a robot knows not only where an object is in the picture but how far away it is (Lesson 14).
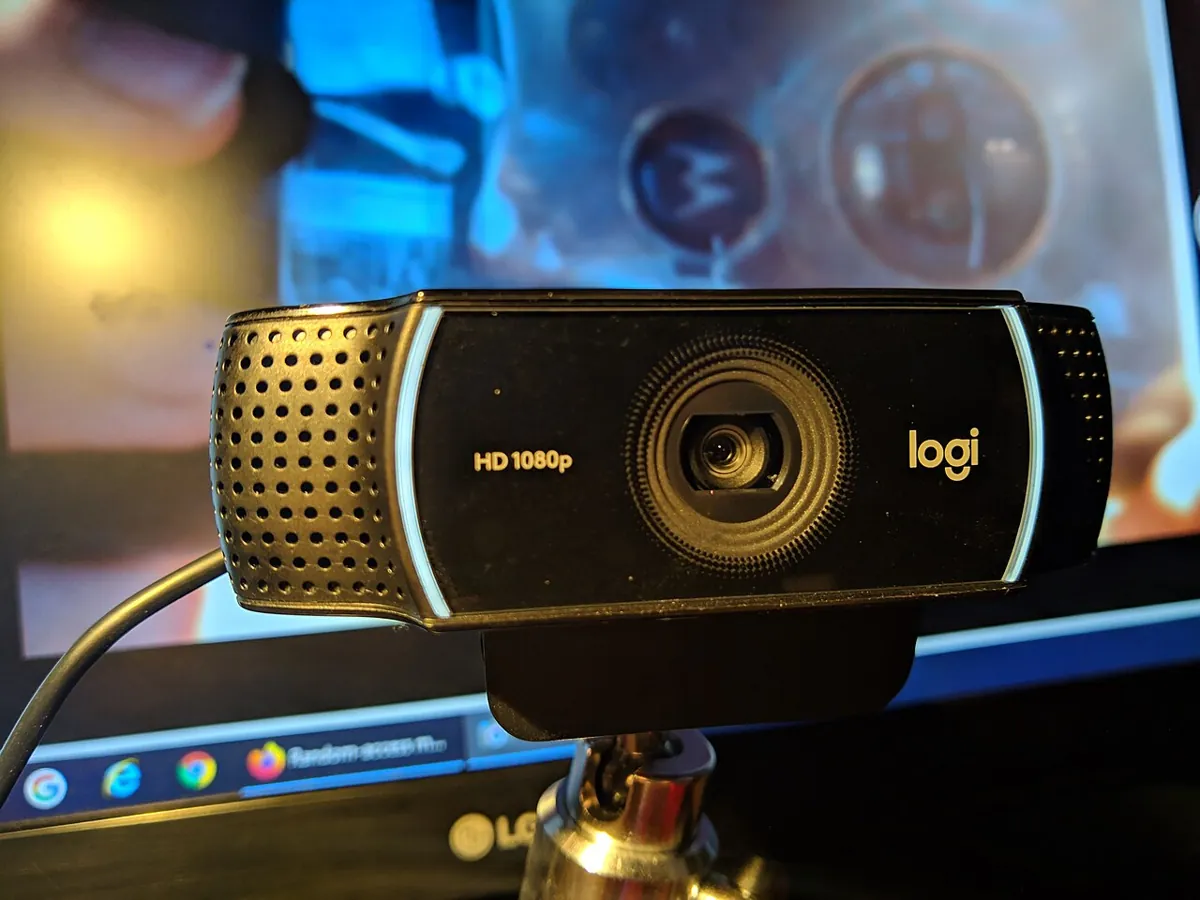
- Your desk arm: an ordinary USB webcam fixed above the table is enough for the Stage 11 capstone: find the block, convert to centimetres, and send a target to the Stage 10 planner.
Think
Think about it
Think
Your arm’s IK is perfect to 1 mm and the block is always placed in a 3D-printed holder on the table. Do you still need a camera? What if the holder is sometimes empty?
Experiment
Try it in the lab
About 45 minutes. Python part needs only NumPy; the camera part needs a webcam and OpenCV; the bench part needs an Arduino UNO, a 10 kΩ pot, a photocell and a 10 kΩ resistor.
Experiment
Blind, seeing and fooled
You will need
- `blind_vs_seeing_arm.py`, Python 3 with NumPy
- `first_look.py` with `opencv-python` and a webcam (or a saved photo)
- Pixel explorer (in your browser)
- Optional bench: Arduino UNO, 10 kΩ pot, photocell, 10 kΩ resistor, jumper wires
Steps
- Run `blind_vs_seeing_arm.py`. Then change `REMEMBERED` to (24, 10) and run again. Which cases change for the blind arm?
- Change `GRIP_TOL_CM` to 5. Does the blind arm now “pass” Case 2? Is that a good fix in real life?
- Change the light in Case 5 to 0.7, 0.6, 0.5. At what level does the seeing arm stop seeing? Why?
- In the pixel explorer, find the (u, v) of the red block’s centre and its RGB values.
- Run `first_look.py`. Write down the centre B, G, R for a red, a green and a white object.
- Bench: run `body_and_world.ino`, turn the pot and wave your hand. Then switch off the room light and watch the false `OBJECT?`.
Interactive · Image pixel explorer · Educational
Hover the synthetic camera image. Robots see numbers, not “red block” — until algorithms assign meaning.
u
—
v
—
R
—
G
—
B
—
Browser canvas educational sim — not OpenCV.js / not a live camera pipeline.
Body sense keeps the arm accurate; world sense keeps it useful. A camera fixes moved and missing objects, but simple vision is easily fooled by light — so the vision node must be able to say “not sure”.
Knowledge check
Check your understanding
Knowledge check
1. Vision mainly gives a robot…
2. Encoders and potentiometers on the joints tell the robot…
3. The block is moved 4 cm and the gripper can absorb 1.5 cm of error. The blind arm…
4. A 640 × 480 colour image in OpenCV has shape…
5. A pure red pixel read with OpenCV prints as…
6. The lights dim and the seeing arm finds no red pixels. The best behaviour is…
7. Where should servo power come from when you add motors to the vision bench?
Mini assignment
Hands-on assignment
Mini assignment
Your arm’s “eyes” plan
Decide what your desk arm needs to see, and prove with numbers why a blind arm is not enough.
Deliverables
- A table of three tasks for your arm (for example: pick a block, sort by colour, stop when a hand comes near) with the sensor you would use for each — camera, depth camera, light sensor or switch — and why.
- Output of `blind_vs_seeing_arm.py` with one new case of your own (a different block position or light level).
- `first_look.py` readings (B, G, R and brightness) for three objects under two different lights.
- Optional (bench): a short note or video of `body_and_world.ino` showing body sense and world sense separately.
Do this, step by step
- Run
python3 blind_vs_seeing_arm.pyand copy the SUMMARY of both arms into your notebook. - Add one case of your own (move the block or change the light) and run again; note which arm fails.
- Make a three-row table: task, sensor (camera, depth camera, light sensor or switch) and one reason.
- Run
first_look.pyand write the centre B, G, R of three objects under the room light, then under a desk lamp. - Optional bench: run
body_and_world.inoand write one line on what the pot (body sense) and the photocell (world sense) each tell you.
Stuck? Hints, one at a time
- The blind arm goes to
REMEMBERED; if the block is farther away thanGRIP_TOL_CM, it misses. - OpenCV prints colours as B, G, R — a red object has a big last number.
- A pick task needs position, so a camera; “a hand is near” can be a simple light or distance sensor.
Challenges (pick by level)
- 🟢 Beginner: Fix the half-pixel error: use
(us.mean() + 0.5) * CM_PER_PX. What error do you get now? - 🟡 Intermediate: Add a second, blue block and make the seeing arm pick the one closest to the arm’s base at (0, 24) cm.
- 🟠 Advanced: Make Case 5 work: instead of a fixed
R > 150, call it red when R is much larger than G and B (for example R > 1.8 × G and R > 1.8 × B). Test light = 0.4 and 1.2. - 🔴 Expert: In
first_look.py, find the red pixels in each camera frame with NumPy and draw a circle at their centre. Print the centre in pixels 5 times a second. - ⚫ Research: Read about event cameras or thermal cameras and write half a page on which robot jobs they handle better than a normal camera, with sources.
Next step
You know why a robot needs vision. In Lesson 2 — How Cameras See the World you will learn how a camera turns light from a 3D table into a 2D grid of pixels: lens, sensor, exposure, field of view and the pinhole model.
Sources
- OpenCV 4.x — Getting Started with Videos (Python) —
VideoCapture(0),isOpened(),read()returning(ret, frame),CAP_PROP_FRAME_WIDTH/HEIGHT,waitKey,release(). - OpenCV 4.x — Image file reading and writing (imgcodecs) — colour images are stored in B G R order;
imreadreturns an empty result if a file cannot be read. - Adafruit — Using a Photocell — voltage divider with a pull-down resistor, 10 kΩ vs 1 kΩ trade-off, reading rises with light.
- Arduino Servo library — servos draw considerable power; for more than one or two, use a separate supply (not the Arduino 5 V pin) and connect the grounds.
- Wikipedia — Proprioception — the sense of self-movement, force and body position.
- Wikipedia — Machine vision — imaging-based automatic inspection, process control and robot guidance.
- PotatoPro — DOWNS introduces CropVision, an optical sorter for unwashed potatoes (2021) — industrial cameras + AI, 360° view of each potato, clods/stones/cut/spoiled detection, three exits.
- Photos: Wikimedia Commons (credits under each image).
Look back: Stage 10 L16: Capstone — Build a ROS 2 6DOF Robot System. Next: Lesson 2: How Cameras See the World. Related: Stage 10 — ROS 2, Stage 4 — Electronics.
Self-attested for now — keep artifacts in your lab notebook.
Complete
Today's goal
0 of 1 done today
Mark this lesson complete when you have worked the experiment, knowledge check, and assignment (even roughly).