
Robot Perception, Planning & Manipulation · Lesson 01
From Perception to Robot Action
Est. 60–75 min
Why
Why this lesson matters
Up to now you have built pieces separately: kinematics and IK (Stage 8), trajectories and control (Stages 7–9), ROS 2 (Stage 10), vision (Stage 11) and simulation (Stage 12). Stage 13 joins them. A robot that manipulates things must sense the world, interpret what it sees, keep a model of the world, plan what to do, and then act — and then check again.
In this lesson you will make one full trip from camera pixel to gripper, in plain Python, and then break each step on purpose to see what goes wrong. On the bench, an Arduino UNO runs the same loop with an ultrasonic sensor and a servo pointer.
Concept
Sense → interpret → model → plan → act
1. Three ways to connect sensing and acting
Robotics books describe a robot by how Sense, Plan and Act are connected. In the hierarchical (deliberative) paradigm the robot senses, updates one internal model of the world, plans the next action from that model, and acts — every step. In the reactive paradigm, sensing is connected straight to action (“sense–act”) through small behaviours, with no central plan. The hybrid paradigm plans first (break the task into sub-tasks) and then runs reactive behaviours to carry them out.
| Paradigm | Loop | Good at | Weak at | Desk-arm example |
|---|---|---|---|---|
| Hierarchical | Sense → Plan → Act | Careful, multi-step tasks | Slow if the world changes | Plan a full pick-and-place from one photo |
| Reactive | Sense → Act | Fast reflexes | No long-term goals | Stop the moment the bump switch closes |
| Hybrid | Plan, then reactive behaviours | Both | More complex to build | Plan the pick, but re-look and stop on contact while moving |
2. The five steps for a robot arm
- Sense: get raw data — a camera image, a depth image, an ultrasonic echo, joint encoders.
- Interpret: turn raw data into facts — “a red block, centred at pixel (67, 68)”.
- Model: put the facts into the robot’s world model, in the robot’s own frame, with a time stamp and how sure we are — “block at x = 22.0 cm, y = 4.9 cm in
base_link, seen 0.1 s ago”. - Plan: decide what to do — is it reachable? which waypoints? which IK solution? is the path clear?
- Act: send the trajectory to the controllers, and watch (sense again) while moving.
3. From pixel to point: the pinhole camera
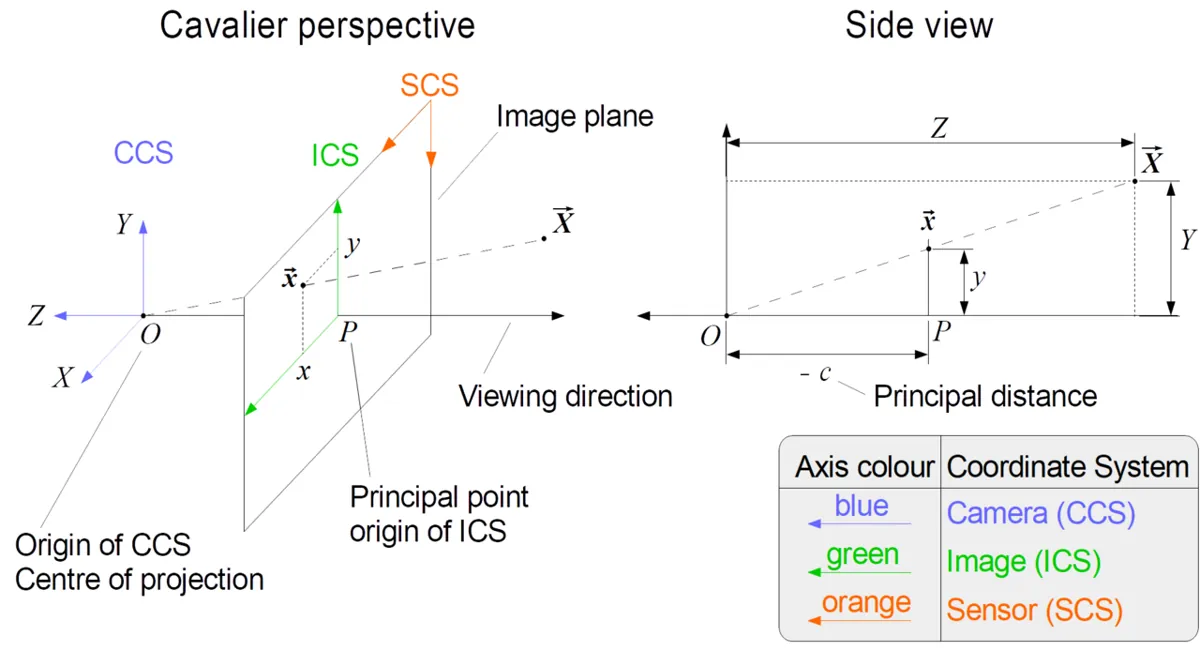
A camera does not give you a position on the table. It gives you a pixel (u, v). OpenCV’s calibration documentation uses the pinhole camera model: a point (X, Y, Z) in the camera frame lands at pixel u = fx·X/Z + cx, v = fy·Y/Z + cy. Here fx, fy are the focal lengths in pixels and (cx, cy) is the principal point, near the image centre. All points along one ray land on the same pixel — so one pixel alone does not tell you the depth Z. You must get Z from somewhere: a depth camera, a known table height, or a second camera.
If you know Z, go backwards: X = (u − cx)·Z / fx, Y = (v − cy)·Z / fy. That is a point in the camera frame. The arm needs it in its base frame, so you apply the camera-to-base transform (rotation + translation) — exactly the frame chains you met in Stage 12 Lesson 5.
4. Open loop vs closed loop
The simplest pipeline looks once, plans, and moves (“look-then-move”). It is fine if nothing changes. But if the object moves, or the camera was bumped, the arm goes confidently to the wrong place. Visual servoing (vision-based robot control) uses camera feedback during the motion. The literature names eye-in-hand (camera on the gripper) and eye-to-hand (camera fixed in the world), and splits control into image-based (IBVS) and position-based (PBVS). In this stage we use a middle path: plan from a snapshot, then re-look at the pre-grasp pose before closing the gripper.
Visual
Visualise it: the robot’s world model
The robot never acts on the real world directly — it acts on its world model. Toggle layers and add perception noise to see the model drift from the truth. (Educational explorer, not an industrial perception stack.)
Interactive · World model explorer · Educational


Mesh/primitive shapes of table, walls, and arm links — a teaching stand-in for CAD/URDF visuals.
World honesty score (toy)
85
Educational browser world model — not MoveIt planning scene / not Gazebo / not industrial map stack.
Code lab
Code lab: one full trip from pixel to gripper
perception_to_action.py draws a fake overhead camera image (160 × 120 pixels, fx = fy = 150, camera 60 cm above the base plane — example values) with a 4 cm red block on the desk. It finds the red pixels, takes their centroid, back-projects the pixel with the pinhole model, transforms it to the arm’s base frame, checks reach (35 cm example), plans pre-grasp → grasp → lift, and checks whether the jaws (1 cm tolerance, example) would land around the block. Then it breaks each step. Run python3 perception_to_action.py — no libraries needed.
"""perception_to_action.py — Stage 13 L01 (AIHUB STATION lab)

One full trip: SENSE -> INTERPRET -> MODEL -> PLAN -> ACT, in plain Python.
A fake overhead camera "photographs" a red block on the desk, we find the
block's pixels, turn the pixel into a 3D point with the pinhole model,
move it into the arm's base frame, check reach, plan waypoints, and
"execute" them.  Then we break each step on purpose to see what goes wrong.

All numbers (camera, arm, block) are EXAMPLE values for a desk setup.
Pinhole model: u = fx*X/Z + cx, v = fy*Y/Z + cy (OpenCV calib3d docs).
No libraries needed. Run:  python3 perception_to_action.py
"""
import math, random

# ---------- example camera (small image so it runs fast) ----------
W, H = 160, 120                    # image size in pixels
FX = FY = 150.0                    # focal length in pixels (example)
CX, CY = 80.0, 60.0                # principal point (image centre)
CAM_IN_BASE = (0.25, 0.0, 0.60)    # camera 60 cm above the base plane, 25 cm in front
# Camera looks straight down.  Optical frame: x right, y down (in image), z forward.
# In the base frame (x forward, y left, z up):  x_cam = -y_base, y_cam = -x_base, z_cam = -z_base
def cam_to_base(p, tilt_deg=0.0):
    xc, yc, zc = p
    if tilt_deg:                    # unknown mounting tilt about the camera x axis
        t = math.radians(tilt_deg)
        yc, zc = yc*math.cos(t) - zc*math.sin(t), yc*math.sin(t) + zc*math.cos(t)
    bx, by, bz = CAM_IN_BASE
    return (bx - yc, by - xc, bz - zc)

def base_to_cam(p):
    bx, by, bz = CAM_IN_BASE
    x, y, z = p
    return (-(y - by), -(x - bx), -(z - bz))

def project(p_cam):
    x, y, z = p_cam
    return (FX*x/z + CX, FY*y/z + CY)

# ---------- SENSE: render a fake image of a 4 cm red block ----------
BLOCK = 0.04       # block side (m)
BLOCK_TOP = 0.03   # top face height above the base plane (m)
def render(block_xy, noise=0):
    img = [[(200, 190, 170)] * W for _ in range(H)]          # beige desk
    cx_, cy_ = block_xy
    for v in range(H):
        for u in range(W):
            # ray through pixel centre hits the plane z = BLOCK_TOP
            zc = CAM_IN_BASE[2] - BLOCK_TOP
            xc = (u + 0.5 - CX) * zc / FX
            yc = (v + 0.5 - CY) * zc / FY
            bx, by, _ = cam_to_base((xc, yc, zc))
            if abs(bx - cx_) <= BLOCK/2 and abs(by - cy_) <= BLOCK/2:
                img[v][u] = (210, 30, 30)                       # red block
    if noise:                                                   # flickering pixels
        for _ in range(noise):
            u, v = random.randrange(W), random.randrange(H)
            img[v][u] = (210, 30, 30)
    return img

# ---------- INTERPRET: colour threshold + centroid ----------
def find_red(img, min_pixels=30):
    su = sv = n = 0
    for v, row in enumerate(img):
        for u, (r, g, b) in enumerate(row):
            if r > 150 and g < 80 and b < 80:
                su += u + 0.5; sv += v + 0.5; n += 1
    if n < min_pixels:
        return None
    return (su/n, sv/n, n)

def pixel_to_base(u, v, depth_z, tilt_deg=0.0):
    xc = (u - CX) * depth_z / FX
    yc = (v - CY) * depth_z / FY
    return cam_to_base((xc, yc, depth_z), tilt_deg)

# ---------- PLAN: reach check + waypoints ----------
REACH = 0.35       # example desk-arm reach from the shoulder axis (m)
GRIP_TOL = 0.010   # example: jaws open 1 cm wider than the block on each side
def plan(target):
    x, y, z = target
    r = math.hypot(x, y)
    if r > REACH:
        return None, f"REFUSE: target {r*100:.1f} cm away, reach is {REACH*100:.0f} cm"
    yaw = math.degrees(math.atan2(y, x))
    wps = [("pre-grasp", (x, y, z + 0.08)), ("grasp", (x, y, z - 0.01)), ("lift", (x, y, z + 0.10))]
    return wps, f"OK: base yaw {yaw:+.1f} deg, radius {r*100:.1f} cm"

# ---------- ACT: did the jaws land around the block? ----------
def act(wps, true_xy):
    gx, gy, _ = dict(wps)["grasp"]
    err = math.hypot(gx - true_xy[0], gy - true_xy[1])
    return err, ("GRASPED" if err <= GRIP_TOL else "MISSED")

def mm(a): return f"{a*1000:.1f} mm"

def full_trip(title, true_xy, depth=None, tilt=0.0, ignore_frames=False, noise=0, moved_to=None, relook=False):
    print(f"\n--- {title} ---")
    img = render(true_xy, noise)
    det = find_red(img)
    if det is None:
        print("SENSE/INTERPRET: no red block found -> robot waits, does not move"); return
    u, v, n = det
    zc = depth if depth is not None else CAM_IN_BASE[2] - BLOCK_TOP
    if ignore_frames:
        xc = (u - CX) * zc / FX; yc = (v - CY) * zc / FY
        target = (xc, yc, BLOCK_TOP)                 # camera numbers used as if base numbers
    else:
        target = pixel_to_base(u, v, zc, tilt)
        target = (target[0], target[1], BLOCK_TOP)
    print(f"INTERPRET: {n} red pixels, centroid u={u:.1f} v={v:.1f} -> base x={target[0]*100:.1f} cm y={target[1]*100:.1f} cm")
    print(f"MODEL: error vs truth {mm(math.hypot(target[0]-true_xy[0], target[1]-true_xy[1]))}")
    wps, msg = plan(target)
    print("PLAN:", msg)
    if wps is None: return
    actual = true_xy
    if moved_to is not None:
        actual = moved_to
        print(f"(while the arm was moving, someone nudged the block to x={moved_to[0]*100:.1f} y={moved_to[1]*100:.1f} cm)")
        if relook:
            det2 = find_red(render(moved_to))
            t2 = pixel_to_base(det2[0], det2[1], zc)
            wps, msg = plan((t2[0], t2[1], BLOCK_TOP))
            print("RE-LOOK at pre-grasp:", msg)
    err, res = act(wps, actual)
    print(f"ACT: jaws off by {mm(err)} -> {res}")

if __name__ == "__main__":
    random.seed(7)
    print("Camera example: %dx%d px, fx=fy=%.0f px, 60 cm above base plane" % (W, H, FX))
    zc = CAM_IN_BASE[2] - BLOCK_TOP
    print("One pixel on the block top covers about %.1f mm" % (zc / FX * 1000))
    truth = (0.22, 0.05)
    print("Truth: block centre at x=22.0 cm y=5.0 cm (base frame), top 3 cm above base plane")
    print("Check: truth projects to pixel u=%.1f v=%.1f" % project(base_to_cam((0.22, 0.05, BLOCK_TOP))))
    full_trip("1. Nominal trip", truth)
    full_trip("2. Forgot the frame change (used camera numbers as base numbers)", truth, ignore_frames=True)
    full_trip("3. Wrong depth: assumed the desk (60 cm) instead of block top (57 cm)", truth, depth=0.60)
    full_trip("4. Camera bumped: real mount tilted 2 deg, model still says 0", truth, tilt=2.0)
    full_trip("5. Block out of reach", (0.42, 0.20))
    full_trip("6. Look once, then move (open loop) - block nudged 3 cm", truth, moved_to=(0.25, 0.05))
    full_trip("7. Re-look before grasping (closed the loop)", truth, moved_to=(0.25, 0.05), relook=True)
    full_trip("8. Flickering red pixels (40 noise pixels)", truth, noise=40)
    print("\n--- 9. Nothing on the desk ---")
    print("SENSE/INTERPRET:", "found" if find_red(render((5.0, 5.0))) else "no red block found -> robot waits, does not move")
Output (run with python3 perception_to_action.py)
Camera example: 160x120 px, fx=fy=150 px, 60 cm above base plane
One pixel on the block top covers about 3.8 mm
Truth: block centre at x=22.0 cm y=5.0 cm (base frame), top 3 cm above base plane
Check: truth projects to pixel u=66.8 v=67.9

--- 1. Nominal trip ---
INTERPRET: 100 red pixels, centroid u=67.0 v=68.0 -> base x=22.0 cm y=4.9 cm
MODEL: error vs truth 0.7 mm
PLAN: OK: base yaw +12.7 deg, radius 22.5 cm
ACT: jaws off by 0.7 mm -> GRASPED

--- 2. Forgot the frame change (used camera numbers as base numbers) ---
INTERPRET: 100 red pixels, centroid u=67.0 v=68.0 -> base x=-4.9 cm y=3.0 cm
MODEL: error vs truth 270.1 mm
PLAN: OK: base yaw +148.4 deg, radius 5.8 cm
ACT: jaws off by 270.1 mm -> MISSED

--- 3. Wrong depth: assumed the desk (60 cm) instead of block top (57 cm) ---
INTERPRET: 100 red pixels, centroid u=67.0 v=68.0 -> base x=21.8 cm y=5.2 cm
MODEL: error vs truth 2.8 mm
PLAN: OK: base yaw +13.4 deg, radius 22.4 cm
ACT: jaws off by 2.8 mm -> GRASPED

--- 4. Camera bumped: real mount tilted 2 deg, model still says 0 ---
INTERPRET: 100 red pixels, centroid u=67.0 v=68.0 -> base x=24.0 cm y=4.9 cm
MODEL: error vs truth 19.5 mm
PLAN: OK: base yaw +11.7 deg, radius 24.5 cm
ACT: jaws off by 19.5 mm -> MISSED

--- 5. Block out of reach ---
INTERPRET: 121 red pixels, centroid u=27.5 v=15.5 -> base x=41.9 cm y=19.9 cm
MODEL: error vs truth 1.0 mm
PLAN: REFUSE: target 46.4 cm away, reach is 35 cm

--- 6. Look once, then move (open loop) - block nudged 3 cm ---
INTERPRET: 100 red pixels, centroid u=67.0 v=68.0 -> base x=22.0 cm y=4.9 cm
MODEL: error vs truth 0.7 mm
PLAN: OK: base yaw +12.7 deg, radius 22.5 cm
(while the arm was moving, someone nudged the block to x=25.0 y=5.0 cm)
ACT: jaws off by 30.4 mm -> MISSED

--- 7. Re-look before grasping (closed the loop) ---
INTERPRET: 100 red pixels, centroid u=67.0 v=68.0 -> base x=22.0 cm y=4.9 cm
MODEL: error vs truth 0.7 mm
PLAN: OK: base yaw +12.7 deg, radius 22.5 cm
(while the arm was moving, someone nudged the block to x=25.0 y=5.0 cm)
RE-LOOK at pre-grasp: OK: base yaw +11.2 deg, radius 25.5 cm
ACT: jaws off by 0.6 mm -> GRASPED

--- 8. Flickering red pixels (40 noise pixels) ---
INTERPRET: 140 red pixels, centroid u=73.0 v=62.6 -> base x=24.0 cm y=2.7 cm
MODEL: error vs truth 30.7 mm
PLAN: OK: base yaw +6.4 deg, radius 24.2 cm
ACT: jaws off by 30.7 mm -> MISSED

--- 9. Nothing on the desk ---
SENSE/INTERPRET: no red block found -> robot waits, does not move
Try it: switch world-model layers on and off and raise perception noise. Watch how the model the planner sees drifts from the true scene. (Educational explorer, not an industrial perception stack.)
Interactive · World model explorer · Educational
Mesh/primitive shapes of table, walls, and arm links — a teaching stand-in for CAD/URDF visuals.
World honesty score (toy)
85
Educational browser world model — not MoveIt planning scene / not Gazebo / not industrial map stack.
Bench build: a sense–plan–act loop on the UNO
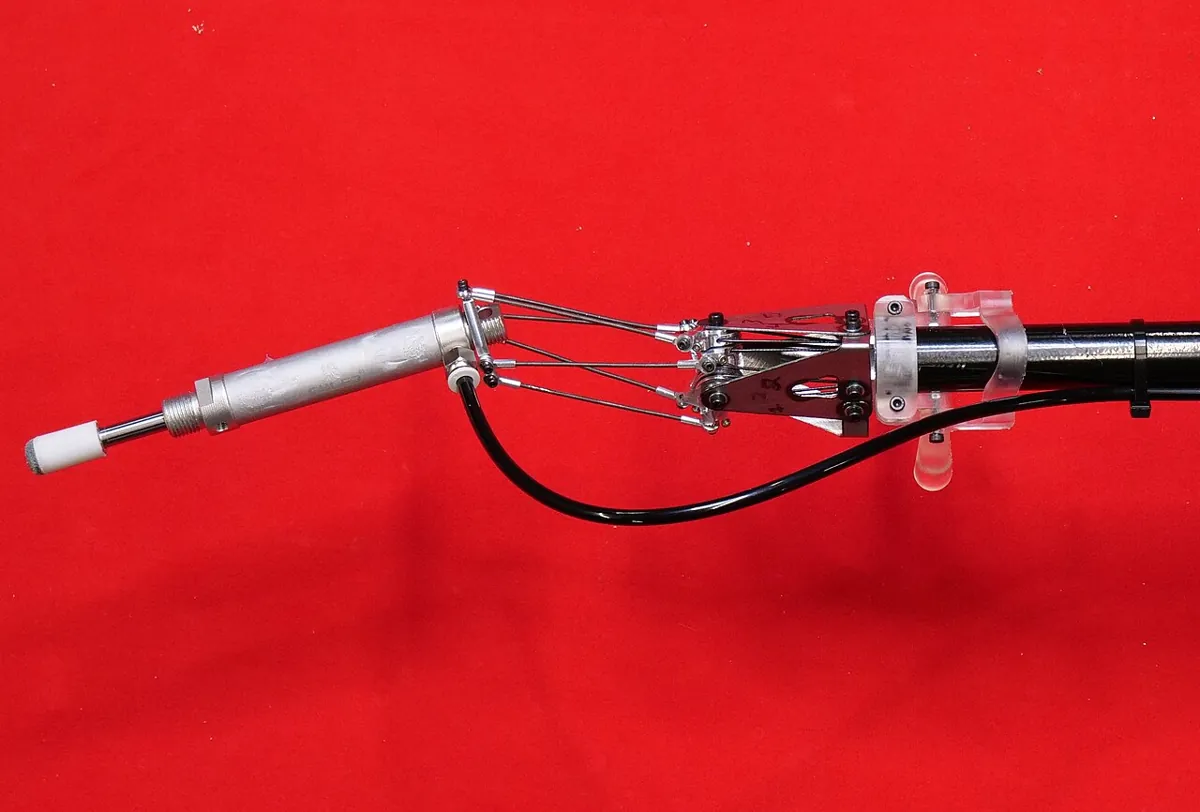
sense_plan_act.ino is the same loop, small enough for an UNO. Sense: an HC-SR04 ultrasonic sensor measures distance. The SparkFun-hosted HC-SR04 datasheet gives 2 cm – 4 m range, a 10 µs trigger pulse and a 15° measuring angle. Model: take the median of 5 readings, and only trust an object seen 3 times in a row. Plan: objects 5–25 cm away are “in reach”; map the distance to a pointer angle (30°–150°). Anything else → park at 90°. Act: move a servo pointer at most 60°/s, re-planning every loop.
| Part | Connection | Note |
|---|---|---|
| HC-SR04 | VCC → 5V, GND → GND, TRIG → D7, ECHO → D8 | datasheet: 5 V, about 15 mA |
| Servo (SG90-class) | signal → D9 | power from a separate 5–6 V supply, not the UNO |
| Servo supply | red → +5–6 V, brown → supply GND | supply GND joined to UNO GND |
| Green LED + 220 Ω | D5 → resistor → LED → GND | target trusted, acting |
| Red LED + 220 Ω | D6 → resistor → LED → GND | no target / out of reach |
// sense_plan_act.ino — Stage 13 L01 (AIHUB STATION lab)
// A tiny SENSE -> MODEL -> PLAN -> ACT loop on an Arduino UNO.
// SENSE : HC-SR04 measures how far an object is (2 cm - 4 m per datasheet).
// MODEL : median of 5 readings, and the object must be seen 3 times in a row.
// PLAN  : only objects 5-25 cm away are "in reach"; map distance to a pointer angle.
// ACT   : move a servo pointer there slowly (max 60 deg/s), re-checking every 50 ms.
//
// Wiring (signals only from the UNO):
//   HC-SR04 VCC -> 5V, GND -> GND, TRIG -> D7, ECHO -> D8
//   Servo signal -> D9.  Servo red/brown -> SEPARATE 5-6 V supply; supply GND to UNO GND.
//   Green LED: D5 -> 220 ohm -> LED -> GND  (acting on a target)
//   Red LED:   D6 -> 220 ohm -> LED -> GND  (no target / out of reach)
// Never power the servo from a GPIO pin or the UNO 5V pin.
#include <Servo.h>

const byte TRIG = 7, ECHO = 8, SERVO_PIN = 9, LED_OK = 5, LED_NO = 6;
const float NEAR_CM = 5.0, FAR_CM = 25.0;      // example "reach" of our pointer arm
const float MAX_DEG_PER_S = 60.0;              // speed limit for the pointer
const byte CONFIRM = 3;                        // see it 3 times before trusting it

Servo pointer;
float angleNow = 90.0;                         // where the pointer is (deg)
byte seenCount = 0;
unsigned long lastStep = 0;

float readCm() {                               // one HC-SR04 reading, -1 if no echo
  digitalWrite(TRIG, LOW);  delayMicroseconds(2);
  digitalWrite(TRIG, HIGH); delayMicroseconds(10);   // at least 10 us trigger
  digitalWrite(TRIG, LOW);
  unsigned long us = pulseIn(ECHO, HIGH, 30000UL);   // ~5 m round trip max
  if (us == 0) return -1;
  return us * 0.0343 / 2.0;                    // speed of sound ~343 m/s, there and back
}

float medianOf5() {
  float r[5];
  for (byte i = 0; i < 5; i++) { r[i] = readCm(); delay(12); }
  for (byte i = 0; i < 5; i++)                 // tiny sort
    for (byte j = i + 1; j < 5; j++)
      if (r[j] < r[i]) { float t = r[i]; r[i] = r[j]; r[j] = t; }
  return r[2];
}

void setup() {
  Serial.begin(115200);
  pinMode(TRIG, OUTPUT); pinMode(ECHO, INPUT);
  pinMode(LED_OK, OUTPUT); pinMode(LED_NO, OUTPUT);
  pointer.attach(SERVO_PIN);
  pointer.write((int)angleNow);
  Serial.println(F("sense_plan_act: SENSE -> MODEL -> PLAN -> ACT every 50 ms"));
}

void loop() {
  if (millis() - lastStep < 50) return;        // at most 20 Hz (5 echoes can take longer)
  float dt = (millis() - lastStep) / 1000.0;
  if (dt > 0.2) dt = 0.2;                      // first loop / slow echo: cap the step
  lastStep = millis();

  // SENSE + MODEL
  float d = medianOf5();
  bool inReach = (d >= NEAR_CM && d <= FAR_CM);
  seenCount = inReach ? min(seenCount + 1, 255) : 0;
  bool trusted = seenCount >= CONFIRM;

  // PLAN
  float goal = 90.0;                           // park position when nothing trusted
  if (trusted) goal = 30.0 + (d - NEAR_CM) * (120.0 / (FAR_CM - NEAR_CM));

  // ACT (rate limited, re-planned every loop = closed loop)
  float maxStep = MAX_DEG_PER_S * dt;
  float err = goal - angleNow;
  if (err >  maxStep) err =  maxStep;
  if (err < -maxStep) err = -maxStep;
  angleNow += err;
  pointer.write((int)(angleNow + 0.5));

  digitalWrite(LED_OK, trusted);
  digitalWrite(LED_NO, !trusted);

  Serial.print(F("d=")); Serial.print(d, 1);
  Serial.print(F("cm seen=")); Serial.print(seenCount);
  Serial.print(trusted ? F(" PLAN goal=") : F(" WAIT park=")); Serial.print(goal, 0);
  Serial.print(F(" angle=")); Serial.println(angleNow, 0);
}sense_plan_act: SENSE -> MODEL -> PLAN -> ACT every 50 ms
d=-1.0cm seen=0 WAIT park=90 angle=90
d=14.8cm seen=1 WAIT park=90 angle=90
d=14.9cm seen=2 WAIT park=90 angle=90
d=14.8cm seen=3 PLAN goal=89 angle=89
d=14.9cm seen=4 PLAN goal=89 angle=89
d=32.0cm seen=0 WAIT park=90 angle=90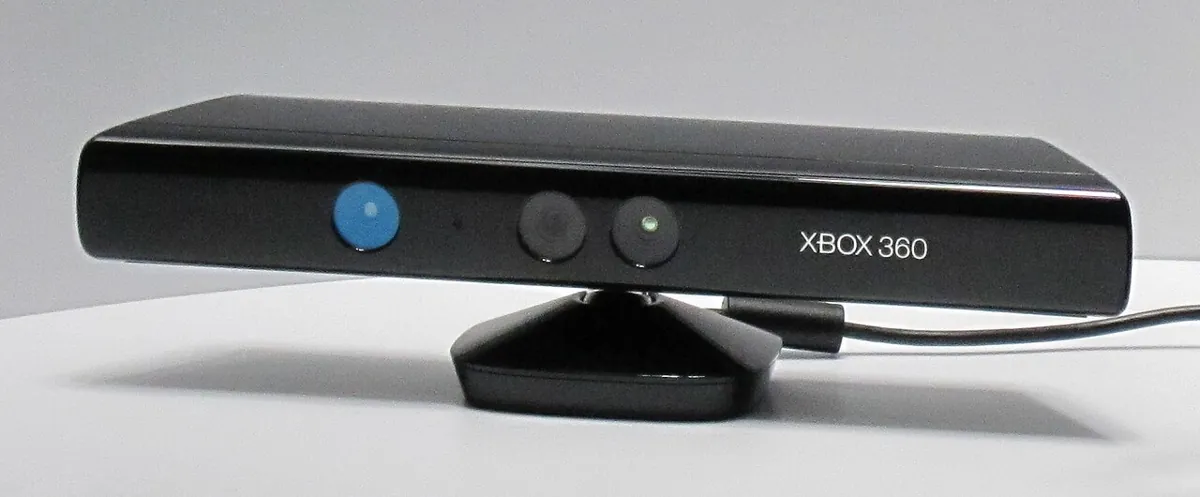
Debugging
| Symptom | Likely cause | Fix |
|---|---|---|
| Arm goes to a mirror-image or rotated spot | camera-frame numbers used as base-frame numbers, or a wrong axis sign | Write the frame next to every number; check one point by hand |
| Error grows towards the image edges | wrong depth, or lens distortion not removed | Use the real object height or a depth camera; undistort with calibration |
| Everything off by the same few cm after someone touched the stand | camera extrinsics changed | Re-run the camera-to-base calibration |
| Arm jumps between two places | flickering detections | Largest blob only; require N agreeing frames; filter |
| Arm reaches, but object has moved | look-once (open loop) | Re-look at pre-grasp; check during the move |
| Bench: distance shows -1.0 | no echo (too far, soft surface, wiring) | Check TRIG/ECHO pins; use a hard flat target 5–25 cm away |
| Bench: UNO resets when the servo moves | servo powered from the UNO | Separate servo supply with common ground |
Real world
Perception-to-action in the real world
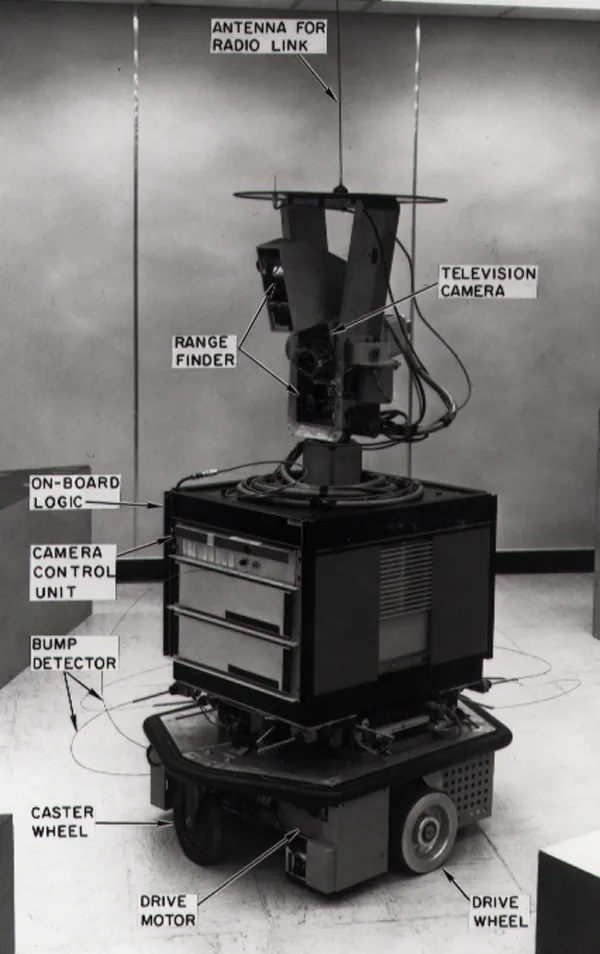
- Research history: Shakey at SRI combined computer vision, planning and action, and produced the A* search algorithm and the Hough transform — tools you will still use in this stage.
- Warehouses and factories: a camera finds parts in a tray, software turns pixels into poses in the robot’s frame, a planner chooses a grasp and path, and safety systems stop motion if something unexpected enters the cell.
- Games and entertainment: depth cameras like the Kinect turned pixels into body positions so games could react to players.
- Your lab: the 6DOF desk arm with an overhead or wrist camera: detect → back-project → transform to
base_link→ reach check → plan → re-look → grasp.
Think
Think about it
Think
Your detector is 99% accurate, but the arm still misses about one pick in ten. List at least four places between “detection” and “gripper closed” where the error could come from, and how you would test each one.
Experiment
Try it in the lab
About 60 minutes. Python 3 for the script; Arduino UNO, HC-SR04, a small servo with its own 5–6 V supply, two LEDs and two 220 Ω resistors for the bench.
Experiment
Follow one pixel all the way to the gripper
You will need
- `perception_to_action.py` (Python 3, no libraries)
- World-model explorer (in your browser)
- Arduino UNO, HC-SR04, SG90-class servo + separate 5–6 V supply, green and red LEDs, two 220 Ω resistors, jumper wires
Steps
- Run `perception_to_action.py`. Check the “Check” line by hand with the pinhole formula.
- Move the block to (0.30, −0.10). Is it in reach? What is the error in the nominal case?
- In case 4, try tilts of 0.5°, 1° and 5°. At what tilt does the grasp start to miss?
- In case 3, make the block 10 cm tall (BLOCK_TOP = 0.10) and keep the wrong depth. How big is the error now?
- Add a function that keeps only the largest connected group of red pixels and re-run case 8.
- Bench: test the pointer with your hand at 10, 15, 20 and 30 cm. Note when it acts and when it parks.
- Bench: set MAX_DEG_PER_S to 300. What changes, and why is a speed limit useful near people?
Interactive · World model explorer · Educational
Mesh/primitive shapes of table, walls, and arm links — a teaching stand-in for CAD/URDF visuals.
World honesty score (toy)
85
Educational browser world model — not MoveIt planning scene / not Gazebo / not industrial map stack.
Perception is only the first link. Most misses come from frames, depth, calibration, timing or acting on noise — not from the detector.
Knowledge check
Check your understanding
Knowledge check
1. In the hierarchical (deliberative) paradigm the robot…
2. Why can one camera pixel not give you the 3D position by itself?
3. In the pinhole model u = fx·X/Z + cx, what is cx?
4. In the script, forgetting the camera-to-base transform gave an error of about…
5. The block was nudged 3 cm during the move. What fixed the miss?
6. The detector finds nothing on the desk. The correct action is…
7. Why does the bench sketch need 3 readings in a row before acting?
8. How should the servo be powered?
Mini assignment
Hands-on assignment
Mini assignment
A perception-to-action report for your desk arm
Draw and test the full chain from camera pixel to gripper for your own desk arm setup.
Deliverables
- A diagram of your chain: sensor → detector → back-projection → frame transform → world model → reach check → planner → controller, with the frame name on every arrow.
- Your camera numbers (fx, fy, cx, cy, height above the table) — from a real calibration if you have one, or clearly marked as example values.
- A table of five deliberate mistakes (from the script or your own setup) with the measured error in mm.
- A bench log from `sense_plan_act.ino` showing WAIT, PLAN and a refusal for an out-of-reach object.
Do this, step by step
- Run
perception_to_action.pyonce and copy the final error line into your notes. - Put your own camera numbers into
CAM_IN_BASE(and fx, fy, cx, cy if you have them) and run it again. - Break one step at a time on purpose (wrong tilt, wrong frame, no depth) and write the error in mm for each.
- Draw your chain diagram with the frame name on every arrow.
- Bench: servo on its own 5–6 V supply, grounds joined, upload
sense_plan_act.inoand log WAIT, PLAN and one refusal outsideNEAR_CM–FAR_CM.
Stuck? Hints, one at a time
- If the error is many centimetres, check the frame first: a point in
cameraframe used as abasepoint is the most common mistake. REACHis 0.35 m in the example. If your block is farther, the script must refuse, not move.- The sketch only acts after
CONFIRM= 3 readings in a row. If it never plans, print each reading and look for jumps.
Challenges (pick by level)
- 🟢 Beginner: For three pixels of your choice, compute X and Y by hand with Z = 0.57 m and check them with the script.
- 🟡 Intermediate: Add a “largest blob only” step and a “3 frames must agree within 5 mm” rule. Show case 8 now passes.
- 🟠 Advanced: Replace the fake camera with a real webcam and OpenCV: colour-threshold a red block, find its centroid, and print its base-frame position using your measured camera height.
- 🔴 Expert: Calibrate your webcam with an OpenCV chessboard, undistort the image, and measure how much the corner error drops compared with no calibration.
- ⚫ Research: Read about eye-in-hand vs eye-to-hand visual servoing and IBVS vs PBVS. Write one page on which would suit your desk arm and why.
Next step
The planner never sees the real world — it sees the world model. In Lesson 2 — Robot World Models you will build one: objects, obstacles, time stamps and confidence, and learn how to keep it honest as things change.
Look back: Stage 12 Lesson 16: Capstone — Build & Test a Simulated 6DOF Arm. Next: Lesson 2: Robot World Models. Related: Stage 11 — Computer Vision.
Sources
- Wikipedia — Robotic paradigm — hierarchical (sense–plan–act), reactive and hybrid paradigms.
- OpenCV — Camera Calibration and 3D Reconstruction (calib3d) — pinhole model, intrinsic matrix (fx, fy, cx, cy), homogeneous transforms, distortion, hand-eye calibration.
- Wikipedia — Visual servoing — eye-in-hand vs eye-to-hand, IBVS, PBVS, look-and-move.
- Wikipedia — Shakey the robot — first mobile robot to reason about its actions; A*, Hough transform.
- HC-SR04 datasheet (SparkFun-hosted PDF) — 2 cm–4 m range, 10 µs trigger, 15 mA, 15° angle.
- Arduino Servo library (GitHub) — controlling RC hobby servos.
- Photos: Wikimedia Commons (credits under each image).
Self-attested for now — keep artifacts in your lab notebook.
Complete
Today's goal
0 of 1 done today
Mark this lesson complete when you have worked the experiment, knowledge check, and assignment (even roughly).