
Linux & Dev Environment · Lesson 14
Capstone: Build Your Robotics Workspace
Est. 60–90 min
Why
Why a ready workspace is your real Stage 3 certificate
In this capstone you will run one setup script that builds the whole workspace, prove each piece works with a self-check, and record it all in Git. It pulls together all 13 lessons of Stage 3.
Concept
The big idea: one script, one checklist, one clean repo
| Lesson | You can… | Proof command |
|---|---|---|
| 1–2 | Use the terminal confidently | pwd && ls -a ~/robot_ws |
| 3 | Keep a clean project tree | find ~/robot_ws -maxdepth 1 | sort |
| 4 | Read and fix permissions | stat -c '%A %n' scripts/bringup.sh and groups (has dialout?) |
| 5 | See and stop processes safely | pgrep -a python and a graceful-stop loop |
| 6 | Install system tools | bash check_tools.sh |
| 7 | Configure with environment variables | echo $SERIAL_PORT and read_env.py |
| 8 | Automate with bash | ./scripts/bringup.sh sim; echo $? |
| 9 | Version everything | git log --oneline | head -n 5 |
| 10 | Edit in a configured VS Code | .vscode/settings.json committed, venv interpreter selected |
| 11 | Isolate Python | python which_env.py → in venv: True |
| 12 | Understand the LAN | ip -brief addr and your network sketch |
| 13 | Reach the robot securely | ssh jetson hostname (if you have hardware) |
How it works
How it actually works: the setup script, piece by piece
Choose the folder
WS="${1:-$HOME/robot_ws}"— default~/robot_ws, or any folder you pass (Lesson 8 defaults).Build the tree
mkdir -p "$WS"/{src,config,scripts,logs}— brace expansion makes four folders in one go (Lesson 3).Never overwrite precious files
[ -f config/robot.yaml ] || …writes the config only if it does not exist yet.Scripts and permissions
Writes
scripts/bringup.shand gives it the x bit (Lesson 4).Environment and history
Creates
.venv(Lesson 11) andgit init(Lesson 9) — only if missing, so rerunning is safe.Self-check
Prints PASS / FAIL per item and runs bring-up in sim mode. A script that checks itself is a script you can trust.
Visual
Visualise it: leave a clean commit trail
Practise your capstone commit: stage the right files (not logs or .venv), write a clear message and commit. Your commit trail is your portfolio.
Interactive · Git workflow simulator
Working tree
- M robot_controller.py
- ?? camera_driver.py
- M README.md
- ?? config/robot.yaml
Staging area
- (empty)
Recent commits
- (none yet)
# git workflow simulator — working → add → commit
# no remote / network / credentials
Code lab
Code lab: build the whole workspace in one go
Save as setup_workspace.sh, chmod +x it, and try it first on a scratch folder: ./setup_workspace.sh /tmp/aihub-lab/robot_ws. When happy, run it with no argument to create ~/robot_ws.
#!/usr/bin/env bash
# setup_workspace.sh — Stage 3 capstone: build a complete robot workspace in one go
# Usage: ./setup_workspace.sh [folder]     (default: ~/robot_ws)
set -euo pipefail
WS="${1:-$HOME/robot_ws}"

mkdir -p "$WS"/{src,config,scripts,logs}
cd "$WS"
[ -f config/robot.yaml ] || printf 'robot_name: desk-arm\nserial_port: /dev/ttyUSB0\nstop_distance_cm: 20\n' > config/robot.yaml
printf '.venv/\nlogs/\n__pycache__/\n*.log\n' > .gitignore
cat > scripts/bringup.sh <<'SH'
#!/usr/bin/env bash
set -euo pipefail
cd "$(dirname "$0")/.."
echo "[bringup] mode=${1:-sim} port=${SERIAL_PORT:-/dev/ttyUSB0}"
SH
chmod +x scripts/bringup.sh
[ -d .venv ] || python3 -m venv .venv
[ -d .git ] || git init -q -b main

# --- self-check ---
for item in src config scripts logs .venv .git .gitignore; do
  if [ -e "$item" ]; then echo "PASS  $item"; else echo "FAIL  $item"; fi
done
[ -x scripts/bringup.sh ] && echo "PASS  scripts/bringup.sh is executable"
./scripts/bringup.sh sim
Output of ./setup_workspace.sh /tmp/aihub-lab/robot_ws
PASS  src
PASS  config
PASS  scripts
PASS  logs
PASS  .venv
PASS  .git
PASS  .gitignore
PASS  scripts/bringup.sh is executable
[bringup] mode=sim port=/dev/ttyUSB0
cd ~/robot_ws
git add .gitignore config scripts
git commit -m "chore: robotics workspace skeleton (Stage 3 capstone)"
git status --short # should print nothing: cleanRubric
Self-assessment rubric
| Area | Getting there | Ready for the next stage |
|---|---|---|
| Tree | Files mixed in one folder | src / config / scripts / logs, logs ignored |
| Scripts | Manual commands from memory | bringup.sh with checks, exit codes, sim mode |
| Python | System pip, unknown versions | .venv + requirements.txt, interpreter selected in VS Code |
| Git | One huge commit called “update” | Small commits with clear messages, clean git status |
| Safety | sudo for everything | dialout group, 755 scripts, 600 keys, graceful stop |
| Remote | Monitor and keyboard on the robot | SSH key login, ~/.ssh/config alias, rsync |
Real world
Where this workspace takes you next
- Stage 4 (Electronics & Embedded Systems) will talk to Arduino boards over the serial ports you can now open safely.
- Stage 6 (the 6DOF arm) goes much more smoothly when you can run scripts, open the serial port and keep calibration in Git.
- ROS 2 (Stage 10) is used from the terminal, configured with environment variables and organised in workspaces — all things you practised here.
- A clean public repo with good commits is something you can show in an internship interview.
Mistakes
Common mistakes and debugging
Hardware & safety
Hardware lab and safety notes
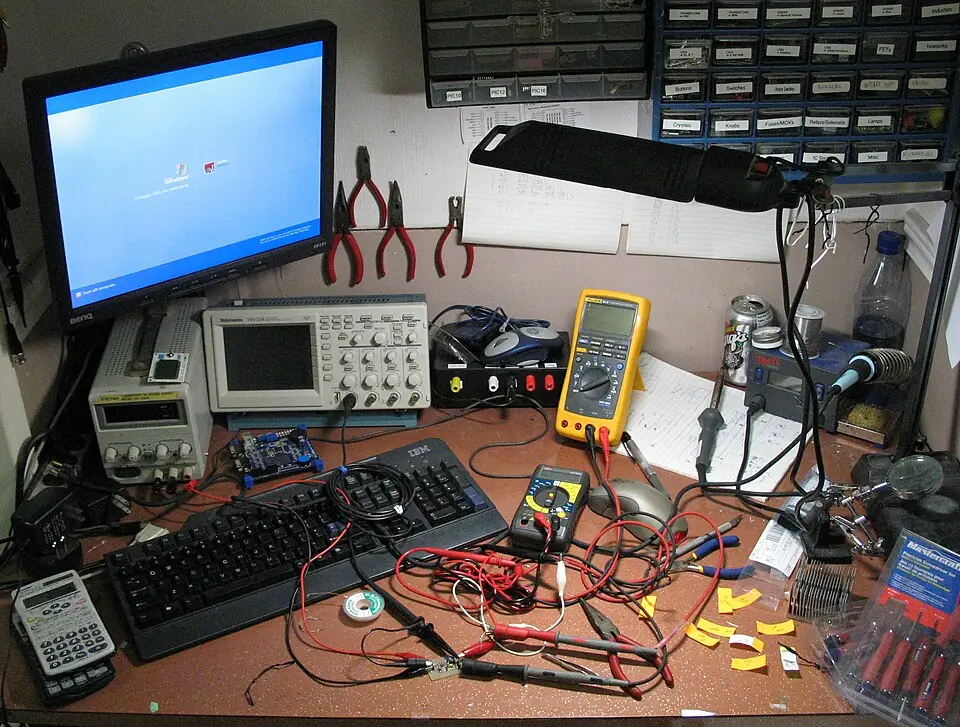
If you have a robot computer, finish the capstone by reaching it from your new workspace — SSH in, sync code, run a sim-mode check.
- Laptop:
robot_wsrepo,.venv, VS Code settings,setup_workspace.shall PASS. - Robot (optional): SSH config entry,
rsyncofsrc/,bringup.sh simrun remotely. - Arduino (optional):
hello_serial.inouploaded and read through the venv’s pyserial without sudo.
Debugging
Debugging: when it doesn’t work
| Symptom | Likely cause | Fix |
|---|---|---|
setup_workspace.sh shows FAIL | A tool is missing | Install it (Lesson 6) and re-run |
| Git push asks for a password | HTTPS remote | Use an SSH remote with your key (Lesson 13) |
| Code works on laptop, fails on robot | Different venv / missing package | Rebuild the venv from requirements.txt on the robot |
| Arduino denied on the robot | Robot user not in dialout | sudo usermod -aG dialout $USER on the robot, log out and in |
Think
Think about it
Think
Which checklist item protects people first, not just code?
Experiment
Try it in the lab: the capstone pass
Do this honestly — the checklist is for you, not for the app.
Experiment
The capstone pass
You will need
- Git workflow simulator
- Ubuntu laptop (or WSL2 / a Raspberry Pi)
- Your notes from Lessons 1–13
Steps
- In the simulator, stage only the code and config files and commit with `docs: robotics workspace checklist`.
- On a real machine, run `setup_workspace.sh /tmp/aihub-lab/robot_ws` and check every line says PASS.
- Run it again to prove it is safe to rerun.
- Create your real `~/robot_ws`, make the first commit and push it to your own remote repository.
- Go down the checklist table and run every proof command. Tick each one.
- Write a 5-line reflection: what was hardest, and what you will automate next.
Interactive · Git workflow simulator
Working tree
- M robot_controller.py
- ?? camera_driver.py
- M README.md
- ?? config/robot.yaml
Staging area
- (empty)
Recent commits
- (none yet)
# git workflow simulator — working → add → commit
# no remote / network / credentials
Every line PASS, git status clean, bring-up prints mode=sim. Then mark Stage 3 complete in the app.
Knowledge check
Check your understanding
Knowledge check
1. The Stage 3 capstone is mainly about…
2. Why should setup_workspace.sh be safe to run twice?
3. Which should NOT be committed?
4. `mkdir -p "$WS"/{src,config,scripts,logs}` creates…
5. Which stage after this one will use your serial-port permission skills first?
Mini assignment
Capstone deliverables
Mini assignment
DevBox portfolio
Submit your finished robotics workspace as a small portfolio.
Deliverables
- Link or screenshot of your `robot_ws` repository with at least 3 good commits
- Terminal output of `setup_workspace.sh` (all PASS)
- The completed checklist table with proof outputs
- Your network sketch and SSH config (if you have robot hardware)
- A 5-line reflection on Stage 3
Do this, step by step
- Run
setup_workspace.shon your own path and get every line PASS. - Push
robot_wsto a private GitHub repo with at least 3 good commits. - Fill the checklist table with proof outputs.
- Write the 5-line reflection.
Stuck? Hints, one at a time
- Hint 1: Run the script on a fresh folder like
/tmp/aihub-lab/robot_wsfirst so nothing real is overwritten. - Hint 2: A private repo is fine — share a screenshot if you cannot share the link.
- Hint 3: Reflection idea: one thing that broke, how you found it, and what you will do differently.
Challenges (pick by level)
- 🟢 Easy: Add a README with “how to rebuild this workspace in 10 minutes”.
- 🟡 Medium: Make
setup_workspace.shalso create the.venvand installrequirements.txt. - 🟠 Hard: Rebuild the whole workspace on a second machine (or Pi) from the repo alone.
Next step
Look back: Lesson 13: SSH & Remote Robotics Development. You have finished Stage 3! Next stage: Stage 4 — Electronics & Embedded Systems. Related: Stage 10 — ROS 2 and Stage 12 — Simulation & Digital Twin.
Sources
- Pro Git book
- Python docs — venv
- ROS 2 Jazzy — Creating a workspace
- ShellCheck — shell script analysis
- Photos: Wikimedia Commons (credits under each image).
Self-attested for now — keep artifacts in your lab notebook.
Complete
Today's goal
0 of 1 done today
Mark this lesson complete when you have worked the experiment, knowledge check, and assignment (even roughly).