
Linux & Dev Environment · Lesson 01
Why Linux for Robotics
Est. 30–40 min
Why
Why every robotics lab runs on Linux
In Stage 2 you wrote Python that makes decisions. Now we need a proper workshop for that code: a place to keep files neatly, install tools, run programs, watch logs and talk to the robot over USB and Wi-Fi. That workshop is a Linux machine — usually your laptop running Ubuntu, plus a small Linux computer (Raspberry Pi or Jetson) sitting on the robot itself.
By the end of this lesson you will be able to explain, in your own words, why Linux is the default robotics OS, name its main layers, and run your first “who am I, where am I” checks safely.
Concept
The big idea: kernel, shell and “everything is a file”
Linux is not one app. It is a stack of layers, a bit like a building: the foundation you never see, the lift and wiring in the middle, and the flats where people live.
| Layer | Building analogy | What it does for a robot |
|---|---|---|
| Hardware | Land, pillars, electricity meter | CPU, RAM, USB ports, camera, Wi-Fi chip |
| Kernel | Foundation + lift + wiring | Talks to hardware, shares CPU between programs, enforces permissions |
| Drivers | Electrician who knows each switchboard | Make a USB-serial adapter appear as /dev/ttyUSB0, a webcam as /dev/video0 |
| Shell (bash) | Society office window | You type a command, it asks the kernel to do the job |
| Programs | The families in the flats | Python scripts, ROS 2 nodes, Git, VS Code |
- Distribution (distro): a ready-made package of kernel + tools. Robotics mostly uses Ubuntu LTS (Long Term Support) — for example ROS 2 Humble targets Ubuntu 22.04 and ROS 2 Jazzy targets Ubuntu 24.04.
- Everything is a file: on Linux, a serial port, a camera, even random numbers appear as files under
/dev. Your Python code can open a robot’s USB port almost like opening a text file. - Shell first: the GUI is optional. Robots often have no screen at all, so you control them with typed commands, usually over SSH (Lesson 13).
- Free and open: you can read the source, install it on old laptops and small boards, and there are no per-robot licence fees.
How it works
How it actually works: what happens when you type a command
You type
At the prompt
ashish@robot-lab:~$you typelsand press Enter.The shell reads it
bash splits the line into a command name (
ls) and arguments, then looks for a program calledlsin the folders listed in$PATH(Lesson 7).The kernel starts a process
The kernel loads
/usr/bin/lsinto memory as a new process with its own ID number (Lesson 5).The program asks for files
lsasks the kernel “what is inside this folder?”. The kernel checks your permissions (Lesson 4) and answers.Output comes back
The program prints text to the terminal, exits, and the shell shows the prompt again — ready for the next command.
Visual
Visualise it: your first safe terminal
A safe practice shell in your browser: a fake robot home folder, whitelisted commands only. Type help, then pwd, ls, whoami and hostname.
Interactive · Terminal simulator
# robotics workstation simulator
# try: pwd · ls · cd workspace · cat robot_controller.py
cwd: /home/robot · simulated only
Worked example
Worked example: the same robot on Windows vs Linux
Priya plugs an Arduino-driven arm into her laptop. Watch the difference in the first ten minutes:
| Task | Typical Windows experience | Typical Ubuntu experience |
|---|---|---|
| Find the USB port | Open Device Manager, look for COM5 / COM7 | ls /dev/ttyUSB* /dev/ttyACM* → /dev/ttyACM0 |
| Install ROS 2 | Extra setup; most tutorials assume Ubuntu | Follow the official Ubuntu install guide step by step |
| Copy code to the robot | Extra tools needed | scp / rsync over SSH, built in |
| Run code with no screen | Hard | Normal: SSH in, run the script, watch logs |
Code lab
Code lab: ask the machine who it is
Open a terminal (Ubuntu: press Ctrl + Alt + T) and run these read-only commands. They change nothing; they only describe the machine.
whoami            # which user am I?
hostname          # what is this computer called?
uname -m          # CPU type: x86_64 (laptop) or aarch64 (Pi / Jetson)
cat /etc/os-release | head -n 2   # which distro and version?
Now the same idea in Python — useful later when one script must behave differently on the laptop and on the robot.
# system_check.py — "Which machine am I on?" (Lesson 1)
# Works on any Linux laptop, Raspberry Pi or Jetson. Only reads, never changes anything.
import os
import platform

print("OS kernel     :", platform.system())        # Linux
print("CPU type      :", platform.machine())       # x86_64 on a laptop, aarch64 on Pi/Jetson
print("Python        :", platform.python_version())

# On Linux, hardware shows up as files under /dev
print("/dev exists   :", os.path.isdir("/dev"))
print("Has /dev/null :", os.path.exists("/dev/null"))
Output on our test machine (your Python version and CPU may differ)
OS kernel     : Linux
CPU type      : x86_64
Python        : 3.13.5
/dev exists   : True
Has /dev/null : True
Real world
Where Linux shows up in a real robot
- ROS 2 binary packages are built for Ubuntu LTS releases.
- NVIDIA Jetson boards are flashed with JetPack, which is Ubuntu-based Linux.
- Raspberry Pi runs Raspberry Pi OS (Debian-based Linux) or Ubuntu.
- USB cameras and serial adapters appear as
/dev/video0,/dev/ttyUSB0,/dev/ttyACM0— files your code can open. - Cloud robotics and simulators (Gazebo, Isaac Sim servers) run on Linux servers.
Mistakes
Common mistakes and confusions
Hardware & safety
Hardware lab and safety notes
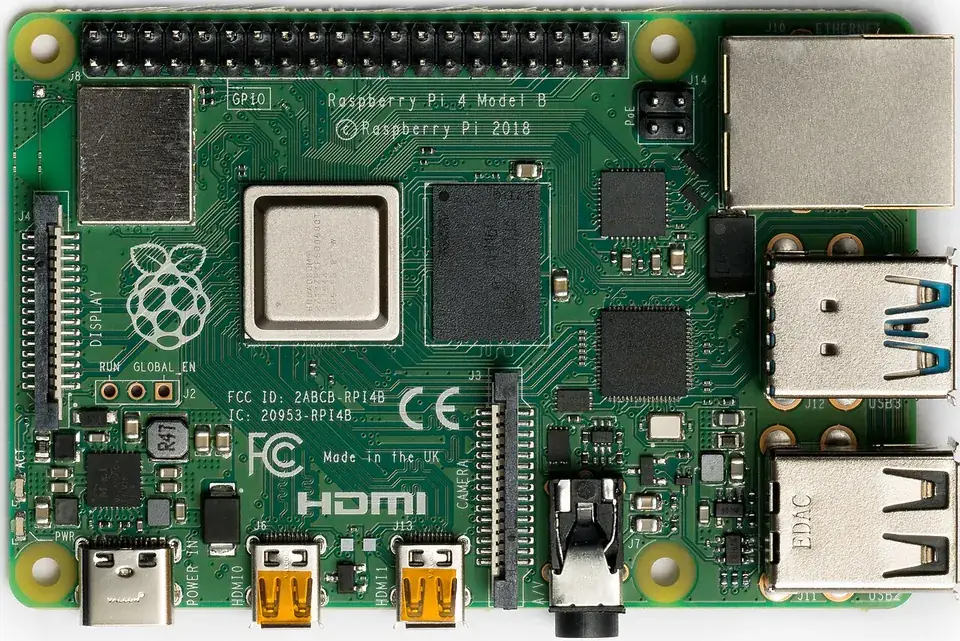
Linux lives on the laptop and on the robot computer — not on the Arduino. If you have a Raspberry Pi or an Arduino, try the read-only checks on real hardware.
- Raspberry Pi: boot it with its official power supply, open a terminal and run
uname -m— you should seeaarch64(64-bit OS) instead ofx86_64. - Arduino: plug it into the laptop and run
ls /dev/ttyACM* /dev/ttyUSB*before and after — the new “file” is the board. - Nothing in this lesson writes to hardware; every command only reads.
Debugging
Debugging: when it doesn’t work
| Symptom | Likely cause | Fix |
|---|---|---|
uname -m prints armv7l on a Pi | 32-bit Raspberry Pi OS installed | Fine for learning; use the 64-bit OS for ROS 2 and most robotics tools |
cat /etc/os-release shows a different Ubuntu than you expected | WSL or an old install | Note the version; match ROS 2 to it (Humble ↔ 22.04, Jazzy ↔ 24.04) |
ls /dev/ttyACM* says “No such file or directory” | Board not plugged in, or a charge-only USB cable | Try another cable (one that carries data) and run sudo dmesg | tail |
| Terminal will not open with Ctrl + Alt + T | Not Ubuntu, or the shortcut is changed | Open “Terminal” from the app menu |
Think
Think about it
Think
Your robot has a Jetson inside it but no monitor, keyboard or mouse. How will you start your Python program on it?
Experiment
Try it in the lab: map your robot stack
Ten minutes, notebook open. You are drawing the “building” for your own robot.
Experiment
Map your robot stack
You will need
- Terminal simulator (above)
- Notebook or a text file
- Optional: your real Ubuntu laptop
Steps
- In the terminal simulator, type `help` to see the allowed commands.
- Run `whoami`, `hostname`, `pwd` and `ls`. Write down what each one told you.
- Draw three boxes: Laptop → Robot computer → Microcontroller. Write which OS runs in each.
- Under each box, list two programs you expect to run there (e.g. VS Code, camera driver, servo firmware).
- If you have Ubuntu, run `first_look.sh` lines for real and compare with the simulator.
Interactive · Terminal simulator
# robotics workstation simulator
# try: pwd · ls · cd workspace · cat robot_controller.py
cwd: /home/robot · simulated only
The simulator answers like a real shell but only inside a fake folder tree. If a command is not allowed, it says so — nothing on your computer is touched.
Knowledge check
Check your understanding
Knowledge check
1. Robotics labs favour Linux mainly because…
2. The terminal simulator in this lesson…
3. Which journey order makes most sense?
4. Which part of Linux decides whether your program may open `/dev/ttyUSB0`?
5. An Arduino Uno on your robot runs…
Mini assignment
Hands-on assignment
Mini assignment
Linux why-card
Make a one-page “why Linux” card for your robot path, in your own words.
Deliverables
- Five bullets: why Linux for your robot
- A 3-box sketch: laptop / robot computer / microcontroller with the OS of each
- Output of `whoami`, `hostname`, `uname -m` from the simulator or a real machine
Tip: write it as if explaining to a younger cousin. If you can explain it simply, you have understood it.
Do this, step by step
- In the terminal simulator, run
whoami,hostname,pwdandlsand copy each answer into your notebook. - On a real machine (or a friend’s Ubuntu laptop / Pi), run the four lines of
first_look.shand note the CPU type. - Draw the 3-box sketch: Laptop → Robot computer → Microcontroller, with the OS under each box.
- Write five “why Linux” bullets in your own words, each linked to a real tool (ROS 2, Jetson,
/dev/ttyACM0…).
Stuck? Hints, one at a time
- Hint 1:
x86_64means a normal laptop/desktop CPU;aarch64means a 64-bit ARM board such as a Pi 4 or Jetson. - Hint 2: The microcontroller box has no Linux — write “firmware (Arduino)” there.
- Hint 3: A good bullet names a tool and a reason, e.g. “ROS 2 Jazzy ships binary packages for Ubuntu 24.04”.
Challenges (pick by level)
- 🟢 Easy: Add
uptimetofirst_look.shand explain the output in one line. - 🟡 Medium: Extend
system_check.pyto print whether/dev/ttyUSB0or/dev/ttyACM0exists. - 🟠 Hard: Run
system_check.pyon two different machines (laptop + Pi or WSL) and write a table of the differences.
Next step
Next: Lesson 2: Linux Terminal Fundamentals. Related: Stage 0 — The Robot Brain and later Stage 10 — ROS 2.
Sources
- ROS 2 Humble — Ubuntu install (Ubuntu 22.04)
- ROS 2 Jazzy — Ubuntu install (Ubuntu 24.04)
- REP 2000 — ROS 2 target platforms
- NVIDIA JetPack SDK
- Python docs — platform
- Wikipedia — Linux kernel
- Photos: Wikimedia Commons (credits under each image).
Self-attested for now — keep artifacts in your lab notebook.
Complete
Today's goal
0 of 1 done today
Mark this lesson complete when you have worked the experiment, knowledge check, and assignment (even roughly).