
Linux & Dev Environment · Lesson 10
VS Code for Robotics
Est. 35–45 min
Why
Why your editor is your workbench
Any editor works, but a well-configured one saves you from silly bugs: wrong Python, wrong folder, Windows line endings, unsaved files. This lesson sets up VS Code the way robotics teams commonly do.
Concept
The big idea: folder + interpreter + terminal + debugger in one window
| Part | How to open | Why it matters for robots |
|---|---|---|
| Open a folder, not a file | cd ~/robot_ws && code . | Paths, settings and Git all work relative to the project |
| Command Palette | Ctrl + Shift + P | Every feature by name, e.g. “Python: Select Interpreter” |
| Quick Open | Ctrl + P | Jump to bringup.sh by typing part of the name |
| Integrated terminal | Ctrl + ` (backtick) | A real bash shell, already in your project folder |
| Source Control | Ctrl + Shift + G | See changes, stage, commit (Lesson 9) |
| Run and Debug | F5 | Breakpoints in your controller loop |
| Toggle comment | Ctrl + / | Quickly disable a line while testing |
| Extension (ID) | What it gives you |
|---|---|
Python (ms-python.python) | Interpreter selection, linting hooks, run button |
Python Debugger (ms-python.debugpy) | Breakpoints and variable inspection for Python |
Remote - SSH (ms-vscode-remote.remote-ssh) | Open a folder that lives on the robot (Lesson 13) |
code.visualstudio.com/docs/setup/linux (a .deb package or sudo snap install code --classic).How it works
How it actually works: which Python does VS Code run?
Open the folder
code ~/robot_ws. VS Code looks for.vscode/settings.jsoninside it.Find interpreters
The Python extension lists every Python it can find:
/usr/bin/python3, and.venv/bin/pythonif the folder has a venv.You choose
Ctrl + Shift + P → “Python: Select Interpreter” → pick the
.venvone. The status bar shows the choice.Run / debug
The Run button and F5 now use that interpreter — the same one that has pyserial and numpy installed.
Terminal follows
New integrated terminals usually activate the selected venv automatically, so
pip installgoes to the right place.
Visual
Visualise it: the integrated terminal is a real shell
VS Code’s integrated terminal is a normal shell. Practise the same moves here: pwd to confirm you are in the project, cd into workspace/scripts, cat bringup.sh.
Interactive · Terminal simulator
# robotics workstation simulator
# try: pwd · ls · cd workspace · cat robot_controller.py
cwd: /home/robot · simulated only
Code lab
Code lab: commit your editor settings with the project
Create a .vscode folder in robot_ws with these two files. Commit them, so every teammate gets the same setup.
{
  "python.defaultInterpreterPath": "${workspaceFolder}/.venv/bin/python",
  "editor.formatOnSave": true,
  "files.trimTrailingWhitespace": true,
  "files.exclude": { "**/__pycache__": true },
  "terminal.integrated.cwd": "${workspaceFolder}"
}{
"recommendations": [
"ms-python.python",
"ms-python.debugpy",
"ms-vscode-remote.remote-ssh"
]
}When a teammate opens the folder, VS Code offers to install the recommended extensions. To debug, create a launch configuration:
{
  "version": "0.2.0",
  "configurations": [
    {
      "name": "Run robot controller",
      "type": "debugpy",
      "request": "launch",
      "program": "${workspaceFolder}/src/robot_controller.py",
      "console": "integratedTerminal",
      "env": { "SERIAL_PORT": "/dev/ttyUSB0", "ROBOT_NAME": "desk-arm" }
    }
  ]
}Real world
Where VS Code fits a robot workflow
- Remote-SSH: open
~/robot_wson the Jetson from your laptop, edit and run there. - Split view: controller code on the left,
robot.yamlon the right, terminal with logs below. - Source Control view shows exactly which config lines you changed before a test run.
- Committed
.vscode/settings mean a new team member is productive on day one.
Mistakes
Common mistakes and debugging
Hardware & safety
Hardware lab and safety notes
VS Code can edit code directly on a Raspberry Pi or Jetson over SSH, so you do not need a screen on the robot.
- The Remote - SSH extension opens a folder on the robot as if it were local (needs SSH from Lesson 13).
- On a small Pi, prefer editing over Remote - SSH from the laptop rather than running the full VS Code on the Pi.
- Add the Arduino sketch folder to the workspace so code and firmware sit side by side.
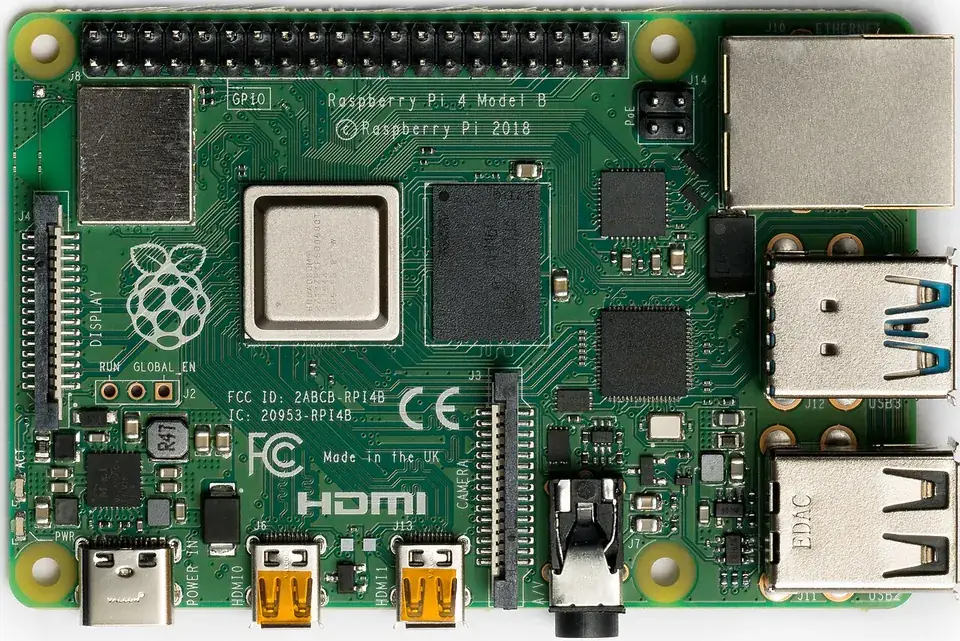
Debugging
Debugging: when it doesn’t work
| Symptom | Likely cause | Fix |
|---|---|---|
ModuleNotFoundError in VS Code but not in the terminal | Wrong interpreter selected | Command Palette → “Python: Select Interpreter” → .venv |
Script fails with \r errors on the Pi | File saved with CRLF | Click “CRLF” in the status bar → choose LF |
| Breakpoint is never hit | Running, not debugging | Use F5 with your launch.json |
| Remote - SSH cannot connect | SSH itself fails | Test ssh jetson in a terminal first (Lesson 13) |
Think
Think about it
Think
Your script runs fine with `python3 src/robot_controller.py` in the terminal but VS Code’s Run button says `No module named 'serial'`. What do you check first?
Experiment
Try it in the lab: set up your workbench
Practise the terminal moves here, then do the real setup on your laptop.
Experiment
Set up your workbench
You will need
- Terminal simulator
- Ubuntu laptop with VS Code (optional but recommended)
Steps
- In the simulator: `pwd`, `cd workspace`, `ls`, `cd scripts`, `cat bringup.sh` — this is what you will do in the integrated terminal.
- On your laptop: `cd ~/robot_ws && code .`
- Install the three recommended extensions.
- Select the `.venv` interpreter (create it first if needed — Lesson 11).
- Add `settings.json` and `extensions.json`, commit them, and check the status bar says LF.
- Set one breakpoint in a loop and step through three iterations with F10.
Interactive · Terminal simulator
# robotics workstation simulator
# try: pwd · ls · cd workspace · cat robot_controller.py
cwd: /home/robot · simulated only
The status bar should show the venv Python and LF line endings. The integrated terminal prompt should end in robot_ws$.
Knowledge check
Check your understanding
Knowledge check
1. For a robot project you should open in VS Code…
2. The Remote - SSH extension lets you…
3. “No module named serial” only inside VS Code usually means…
4. Which shortcut opens the Command Palette?
5. Why commit `.vscode/extensions.json`?
Mini assignment
Hands-on assignment
Mini assignment
VS Code setup notes
Document your editor setup so a teammate can copy it in ten minutes.
Deliverables
- Screenshot or note of the status bar showing the venv interpreter and LF
- Your `settings.json`, `extensions.json` and `launch.json`
- Five shortcuts you will use daily, with what each does
Do this, step by step
- Install VS Code using the official Linux instructions.
- Open
robot_ws, select the.venvinterpreter and set line endings to LF. - Add the three JSON files from the code lab to
.vscode/. - Set a breakpoint in a script, press F5 and step through three lines.
Stuck? Hints, one at a time
- Hint 1: The status bar (bottom) shows the interpreter and “LF/CRLF”.
- Hint 2:
extensions.jsononly recommends extensions; teammates still click Install. - Hint 3: In
launch.json,"program": "${file}"debugs whichever file is open.
Challenges (pick by level)
- 🟢 Easy: Learn Ctrl + P (open file) and Ctrl + Shift + P (command palette).
- 🟡 Medium: Add an
enventry withROBOT_MODE=simtolaunch.json. - 🟠 Hard: Open a folder on a Pi with Remote - SSH and run a script there.
Next step
Look back: Lesson 9: Git & GitHub for Robotics. Next: Lesson 11: Python Virtual Environments. Related: Stage 2 — Python for Robotics.
Sources
- VS Code — Setup on Linux
- VS Code — Python environments
- VS Code — Python debugging
- VS Code — Remote development using SSH
- Photos: Wikimedia Commons (credits under each image).
Self-attested for now — keep artifacts in your lab notebook.
Complete
Today's goal
0 of 1 done today
Mark this lesson complete when you have worked the experiment, knowledge check, and assignment (even roughly).