
Robotics Fundamentals · Lesson 14
Bridge to the 6DOF Arm
Est. 50–65 min
Why
Why this lesson is your pre-flight check
You have learnt the fundamentals one at a time. This chapter connects them to the 6DOF arm course on this site — the build where everything becomes real metal, real servos and real current. The course’s own chapters recommend MG996R-class metal-gear servos for the base and shoulder, an Arduino-class microcontroller with either direct PWM pins or a PCA9685 16-channel PWM driver, and a separate 5–6 V servo supply with a common ground, rated 10 A or more because six loaded servos can momentarily demand 8–10 A. Every one of those choices comes from a Stage 5 lesson.
By the end you will be able to: map each joint of a 6-servo arm to DOF, torque, sensing and limits; tell honestly how many joints position the tool when one servo is the gripper; check your power plan against the course’s supply rule; run a self-check that says GO or REVISIT; rehearse a safe single-servo power-up; and know which course chapter each Stage 5 lesson prepares you for.
Concept
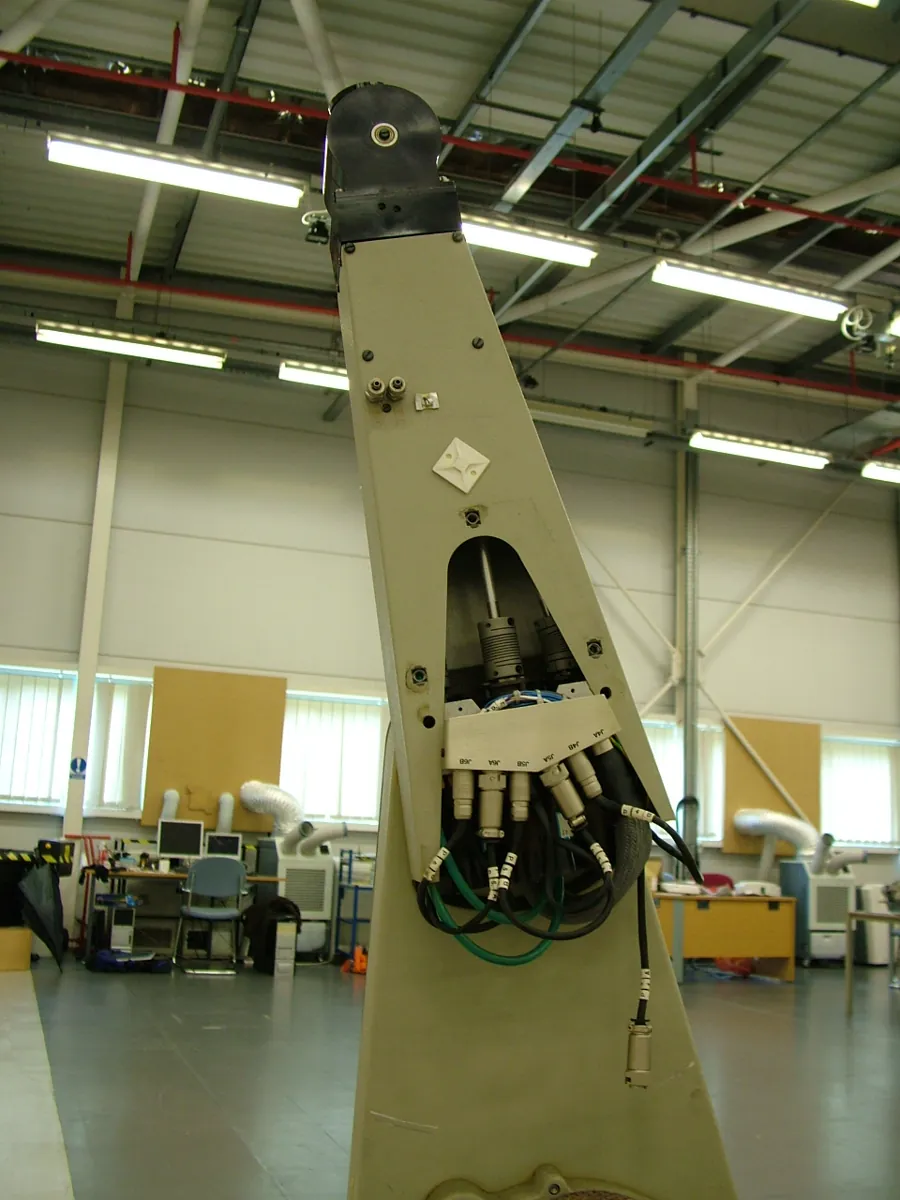
Every Stage 5 idea, mapped onto the real arm
Think of moving from driving lessons in an empty ground to driving on a real road. You already know the steering, the clutch and the brakes. On the road, nothing new is invented — but everything happens together, with real consequences. The 6DOF build is that road. This chapter is the last practice lap in the ground.
Stage 5 lessons → 6DOF course chapters
| Stage 5 lesson | You will use it in… | What you will do |
|---|---|---|
| 3 — Joints, links & DOF | Mechanical Structure, Joints & DOF Mapping | Label J1–J6, count pose DOF vs gripper |
| 4 — Configuration space | Inverse Kinematics Intro; First Programmed Motions | Choose elbow solutions; avoid self-collision |
| 5 — Actuators & transmissions | Servos & Power | Size the shoulder; pick servo classes per joint |
| 6 — Sensors & proprioception | Calibration & Testing | Know what the servo pot measures and what it doesn’t |
| 7 — Sense–plan–act | Firmware Basics (Servo Control) | Structure the control loop and command parsing |
| 8 — Feedback | Firmware Basics; Calibration & Testing | Understand why servos hold position, and their limits |
| 9 — Workspace & reach | What is a 6DOF Arm & Safety; Inverse Kinematics Intro | Measure the workspace radius; place targets in the sweet spot |
| 10 — Frames, pose & TCP | Inverse Kinematics Intro; Calibration & Testing | Define the base frame and TCP; set joint zeros |
| 11 — End effectors | Gripper & End Effector | Set gripper open/close angles per object |
| 13 — Safety & limits | What is a 6DOF Arm & Safety; Controller Board & Wiring | Soft limits, power-off rule, e-stop |
Mapping a 6-servo arm
| Joint | Motion | Type | Load (worst case) | Watch for |
|---|---|---|---|---|
| J1 base | Yaw (turn left/right) | R | Low torque, high inertia | Smooth slow moves; cable twist |
| J2 shoulder | Pitch | R | Highest holding torque (Lesson 5) | Strongest servo; arm sag at full reach |
| J3 elbow | Pitch | R | High torque | Elbow-up vs elbow-down choice |
| J4 wrist pitch | Pitch | R | Medium | Keeps the gripper level or angled |
| J5 wrist roll | Roll | R | Low | Orientation of the gripper fingers |
| J6 gripper | Open/close | End-effector | Grip force (Lesson 11) | Stall when closed too far |
Power: the numbers that decide success
worst-case current ≈ (servos stalled × stall current) + (other servos × moving current)
- The course gives a rule of thumb: hobby metal-gear servos can exceed 1–2 A each at stall. With two servos stalled at 1.5 A and four moving at about 0.5 A: 2 × 1.5 + 4 × 0.5 = 5.0 A. With 25% headroom that needs 6.25 A — inside a 10 A supply. Use your own servos’ datasheet values.
The first power-up, step by step
One servo, no horn
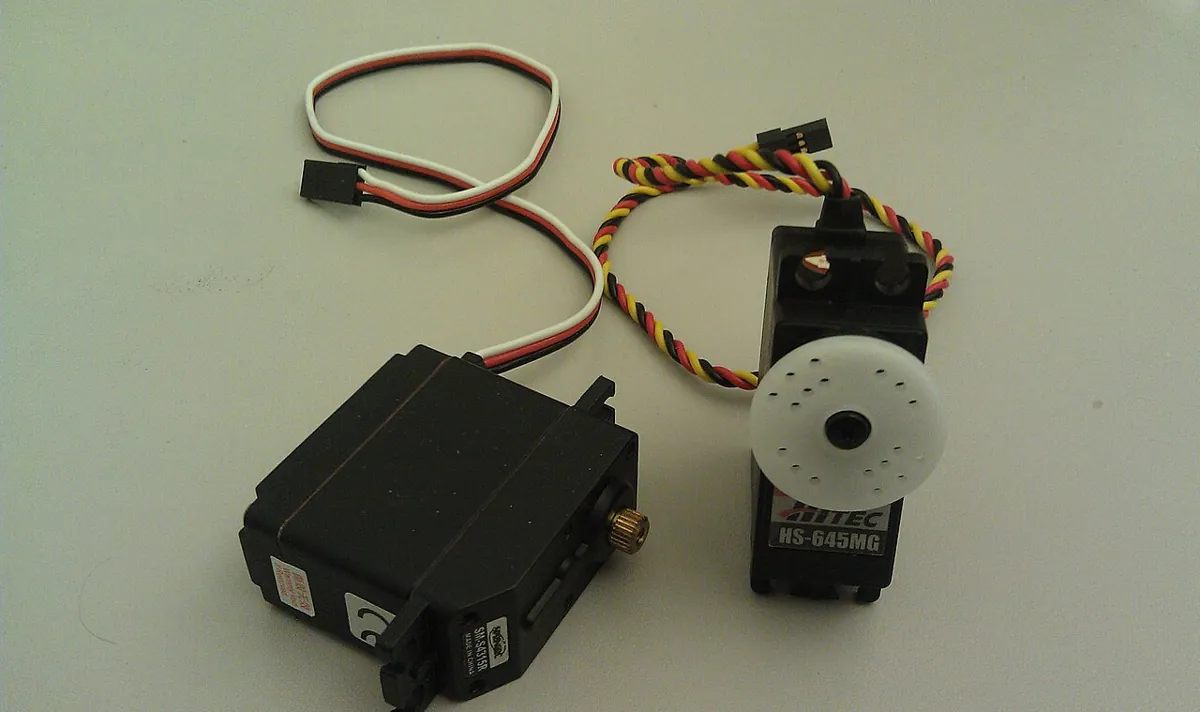
Power a single servo from the 5–6 V supply, common ground, with no horn or link attached. Command 90° with gentle steps.
Then each servo alone
Repeat for each servo before assembly. Mark its 90° position. Note any that buzz or run hot.
Assemble at the centre
Fit horns and links with each servo at its centre mark, as the course’s calibration chapter explains.
E-stop and limits first
Before moving the assembled arm, test the e-stop and load soft limits (Lesson 13).
One joint at a time
Move each joint slowly through a small range, then a larger one, watching the supply voltage.
Visual
Visualise it: a shoulder–elbow–wrist chain
Move the shoulder, elbow and wrist sliders and read the **end-effector pose**. This is the same chain as J2–J4 of your arm, seen from the side — and a preview of forward kinematics in Stage 8.
Interactive · FK chain visualizer (3R planar educational)


Simplified 3R planar stand-in for Base→J1→J2→J3→EE. Full 6DOF adds wrist RPY on top of this position chain.
EE x
153.4
EE y
35.8
ᵇTₑ (planar) calculator
| 0.966 | -0.259 | 0.000 | 157.02 |
| 0.259 | 0.966 | 0.000 | 20.55 |
| 0.000 | 0.000 | 1.000 | 0.00 |
| 0.000 | 0.000 | 0.000 | 1.000 |
Code lab
Code lab: readiness self-check, joint map and power check
Fill in SELF_CHECK with honest answers. The script prints your score and a GO / REVISIT verdict (a recommendation, not a lock), maps a six-servo arm onto joint types, and checks a worst-case current estimate against the course’s 10 A supply rule. Run it with python3 readiness_check.py.
"""readiness_check.py - are you ready for the 6DOF arm course? (soft recommendation, not a lock)
Edit SELF_CHECK with honest answers, then run."""

SELF_CHECK = {
    "count DOF of a serial arm": True,
    "explain C-space vs workspace": True,
    "size a servo with torque = m*g*d": True,
    "name proprio vs extero sensors": True,
    "write a sense-plan-act loop": True,
    "explain open vs closed loop": False,
    "check reach with the law of cosines": True,
    "define TCP and base frame": True,
    "pick a gripper for a 50 g part": False,
    "list joint limits + keep-out + e-stop": True,
}
LESSON = {"count DOF of a serial arm": 3, "explain C-space vs workspace": 4, "size a servo with torque = m*g*d": 5,
          "name proprio vs extero sensors": 6, "write a sense-plan-act loop": 7, "explain open vs closed loop": 8,
          "check reach with the law of cosines": 9, "define TCP and base frame": 10, "pick a gripper for a 50 g part": 11,
          "list joint limits + keep-out + e-stop": 13}

ARM = ["J1 base yaw", "J2 shoulder pitch", "J3 elbow pitch", "J4 wrist pitch", "J5 wrist roll", "J6 gripper"]

done = sum(SELF_CHECK.values())
print(f"== Self-check: {done}/{len(SELF_CHECK)} ==")
for skill, ok in SELF_CHECK.items():
    print(f"[{'x' if ok else ' '}] {skill:40s} (Lesson {LESSON[skill]})")
gaps = [LESSON[s] for s, ok in SELF_CHECK.items() if not ok]
verdict = "GO - start the 6DOF arm course" if done >= 8 else "REVISIT first"
print(f"\nverdict: {verdict}" + (f"; quick revisit: Lessons {', '.join(map(str, gaps))}" if gaps else ""))

print("\n== Map Stage 5 ideas onto a 6-servo arm ==")
for j in ARM:
    kind = "end effector" if "gripper" in j else "revolute joint, 1 DOF"
    print(f"{j:18s} -> {kind}")
print("note: if J6 is a gripper, the arm positions its tool with 5 joints; check what your kit calls '6DOF'")

print("\n== Power sanity check (course rule: 5-6 V servo supply rated >= 10 A, common ground) ==")
supply_a, servos, worst_stall_a = 10, 6, 1.5    # replace stall current with your servo datasheet value
two_stall = 2 * worst_stall_a + (servos - 2) * 0.5
print(f"two servos stalled + four moving ~ {two_stall:.1f} A vs {supply_a} A supply -> {'OK' if two_stall * 1.25 <= supply_a else 'too small'} with 25% headroom")
Output (run with python3 readiness_check.py)
== Self-check: 8/10 ==
[x] count DOF of a serial arm                (Lesson 3)
[x] explain C-space vs workspace             (Lesson 4)
[x] size a servo with torque = m*g*d         (Lesson 5)
[x] name proprio vs extero sensors           (Lesson 6)
[x] write a sense-plan-act loop              (Lesson 7)
[ ] explain open vs closed loop              (Lesson 8)
[x] check reach with the law of cosines      (Lesson 9)
[x] define TCP and base frame                (Lesson 10)
[ ] pick a gripper for a 50 g part           (Lesson 11)
[x] list joint limits + keep-out + e-stop    (Lesson 13)

verdict: GO - start the 6DOF arm course; quick revisit: Lessons 8, 11

== Map Stage 5 ideas onto a 6-servo arm ==
J1 base yaw        -> revolute joint, 1 DOF
J2 shoulder pitch  -> revolute joint, 1 DOF
J3 elbow pitch     -> revolute joint, 1 DOF
J4 wrist pitch     -> revolute joint, 1 DOF
J5 wrist roll      -> revolute joint, 1 DOF
J6 gripper         -> end effector
note: if J6 is a gripper, the arm positions its tool with 5 joints; check what your kit calls '6DOF'

== Power sanity check (course rule: 5-6 V servo supply rated >= 10 A, common ground) ==
two servos stalled + four moving ~ 5.0 A vs 10 A supply -> OK with 25% headroom
Try it: set a servo’s pulse and load on the virtual bench and watch the current — the same habits you need when six servos share one supply.
Interactive · Motor & Servo Bench
Compare a safe path (PWM → driver → motor, common ground, separate power) vs the dangerous habit of driving a motor from a bare GPIO pin. Simulated only.
DC motor (via driver)
Driver handles current. MCU only sends logic-level PWM. Common ground required.
Servo (pulse width)
Servo needs dedicated 5–6 V power + signal from MCU. Soft limits before multi-joint arms.
Real world
From classic arms to your desk
- Classic industrial arms (PUMA, KUKA): six joints, encoders, gearboxes, a controller and a guarded cell — the grown-up version of your build.
- Collaborative arms (UR series): teach pendants, reduced speeds and built-in limits — the safety habits from Lesson 13.
- Your desk arm: MG996R-class servos at the base and shoulder, a PCA9685 or direct PWM, and a separate supply rated 10 A or more, as the course recommends.
Bench build
Bench build: a single-servo power-up rehearsal
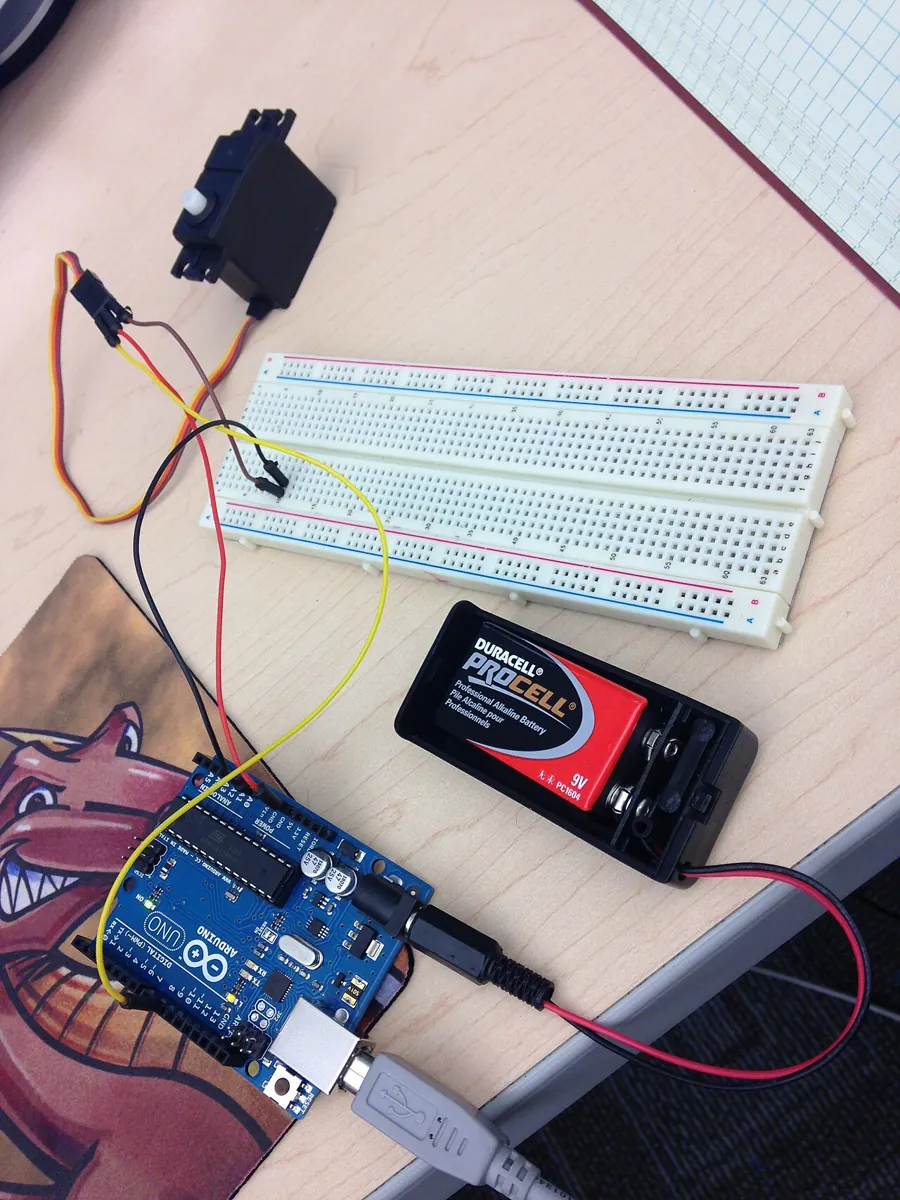
Before the arm arrives (or before you assemble it), rehearse the exact power-up procedure with one servo. You will use slow_servo_steps.ino from Lesson 2 and your Lesson 13 e-stop if you built it.
Prepare
Clear the desk. Servo unmounted, horn removed. Supply set to 5–6 V and measured. E-stop (if built) in the supply line.
Wire
Signal → pin 9; servo power from the supply; supply GND → Arduino GND. Check twice that nothing from the servo goes to the Arduino 5 V pin.
Power order
Plug in the Arduino (USB) first, upload the sketch, then switch on the servo supply.
Centre
Type 90 in the Serial Monitor. Mark the shaft’s position with a marker — this is your centre mark for assembly.
Sweep
Type 45, 135, then 20 and 160 (the soft limits). Watch and listen: smooth motion, no buzzing at rest.
Stop test
Press the e-stop (or unplug the supply) mid-move. The servo must go limp. Restore power: nothing should move until you send a new angle.
Log
Write supply voltage at rest and moving, and any noises. Repeat for every servo in your kit.
// slow_servo_steps.ino - move one joint in gentle 1-degree steps between soft limits.
// Servo signal on pin 9. Servo power comes from a SEPARATE 5-6 V supply, grounds joined.
#include <Servo.h>

Servo joint;
const int PIN = 9;
const int SOFT_MIN = 20;      // stay away from the hard end stops
const int SOFT_MAX = 160;
const int STEP_DELAY_MS = 15; // about 66 degrees per second

int angle = 90;

void moveTo(int target) {
  target = constrain(target, SOFT_MIN, SOFT_MAX);
  while (angle != target) {
    angle += (target > angle) ? 1 : -1;
    joint.write(angle);
    delay(STEP_DELAY_MS);
  }
  Serial.print("at ");
  Serial.println(angle);
}

void setup() {
  Serial.begin(9600);
  joint.write(angle);   // set the start position before attach() so it does not jump
  joint.attach(PIN);
  Serial.println("type an angle (20-160) and press Enter");
}

void loop() {
  if (Serial.available()) {
    int target = Serial.parseInt();
    if (target > 0) moveTo(target);
  }
}
Debugging
Debugging the first days of the build
| Symptom | Likely cause | Stage 5 lesson | Fix |
|---|---|---|---|
| Arm jumps at power-up | Servos go to a default position | 13 | Power one at a time; start angle before attach(); latched start |
| Board resets when the shoulder moves | Supply sag / shared supply | 2, 5 | Separate supply ≥ 10 A; capacitor; short thick wires |
| Shoulder sags at full reach | Torque near the servo’s limit | 5 | Stronger servo; lighter forearm; keep work closer |
| Gripper closes 2 cm off target | Joint zeros or TCP wrong | 10 | Calibrate centres; measure tool offset |
| IK says “unreachable” for a close point | Outside the ring or a joint limit | 9, 4 | Check r; try the other elbow solution |
| Gripper servo hot while holding | Closing past the touch point | 11 | Per-object closed angle |
Think
Think about it
Think
Arjun’s readiness check says 6/10 — REVISIT. He says, “It’s only a recommendation, I’ll start the build anyway.” Meera says, “Then at least revisit the four lessons that matter most for the first week.” Which four would you pick, and why?
Experiment
Try it in the lab: readiness check and a single-servo rehearsal
Thirty to forty minutes: the FK chain visual, the readiness script, the course’s table of contents and — if you have a servo — the rehearsal.
Experiment
Readiness check and a single-servo rehearsal
You will need
- FK chain visualizer (below, runs in your browser)
- The 6DOF arm course chapter list
- Optional: `readiness_check.py`; one servo, Arduino, 5–6 V supply, marker
Steps
- In the FK visualizer, set the shoulder, elbow and wrist so the end-effector points straight down. Write the three angles.
- Run `readiness_check.py` with honest answers. Write your verdict and gaps.
- For each gap, open the matching Stage 5 lesson and re-do its knowledge check.
- Run the single-servo rehearsal and mark the centre of each servo you have.
- Write your own pre-flight checklist (10 lines max) for the first power-up of the full arm.
Interactive · FK chain visualizer (3R planar educational)
Simplified 3R planar stand-in for Base→J1→J2→J3→EE. Full 6DOF adds wrist RPY on top of this position chain.
EE x
153.4
EE y
35.8
ᵇTₑ (planar) calculator
| 0.966 | -0.259 | 0.000 | 157.02 |
| 0.259 | 0.966 | 0.000 | 20.55 |
| 0.000 | 0.000 | 1.000 | 0.00 |
| 0.000 | 0.000 | 0.000 | 1.000 |
Every decision in the 6DOF build traces back to a Stage 5 idea. A short checklist and a single-servo rehearsal catch most first-day mistakes before they cost a servo — or a finger.
Knowledge check
Check your understanding
Knowledge check
1. The 6DOF course recommends a servo supply of…
2. If J6 of your arm is the gripper, how many joints position the tool?
3. Which joint usually needs the highest holding torque?
4. Two servos stalled at 1.5 A plus four moving at 0.5 A draw about…
5. Why power-test each servo alone with the horn removed?
6. Which Stage 5 lesson prepares you for the course’s “Gripper & End Effector” chapter?
7. The readiness script’s verdict is…
8. The board resets whenever the shoulder starts moving. Which lessons help most?
9. The course recommends MG996R-class servos for which joints?
Mini assignment
Hands-on assignment
Mini assignment
Your 6DOF build plan
Write a one-page build plan for your arm that maps every Stage 5 fundamental to a concrete decision, check your power numbers, and complete the single-servo rehearsal for at least one servo.
Deliverables
- A joint table for your actual kit (J1–J6): motion, type, servo model, estimated holding torque and soft limits.
- Your `readiness_check.py` output with your real servo stall current in the power check.
- Your pre-flight checklist (10 lines max) and your build log from the single-servo rehearsal.
- A list of which course chapter you will start with and which Stage 5 lessons you will keep open beside you.
Do this, step by step
- Make a joint table for your kit (J1–J6): motion, joint type, servo model, estimated holding torque and soft limits.
- Find your servos’ stall current in the datasheet and put it into the power check in
readiness_check.py; run it. - Size the supply: add up the stall currents of the servos that can stall together and add margin.
- Rehearse with one servo: supply off, wire it (separate supply, common ground, signal only from the pin), centre it, then sweep slowly inside soft limits.
- Write a 10-line pre-flight checklist and the build log of your rehearsal, and choose which 6DOF course chapter you will start with.
Stuck? Hints, one at a time
- Hint 1: Get your kit’s parts list first (the course’s Bill of Materials chapter helps). Write each servo’s model and datasheet torque at your voltage.
- Hint 2: Estimate the shoulder torque with
gear_torque.pyfrom Lesson 5 using your link lengths. - Hint 3: Soft limits: start conservative (for example 20°–160°) and widen later after calibration.
- Hint 4: Your checklist should cover: area clear, supply voltage, common ground, e-stop test, soft limits loaded, one joint at a time.
Challenges (pick by level)
- 🟢 Easy: Write J1–J6 for your kit with R or “gripper” for each.
- 🟢 Easy: Compute the worst-case current for three stalled servos at 2 A and three moving at 0.5 A. Does a 10 A supply pass with 25% headroom?
- 🟡 Medium: Measure one servo’s current at rest, moving and lightly resisted (Lesson 2 method).
- 🟡 Medium: Draw the full power and signal wiring for six servos and a PCA9685 (the course’s Controller Board & Wiring chapter will check you).
- 🟠 Hard-ish: Estimate the holding torque for J2, J3 and J4 at full reach with your real masses and compare with your servos.
- 🔴 Hard: Write a small Python tool that reads your joint table and prints a warning for any joint whose required torque exceeds 50% of its servo’s rating.
- ⚫ Expert: Plan the first programmed motion (the course’s First Programmed Motions chapter): a pick-and-place between two points in the sweet spot, with both elbow solutions checked against the table and keep-out zones.
Next step
One lesson left. In Lesson 15 — Capstone: Design Your First Robot you put the whole stage together: design a small robot on paper, review it against every fundamental, fix what fails, and present it like an engineer. Then head to the [6DOF arm course](/chapter/intro-safety) when you are ready.
Look back: Lesson 13: Safety, Limits & Operating Envelope. Next: Lesson 15: Capstone: Design Your First Robot. Related: Stage 6 — 6DOF Arm and Stage 4 — Electronics.
Sources
- AIHUB 6DOF Arm course on this site: [What is a 6DOF Arm & Safety](/chapter/intro-safety), [Servos & Power](/chapter/servos-power), [Controller Board & Wiring](/chapter/controller-wiring), [Calibration & Testing](/chapter/calibration-testing) — MG996R-class servos for base/shoulder; Arduino-class MCU with direct PWM or a PCA9685; separate 5–6 V supply rated ≥ 10 A with a common ground; stall currents above 1–2 A per servo.
- Adafruit Learn: 16-Channel PWM/Servo Driver — PCA9685 board: VCC is logic power (3–5 V); V+ supplies the servos; provide 5–6 VDC for servos; default I²C address 0x40.
- SparkFun Learn: Hobby Servo Tutorial — current rises with load (an ampere or more); supply sag can reset microcontrollers; check VCC while servos move.
- Arduino Servo library API —
attach()andwrite(). - OSHA Technical Manual, Section IV Chapter 4 — reduced speed while teaching; unexpected movement as a hazard.
- Photos: Wikimedia Commons (credits under each image).
Self-attested for now — keep artifacts in your lab notebook.
Complete
Today's goal
0 of 1 done today
Mark this lesson complete when you have worked the experiment, knowledge check, and assignment (even roughly).