
Robotics Fundamentals · Lesson 07
Sense–Plan–Act Loop
Est. 50–65 min
Why
Why every robot runs one loop, over and over
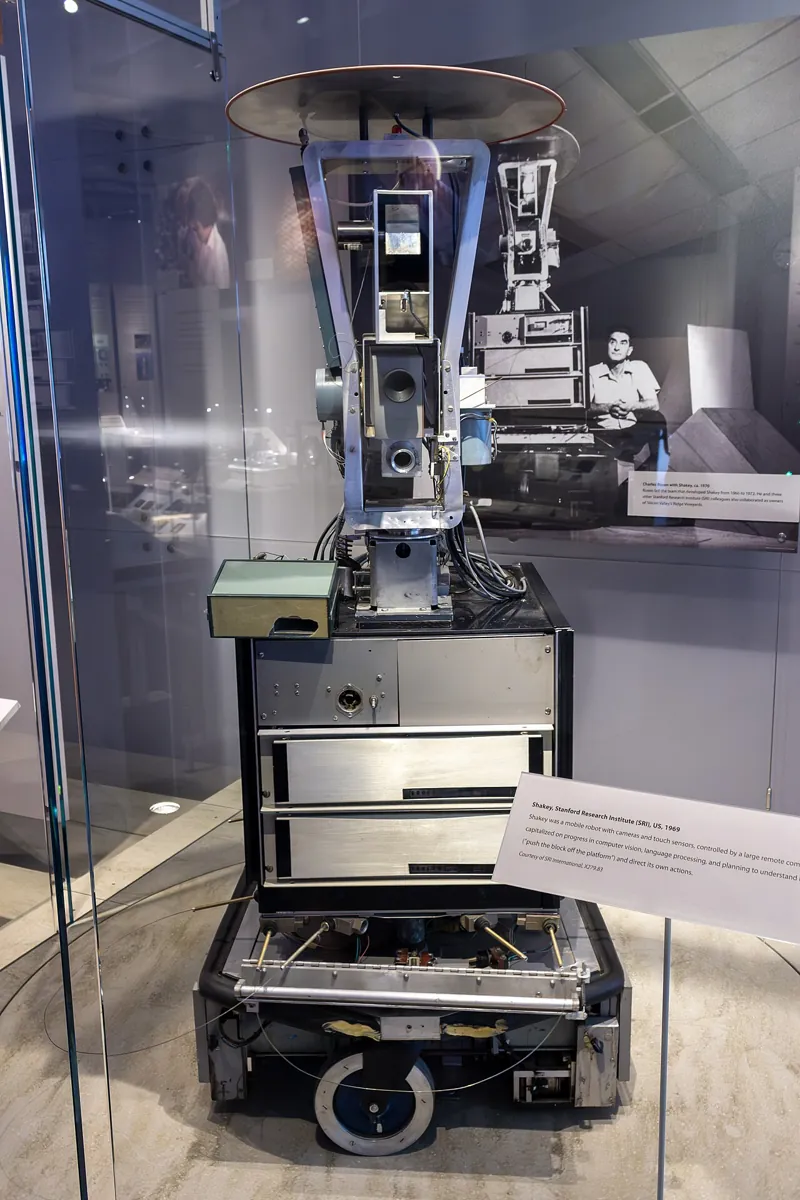
Every robot you will ever build runs one basic cycle: sense (read the sensors), plan (decide what to do), act (command the actuators) — then do it again, many times a second. OSHA describes the same thing for industrial robots: a controller takes input signals from sensors into a computer, runs its programming, and sends output command signals back to the manipulator and end-effector. Shakey, the SRI robot from 1966–1972, was the first mobile robot able to perceive and reason about its surroundings — the grandfather of this loop.
By the end you will be able to: write a sense–plan–act loop with a fixed period; choose a loop rate for a job; design a plan as clear states (CRUISE, SLOW, STOP); handle a missing or bad sensor reading safely; read the timing of an ultrasonic sensor from its datasheet; and build a real loop on an Arduino with an HC-SR04 and an LED standing in for a motor.
Concept
Sense–plan–act in plain words
Think of crossing a busy Indian road on foot. You look (sense: traffic, distance, speed). You decide (plan: wait, walk, run). You move (act). And you never look just once — you keep looking every second until you reach the other side. If a bus blocks your view, you don’t assume the road is still clear; you stop and wait. A robot loop is exactly this habit, written in code.
The three steps
| Step | Job | Rover example | Typical bug |
|---|---|---|---|
| Sense | Read sensors; turn raw numbers into useful values | Ultrasonic echo time → distance in cm | Using a stale or invalid reading |
| Plan | Decide using rules, states or a planner | > 50 cm: CRUISE; 20–50 cm: SLOW; ≤ 20 cm: STOP | No rule for “no data” |
| Act | Send commands to actuators | Set wheel speed | Blocking delays that make the next sense late |
| (Repeat) | Run again at a steady period | Every 100 ms (10 Hz) | Loop period drifts as code grows |
Loop rate: how often?
distance moved between decisions = speed × loop period
- At 30 cm/s and 10 Hz (0.1 s), the rover moves 3 cm between decisions. At 1 Hz it would move 30 cm — far too much near a wall. Faster robots need faster loops.
Sensors set a limit too. The HC-SR04 datasheet says you trigger it with a 10 µs pulse, it sends an 8-cycle 40 kHz burst, and the echo pulse width tells you the distance (µs ÷ 58 = cm). It ranges 2 cm to 400 cm, and the datasheet suggests a measurement cycle of over 60 ms so old echoes don’t confuse new ones. So a loop that reads one HC-SR04 runs comfortably at about 10 Hz.
Plans as states
Write the plan as a small set of named states with clear rules for switching between them. Named states are easy to print, test and explain. For the rover: CRUISE (30 cm/s), SLOW (10 cm/s), STOP (0), plus two safety states — HOLD for a single missed reading and STOP (no data) when readings keep failing.
Beyond simple loops
- Layers: fast loops (joint control, 100s of times a second) run inside slower loops (path planning, a few times a second). Lesson 8 covers the fast inner loop.
- Reactive rules: a bump sensor can stop the motors immediately without waiting for the planner — safety reflexes skip the queue.
- Big planners: in later stages (perception and planning), the “plan” step becomes path planning and task planning — but it still sits inside this same loop.
Visual
Visualise it: run the loop step by step
Step through the loop one tick at a time: **sense** a value, **plan** a decision, **act** on it — then repeat. Try changing the sensor reading in the middle and watch how the next decision changes.
Interactive · Sense–Plan–Act simulator

Range (cm)
80
Threshold 40 cm
Heading
0°
- Log empty — run a cycle.
Code lab
Code lab: a 10 Hz rover loop with a sensor drop-out
The script simulates a rover 120 cm from a wall. Every 0.1 s it senses a noisy distance, plans a state and acts by setting its speed. On ticks 31–33 the sensor returns nothing, to test the safety rules. Run it with python3 spa_loop.py.
"""spa_loop.py - a rover drives toward a wall using one sense-plan-act loop at 10 Hz.
Sense: noisy ultrasonic range (cm). Plan: pick a speed from the distance. Act: set wheel speed.
A watchdog stops the robot if the sensor goes silent."""
import random

random.seed(7)
DT = 0.1                   # loop period (s) -> 10 Hz
wall, x = 120.0, 0.0       # wall position and robot position (cm)
speed = 0.0                # cm/s
STOP_CM, SLOW_CM = 20, 50
silent_ticks = 0

def sense(tick):
    if 31 <= tick <= 33:   # sensor drop-out for 3 ticks
        return None
    return round(wall - x + random.gauss(0, 1.5), 1)

def plan(dist, silent):
    if silent >= 2:
        return "STOP (no data)", 0.0
    if dist is None:
        return "HOLD (1 miss)", speed
    if dist <= STOP_CM:
        return "STOP", 0.0
    if dist <= SLOW_CM:
        return "SLOW", 10.0
    return "CRUISE", 30.0

print("tick  t(s)  sensed(cm)  plan            speed  true gap")
for tick in range(0, 60):
    d = sense(tick)                       # SENSE
    silent_ticks = silent_ticks + 1 if d is None else 0
    state, speed = plan(d, silent_ticks)  # PLAN
    x += speed * DT                       # ACT
    if tick % 4 == 0 or d is None or state.startswith("STOP"):
        print(f"{tick:4d}  {tick*DT:4.1f}  {str(d):>10s}  {state:14s} {speed:5.1f}  {wall-x:6.1f}")
    if state == "STOP" and tick > 40:
        break
print(f"\nstopped {wall-x:.1f} cm from the wall after {tick*DT:.1f} s")
Output (run with python3 spa_loop.py)
tick  t(s)  sensed(cm)  plan            speed  true gap
   0   0.0       119.6  CRUISE          30.0   117.0
   4   0.4       106.6  CRUISE          30.0   105.0
   8   0.8        97.6  CRUISE          30.0    93.0
  12   1.2        81.5  CRUISE          30.0    81.0
  16   1.6        69.5  CRUISE          30.0    69.0
  20   2.0        60.5  CRUISE          30.0    57.0
  24   2.4        50.5  CRUISE          30.0    47.0
  28   2.8        44.8  SLOW            10.0    43.0
  31   3.1        None  HOLD (1 miss)   10.0    40.0
  32   3.2        None  STOP (no data)   0.0    40.0
  33   3.3        None  STOP (no data)   0.0    40.0
  36   3.6        37.8  SLOW            10.0    37.0
  40   4.0        32.6  SLOW            10.0    33.0
  44   4.4        30.4  SLOW            10.0    29.0
  48   4.8        28.0  SLOW            10.0    25.0
  52   5.2        20.8  SLOW            10.0    21.0
  54   5.4        19.9  STOP             0.0    20.0

stopped 20.0 cm from the wall after 5.4 s
Try it: see how the echo time grows with distance — the raw number the Sense step turns into centimetres.
Interactive · Ultrasonic echo lab (HC-SR04 style)
Echo time
2861 µs
Speed of sound
349.5 m/s
Code reports (343 m/s)
49.1 cm
Average of 5
49.2 cm
Speed of sound in air ≈ 331.3 + 0.606 × T (m/s). Many Arduino sketches hard-code 0.0343 cm/µs (343 m/s, about 20 °C), so they read slightly wrong when it is hot or cold. Noise here is a simple ± uniform model.
Real world
The loop inside real robots
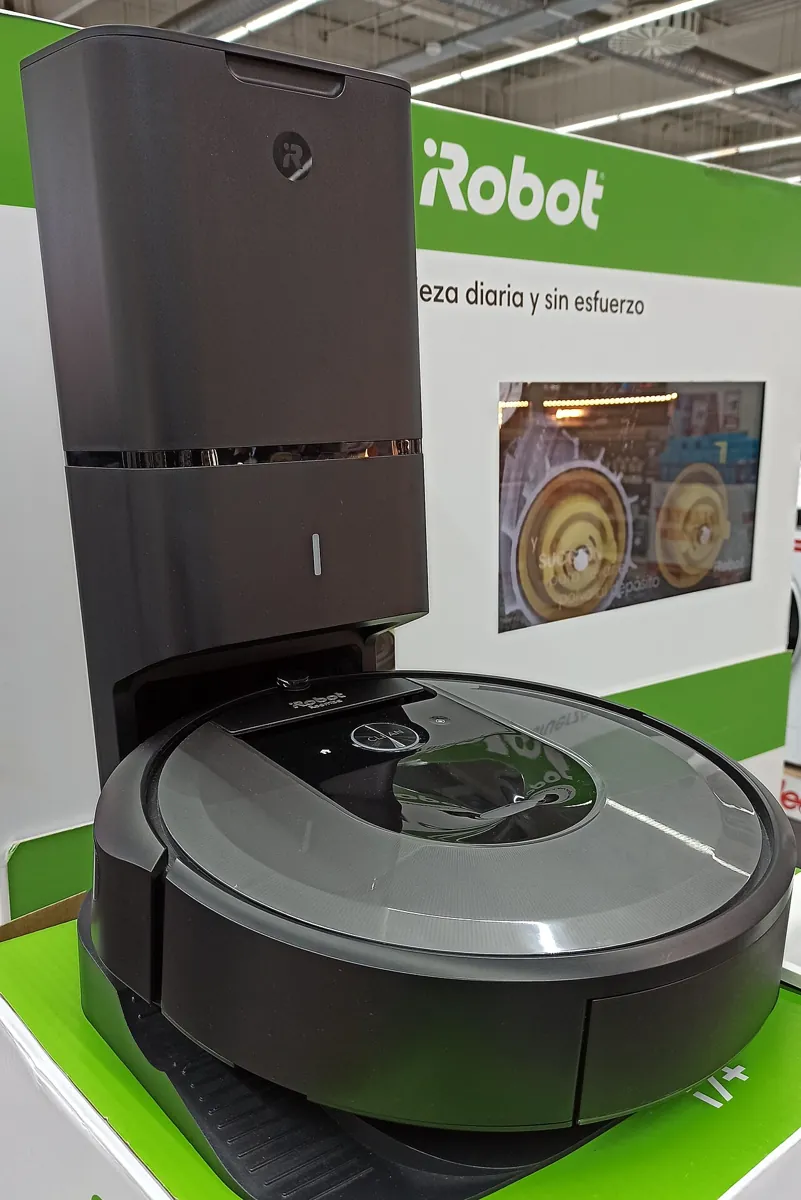
- Robot vacuums: bump and cliff sensors → choose a direction → drive; dock when the battery is low.
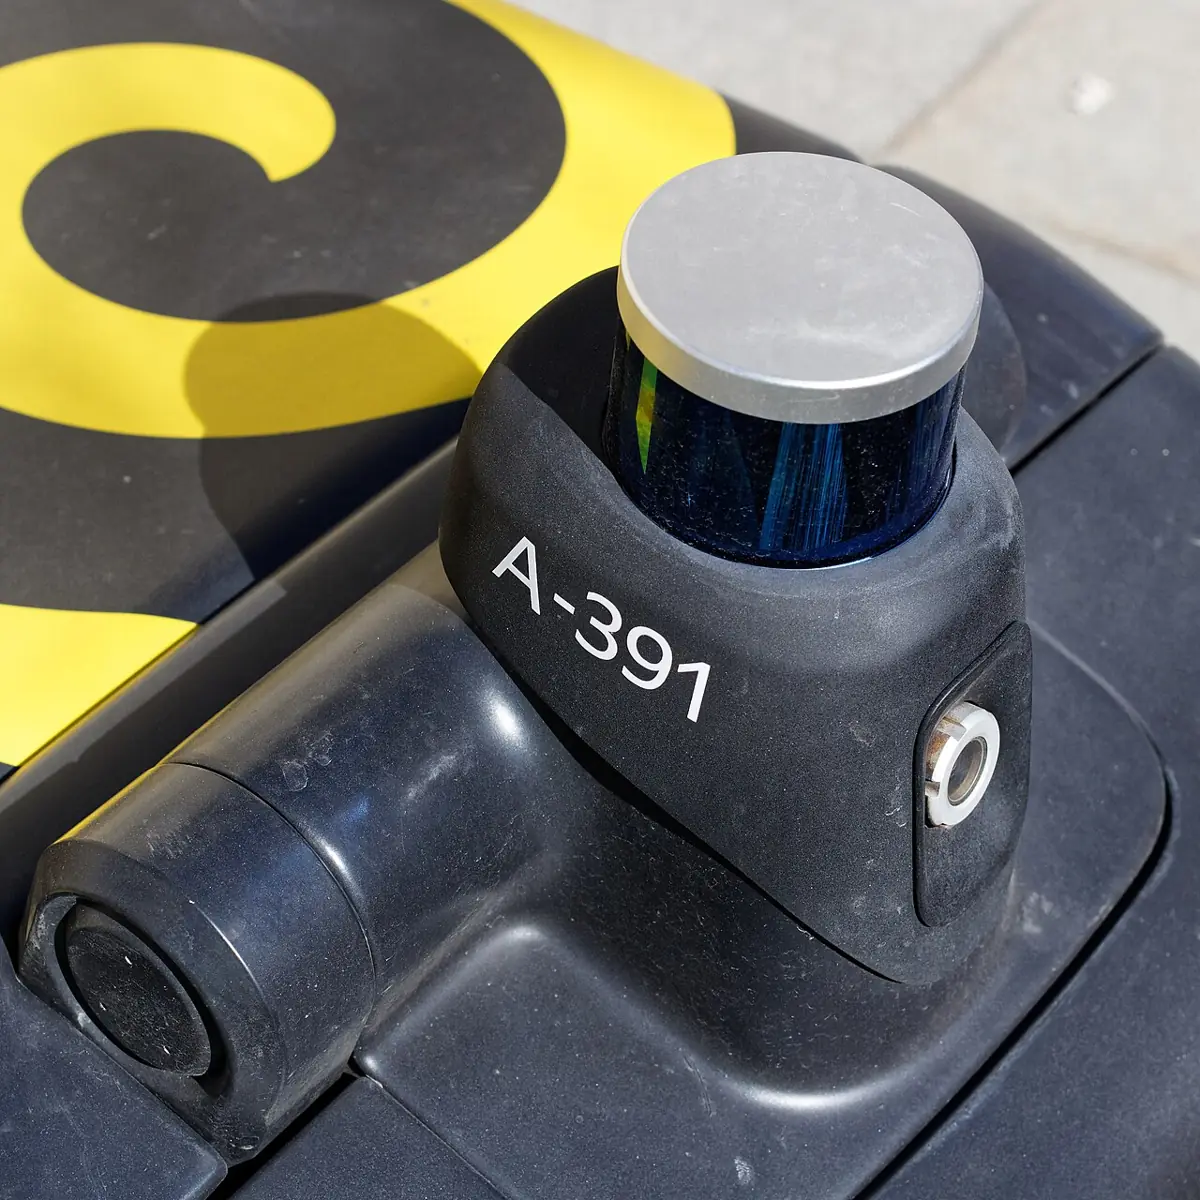
- Delivery robots: cameras and range sensors → plan a path on the pavement → drive the wheels, many times a second.
- Industrial arms: OSHA describes sensor inputs to the controller and output commands back to the manipulator and end-effector.
- Shakey (SRI, 1966–1972): perception, planning and route-finding on one mobile robot — the classic example of the loop.
Bench build
Bench build: a real sense–plan–act loop with an HC-SR04
Build the rover’s brain on the bench. An HC-SR04 is the sense, the Arduino plans, and an LED is the “motor”: on means drive (CRUISE or SLOW), off means stop. Move your hand toward the sensor and watch the states change.
Wire the sensor
HC-SR04 VCC to 5 V, GND to GND, TRIG to pin 7, ECHO to pin 6. (On a 3.3 V board, divide or level-shift ECHO first — Stage 4, Lesson 7.)
Wire the LED
LED with a 220 Ω resistor from pin 13 to GND (or use the on-board LED).
Upload
Upload
spa_ultrasonic.inoand open the Serial Monitor at 9600 baud.Test the states
Move your hand from 1 m to 10 cm. You should see CRUISE → SLOW → STOP, and the LED turn off at STOP.
Test the failure
Point the sensor at the ceiling far away or cover it with soft cloth so no echo returns. After two misses it should print STOP (no data) and the LED should go off.
// spa_ultrasonic.ino - one sense-plan-act loop at about 10 Hz with an HC-SR04 and an LED.
// HC-SR04: VCC 5V, GND, TRIG pin 7, ECHO pin 6 (5 V board such as UNO R3; level-shift ECHO on 3.3 V boards).
// LED with a 220-ohm resistor on pin 13 stands in for "motor on" - no motor is driven from a pin.
const int TRIG = 7, ECHO = 6, LED = 13;
const int STOP_CM = 20, SLOW_CM = 50;
int misses = 0;

long senseCm() {
  digitalWrite(TRIG, LOW);  delayMicroseconds(2);
  digitalWrite(TRIG, HIGH); delayMicroseconds(10);
  digitalWrite(TRIG, LOW);
  unsigned long us = pulseIn(ECHO, HIGH, 26000UL);   // timeout: about 4 m round trip
  if (us == 0) return -1;                            // no echo = unknown
  return us / 58;                                    // datasheet rule of thumb
}

void setup() {
  Serial.begin(9600);
  pinMode(TRIG, OUTPUT);
  pinMode(ECHO, INPUT);
  pinMode(LED, OUTPUT);
}

void loop() {
  long d = senseCm();                       // SENSE
  misses = (d < 0) ? misses + 1 : 0;
  const char* plan;                         // PLAN
  if (misses >= 2)        plan = "STOP (no data)";
  else if (d < 0)         plan = "HOLD";
  else if (d <= STOP_CM)  plan = "STOP";
  else if (d <= SLOW_CM)  plan = "SLOW";
  else                    plan = "CRUISE";
  bool go = (plan[0] == 'C') || (plan[1] == 'L');    // CRUISE or SLOW
  digitalWrite(LED, go ? HIGH : LOW);       // ACT
  Serial.print(d); Serial.print(" cm -> "); Serial.println(plan);
  delay(100);
}Debugging
Debugging the loop
| Symptom | Likely cause | Fix |
|---|---|---|
| Robot reacts late or overshoots | Loop too slow (delays, long prints) | Shorten the loop; remove delay()s; print less often |
| Distance reads 0 or jumps to huge values | No echo (soft or angled surface, out of range) | Treat 0 / timeout as “no data”, not as a distance |
| Robot keeps going when the sensor fails | Plan uses the last good value | Count misses; HOLD on one, STOP on two or more |
| Readings interfere with each other | Triggering faster than echoes die out | Keep the measurement cycle above about 60 ms (datasheet) |
| Loop freezes for a second | pulseIn() without a timeout | Pass a timeout (the sketch uses 26 ms) |
| States flicker at a boundary | Noise around 50 cm switches SLOW/CRUISE every tick | Add hysteresis: switch to SLOW at 50, back to CRUISE only above 55 |
Think
Think about it
Think
Arjun wants his rover’s loop to run as fast as possible — “1000 times a second!” — using the same HC-SR04. Meera says it will make things worse. Who is right, and what loop rate would you choose?
Experiment
Try it in the lab: a stop-before-the-wall loop
Thirty minutes with the loop simulator, the rover script and — if you have one — an HC-SR04 on the bench.
Experiment
A stop-before-the-wall loop
You will need
- Sense–plan–act simulator (below, runs in your browser)
- Notebook
- Optional: `spa_loop.py`; Arduino, HC-SR04, LED + 220 Ω resistor
Steps
- In the simulator, step through ten ticks and write sense / plan / act for each.
- Run `spa_loop.py`. Find the tick where it switches to SLOW and the tick where it stops. Why those ticks?
- Change `DT` to 0.3 and run again. Write the final gap. Explain the difference.
- On the bench, run `spa_ultrasonic.ino`. Write the distances where it switches state as you move your hand slowly.
- Cause a sensor failure (cover or point away). Write what the loop prints and how many ticks it takes to stop.
Interactive · Sense–Plan–Act simulator
Range (cm)
80
Threshold 40 cm
Heading
0°
- Log empty — run a cycle.
The loop period sets how far the robot moves between decisions. Named states make plans readable. And every loop needs an explicit rule for missing data — the safe default is to stop.
Knowledge check
Check your understanding
Knowledge check
1. The three steps of the basic robot loop are…
2. At 30 cm/s with a 10 Hz loop, how far does the rover move between decisions?
3. The sensor misses two readings in a row. The safe plan is to…
4. The HC-SR04 datasheet converts echo time to distance with…
5. Why give `pulseIn()` a timeout?
6. Shakey (SRI) is famous as…
7. States flicker between SLOW and CRUISE near 50 cm. A good fix is…
8. Why is `delay(1000)` inside a robot loop dangerous?
9. Which is an example of the Act step?
Mini assignment
Hands-on assignment
Mini assignment
Design a safe loop for a doorway robot
Design, simulate and (optionally) build a sense–plan–act loop for a robot that must drive through a doorway and stop safely before a wall, including sensor failures.
Deliverables
- A state diagram with at least four states (for example CRUISE, SLOW, STOP, FAULT) and the rule for every transition.
- Your edited `spa_loop.py` that adds hysteresis and a latched fault, with its output.
- A short table of loop rates you tried and the final stopping distance for each.
- If you built the bench version: the Serial Monitor log showing all states, including the no-data stop.
Do this, step by step
- Draw a state diagram with at least CRUISE, SLOW, STOP and FAULT, and write the rule for every arrow.
- Run
spa_loop.pyand note the stopping distance from the wall. - Add hysteresis (different enter/leave distances) and a latched FAULT that only clears on reset; run it again.
- Change
DT(the loop period) to try three loop rates — 0.2 s (5 Hz), 0.1 s (10 Hz) and 0.02 s (50 Hz) — and record the final stopping distance for each in a table. - Optional bench: flash
spa_ultrasonic.ino, walk a book towards the sensor, then unplug Echo and check the robot goes to the no-data stop.
Stuck? Hints, one at a time
- Hint 1: Draw circles for states and arrows for transitions. Label each arrow with its condition (e.g. “dist ≤ 20”).
- Hint 2: For hysteresis, keep the current state in a variable and use it in the rules: “if state is SLOW and dist > 55 → CRUISE”.
- Hint 3: For a latched fault, set
fault = Trueon two misses and checkif fault: speed = 0before any other rule. - Hint 4: Only clear the fault when a
resetvariable is set — not when the sensor comes back.
Challenges (pick by level)
- 🟢 Easy: Compute the travel between decisions at 20 cm/s for 2 Hz, 10 Hz and 50 Hz.
- 🟢 Easy: From the HC-SR04 datasheet formula, convert an echo of 1160 µs into centimetres.
- 🟡 Medium: Add hysteresis to
spa_loop.pyand show that the state no longer flickers with noise 6. - 🟡 Medium: In
spa_ultrasonic.ino, add a second LED that lights only in SLOW. - 🟠 Hard-ish: Make the plan speed proportional to distance (e.g. speed = 0.5 × (dist − 20), capped at 30). Compare the stopping behaviour with the three-state plan.
- 🔴 Hard: Rewrite
spa_ultrasonic.inowithoutdelay(), usingmillis()to run the loop every 100 ms while a heartbeat LED blinks independently. - ⚫ Expert: Add a second simulated sensor (a bump switch) that stops the rover immediately, skipping the planner. Explain why reflexes like this belong below the planner.
Next step
Your loop decides between states. In Lesson 8 — Feedback & Closed-Loop Control you make the decision *continuous*: measure the error, correct in proportion, and see why closed loops beat open loops every time a disturbance appears.
Look back: Lesson 6: Sensors & Proprioception. Next: Lesson 8: Feedback & Closed-Loop Control. Related: Stage 2 — Python and Stage 7 — Control Systems & PID.
Sources
- SRI: Shakey the Robot — first mobile robot able to perceive and reason about its surroundings; SRI AI Center research 1966–1972; planning, route-finding, rearranging simple objects; now at the Computer History Museum.
- OSHA Technical Manual, Section IV Chapter 4 — robot controllers: sensor inputs to a computer, programming, output command signals to the manipulator and end-effectors.
- HC-SR04 datasheet (Elecfreaks, via SparkFun) — 2–400 cm; 10 µs trigger; 8-cycle 40 kHz burst; µs ÷ 58 = cm; measurement cycle over 60 ms.
- Arduino Language Reference: pulseIn() (source) — returns the pulse length in microseconds, or 0 if no complete pulse arrives within the optional timeout.
- Photos: Wikimedia Commons (credits under each image).
Self-attested for now — keep artifacts in your lab notebook.
Complete
Today's goal
0 of 1 done today
Mark this lesson complete when you have worked the experiment, knowledge check, and assignment (even roughly).