
Robotics Fundamentals · Lesson 01
Why Robotics Fundamentals
Est. 40–55 min
Why
Why a robot builder needs fundamentals before code
Stages 0–4 gave you the tools: maths, Python, Linux and electronics. Stage 5 is where those tools meet a real machine. Modern Robotics (Lynch & Park) opens its chapter on configuration space with one clean sentence: a robot is built by connecting rigid links with joints; actuators such as electric motors deliver the forces or torques that move the links; and usually an end-effector, like a gripper, is attached to one link. Every lesson in this stage unpacks one piece of that sentence — plus the sensing, the loop and the safety rules that make it work.
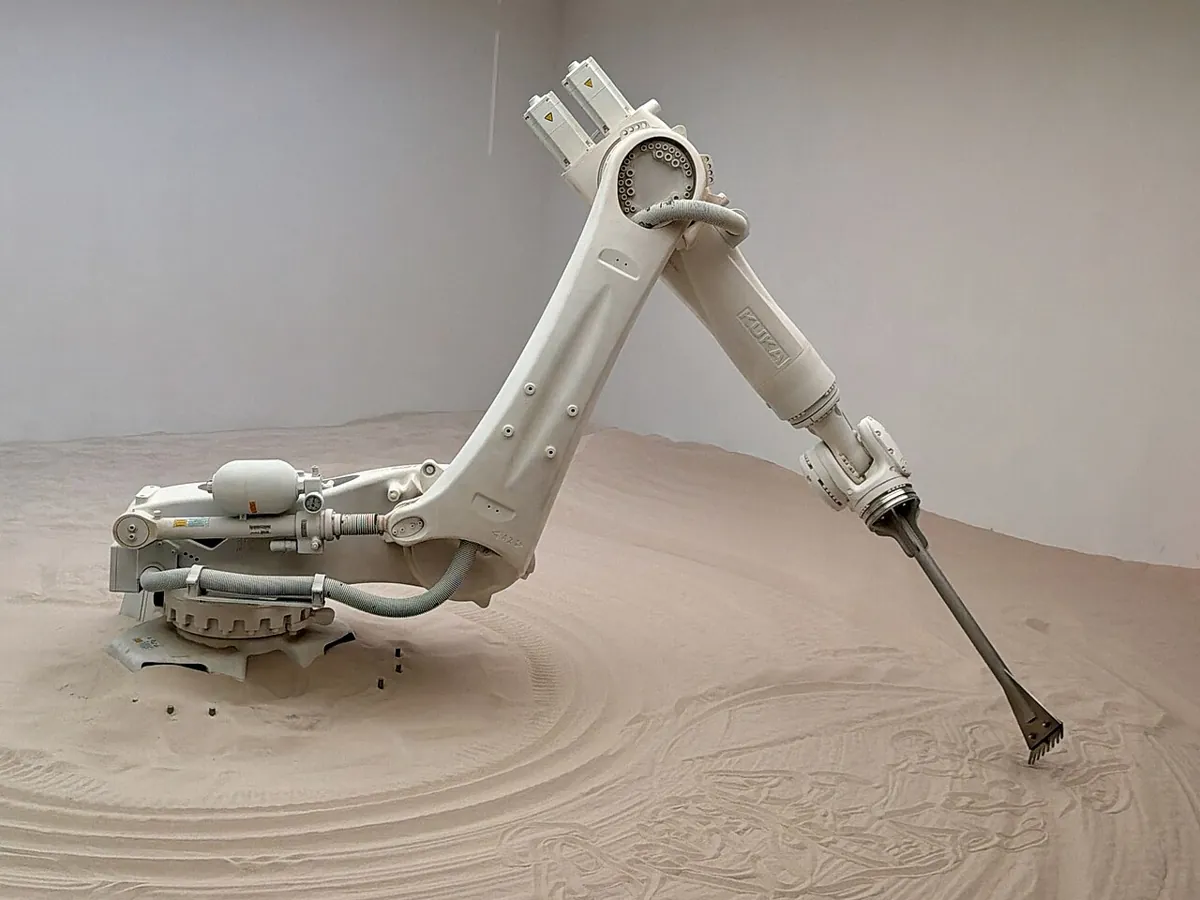
By the end of this chapter you will be able to: name the five layers every robot has (body, actuation, sensing, decision, safety); place each Stage 5 lesson on that map; describe what an industrial robot system includes, using OSHA’s definition; read a real robot photo and point out its links, joints, actuators, sensors and end-effector; and make an honest starting-point map of what you already know.
Concept
Robotics fundamentals in plain words: one shared language for every robot
Think of a cricket fielder catching a ball. Their body is bones and joints (links and joints). Their muscles pull on the bones through tendons (actuators and transmissions). Their eyes track the ball and their inner ear and muscle sense tell them where their own hands are (exteroception and proprioception). Their brain keeps correcting the hands until the ball lands (the sense–plan–act loop and feedback). And a good fielder never dives into the boundary rope at full speed (limits and safety). A robot has exactly these five layers.
The five layers of every robot
| Layer | What it is | In a robot arm | Stage 5 lessons |
|---|---|---|---|
| Body | Rigid links joined by joints; its shape decides where it can go | Base, shoulder, upper arm, forearm, wrist | 3, 4, 9, 10, 12 |
| Actuation | Motors plus gears/belts/screws that make joints move; the tool at the end | Servos in each joint, a gripper | 5, 11 |
| Sensing | Measuring the robot itself and the world around it | Joint encoders or potentiometers, a camera | 6 |
| Decision | The loop that reads sensors, decides, and commands actuators — again and again | Firmware or a PC running a control loop | 7, 8 |
| Safety | Limits, stops and guards that keep people and the robot safe | Soft limits, e-stop, slow teach mode | 13 |
Lessons 1–2 build this map and connect it to Stage 4. Lessons 3–4 give the body a precise vocabulary (degrees of freedom and configuration space). Lessons 5–6 cover what moves the body and what measures it. Lessons 7–8 close the loop. Lessons 9–11 describe where the tool can go and what it is. Lessons 12–13 compare robot types and set the safety rules. Lesson 14 bridges into the 6DOF arm course, and Lesson 15 is your capstone design.
What counts as a robot system?
OSHA’s Technical Manual chapter on industrial robots gives a useful, practical definition. An industrial robot system includes not only the robot itself but also the end-effector attached to the manipulator; the control system (computers, processors and programs); power sources; sensors; and the input/output interfaces that sequence or monitor the work. Notice: the motor alone is not the robot, and the code alone is not the robot. The *system* is the robot.
Robot system = body (links + joints) + actuators + end-effector + sensors + controller + power + I/O + safety
- This is a checklist, not a maths equation. If any item is missing, you have a machine, not a working robot.
Why fundamentals before advanced topics
- Kinematics (Stage 8) needs links, joints, frames and the tool centre point (Lessons 3, 10).
- Control & PID (Stage 7) needs feedback and the sense–plan–act loop (Lessons 7, 8).
- Trajectory planning (Stage 9) needs configuration space, joint limits and workspace (Lessons 4, 9, 13).
- Perception (Stages 11, 13) needs sensors and frames (Lessons 6, 10).
- Your 6DOF arm build needs all of it — especially torque, power and safety (Lessons 5, 13, 14).
Visual
Visualise it: the layers of a robot
Tap each block to see how a robot’s parts connect: sensors feed the controller, the controller commands the actuators, the actuators move the body, and power feeds everything. Match each block to one of the **five layers** in the table above.
Interactive · Robot architecture
Sensors — examples
- •Distance (ultrasonic / ToF)
- •Encoders / pots
- •IMU
- •Camera
- •Bump / limit switches
Code lab
Code lab: map Stage 5 to your own starting point
This short Python script groups the Stage 5 topics by robot layer, then asks *you* how well you know each one (0 = new, 1 = heard of it, 2 = can explain it). It prints a readiness score and the three lessons you should give extra time. Copy it, run it with python3 stage_map.py, then edit MY_RATING honestly and run it again.
"""stage_map.py - where each Stage 5 idea lives in a robot, and what you already know.
Edit MY_RATING (0 = new to me, 1 = heard of it, 2 = can explain it) and run again."""

LAYERS = ["Body", "Actuate", "Sense", "Decide", "Safety"]

TOPICS = [  # (lesson, topic, layer, stage where you first met it)
    (3, "Joints, links & DOF", "Body", "Stage 0"),
    (4, "Configuration space", "Body", "Stage 1 (math)"),
    (5, "Actuators & gears", "Actuate", "Stage 4"),
    (6, "Encoders, IMUs, cameras", "Sense", "Stage 4"),
    (7, "Sense-plan-act loop", "Decide", "Stage 2 (Python)"),
    (8, "Feedback control", "Decide", "Stage 0"),
    (9, "Workspace & reach", "Body", "Stage 1 (math)"),
    (10, "Frames, pose & TCP", "Body", "Stage 1 (math)"),
    (11, "End effectors", "Actuate", "new"),
    (12, "Robot platforms", "Body", "Stage 0"),
    (13, "Limits & safety envelope", "Safety", "Stage 4"),
]

MY_RATING = {3: 1, 4: 0, 5: 1, 6: 1, 7: 2, 8: 1, 9: 0, 10: 1, 11: 0, 12: 2, 13: 1}

print("== Stage 5 topics by robot layer ==")
for layer in LAYERS:
    rows = [t for t in TOPICS if t[2] == layer]
    names = ", ".join(f"L{n:02d} {name}" for n, name, _, _ in rows)
    print(f"{layer:8s} ({len(rows)}): {names}")

print("\n== Your starting point ==")
labels = {0: "new", 1: "heard of it", 2: "can explain"}
total = 0
for n, name, layer, first in TOPICS:
    r = MY_RATING.get(n, 0)
    total += r
    print(f"L{n:02d} {name:26s} first met: {first:15s} -> {labels[r]}")

score = 100 * total / (2 * len(TOPICS))
print(f"\nReadiness today: {score:.0f}% of Stage 5 ideas you can already explain")
focus = [f"L{n:02d}" for n, *_ in TOPICS if MY_RATING.get(n, 0) == 0]
print("Start with:", ", ".join(focus) if focus else "nothing new - review the capstone")
Output (run with python3 stage_map.py)
== Stage 5 topics by robot layer ==
Body     (5): L03 Joints, links & DOF, L04 Configuration space, L09 Workspace & reach, L10 Frames, pose & TCP, L12 Robot platforms
Actuate  (2): L05 Actuators & gears, L11 End effectors
Sense    (1): L06 Encoders, IMUs, cameras
Decide   (2): L07 Sense-plan-act loop, L08 Feedback control
Safety   (1): L13 Limits & safety envelope

== Your starting point ==
L03 Joints, links & DOF        first met: Stage 0         -> heard of it
L04 Configuration space        first met: Stage 1 (math)  -> new
L05 Actuators & gears          first met: Stage 4         -> heard of it
L06 Encoders, IMUs, cameras    first met: Stage 4         -> heard of it
L07 Sense-plan-act loop        first met: Stage 2 (Python) -> can explain
L08 Feedback control           first met: Stage 0         -> heard of it
L09 Workspace & reach          first met: Stage 1 (math)  -> new
L10 Frames, pose & TCP         first met: Stage 1 (math)  -> heard of it
L11 End effectors              first met: new             -> new
L12 Robot platforms            first met: Stage 0         -> can explain
L13 Limits & safety envelope   first met: Stage 4         -> heard of it

Readiness today: 45% of Stage 5 ideas you can already explain
Start with: L04, L09, L11
How it works: TOPICS is a list of tuples. The first loop filters by layer with a list comprehension; the second looks up your rating with dict.get(n, 0) so a missing lesson counts as “new”. The score is your total divided by the maximum possible (2 points × 11 topics).
Real world
Where these fundamentals show up in real robots
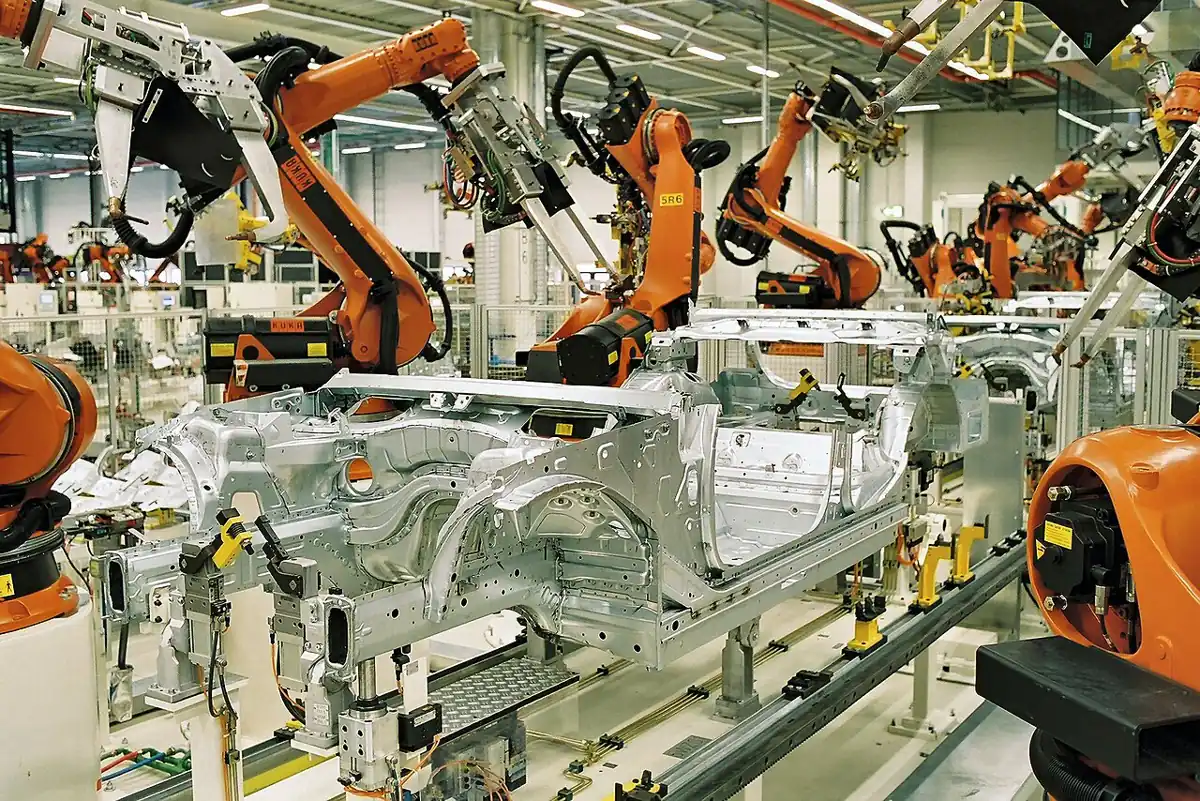
- Car factories: welding arms are a body of six joints, geared electric motors, a welding gun, joint encoders and a controller inside a guarded cell.
- Planetary rovers: NASA’s Curiosity is a mobile body with wheels and a robotic arm; it senses its surroundings with cameras and must decide a lot on its own because Earth is far away and a driver cannot steer it moment by moment.
- Warehouses: mobile robots carry shelves and pallets; OSHA notes that mobile robots can navigate autonomously in a facility.
- Your home: a robot vacuum cleaner has wheels, motors, bump and cliff sensors, and a loop that decides where to go next (Lesson 2 opens one up).
- Your 6DOF arm: the same layers on a desk — servos, brackets, a driver board, a microcontroller and your safety habits.

Bench build
Bench build: a robot anatomy board
No electronics today — just a hands-on map you will use for the whole stage. Take one real machine you can touch (a desk fan with oscillation, a toy car, a hobby servo, or your Stage 4 servo bench) and build an anatomy board: a sheet of chart paper with five columns, one per layer.
Pick the machine
Choose something with at least one motor. A pedestal fan is great: it has a motor, a gearbox for oscillation, a speed switch and a body with joints.
Draw the body
Sketch it. Colour each rigid part (link) one colour and circle each place where two parts move relative to each other (joint).
Find the actuators
Mark every motor. Write what it moves and through what (gear, belt, crank).
Find the sensors
Does it measure anything? A fan usually measures nothing — that is an important finding. Your Stage 4 servo has a potentiometer inside.
Find the decision and safety
Who decides? (A switch, a chip, you.) What stops it safely? (A guard, a fuse, a switch.)
Grade it
Is it a robot by the five-layer test? If not, which layer is missing?
Debugging
Debugging your thinking: common confusions
| Confusion | Why it happens | Better way to think |
|---|---|---|
| “A robot is the code” | Most tutorials start with software | Code is only the decision layer; the body and power decide what is physically possible |
| “More motors = better robot” | Specs look impressive | Each joint adds weight, cost and things to calibrate — pick the fewest joints that do the job (Lesson 3) |
| “The servo knows where the gripper is” | A servo has internal feedback | The servo knows its *own angle* only; the gripper’s position needs link lengths and frames (Lesson 10) |
| “Safety comes at the end” | It feels like paperwork | Limits and stops are designed in from the first sketch (Lesson 13) |
| “A remote-control car is a robot” | It moves and has motors | Without sensing and a decision loop it is a machine you drive — add sensors and a loop and it becomes a robot |
Think
Think about it
Think
Meera says her automatic washing machine is a robot: it has motors, a water-level sensor, a programme that decides when to fill, wash and spin, and a lid lock for safety. Arjun says it is “just an appliance”. Using the five layers, who is right — and what would you look for to decide?
Experiment
Try it in the lab: map a real robot to the layers
Twenty minutes with the robot-architecture visual, the Python script and the photos in this chapter. You will practise the most important habit of this stage: looking at any robot and naming its layers.
Experiment
Map a real robot to the layers
You will need
- Robot architecture visual (below, runs in your browser)
- Notebook or chart paper
- Optional: your laptop to run `stage_map.py`
Steps
- Open the visual and tap each block. For each one, write which of the five layers it belongs to.
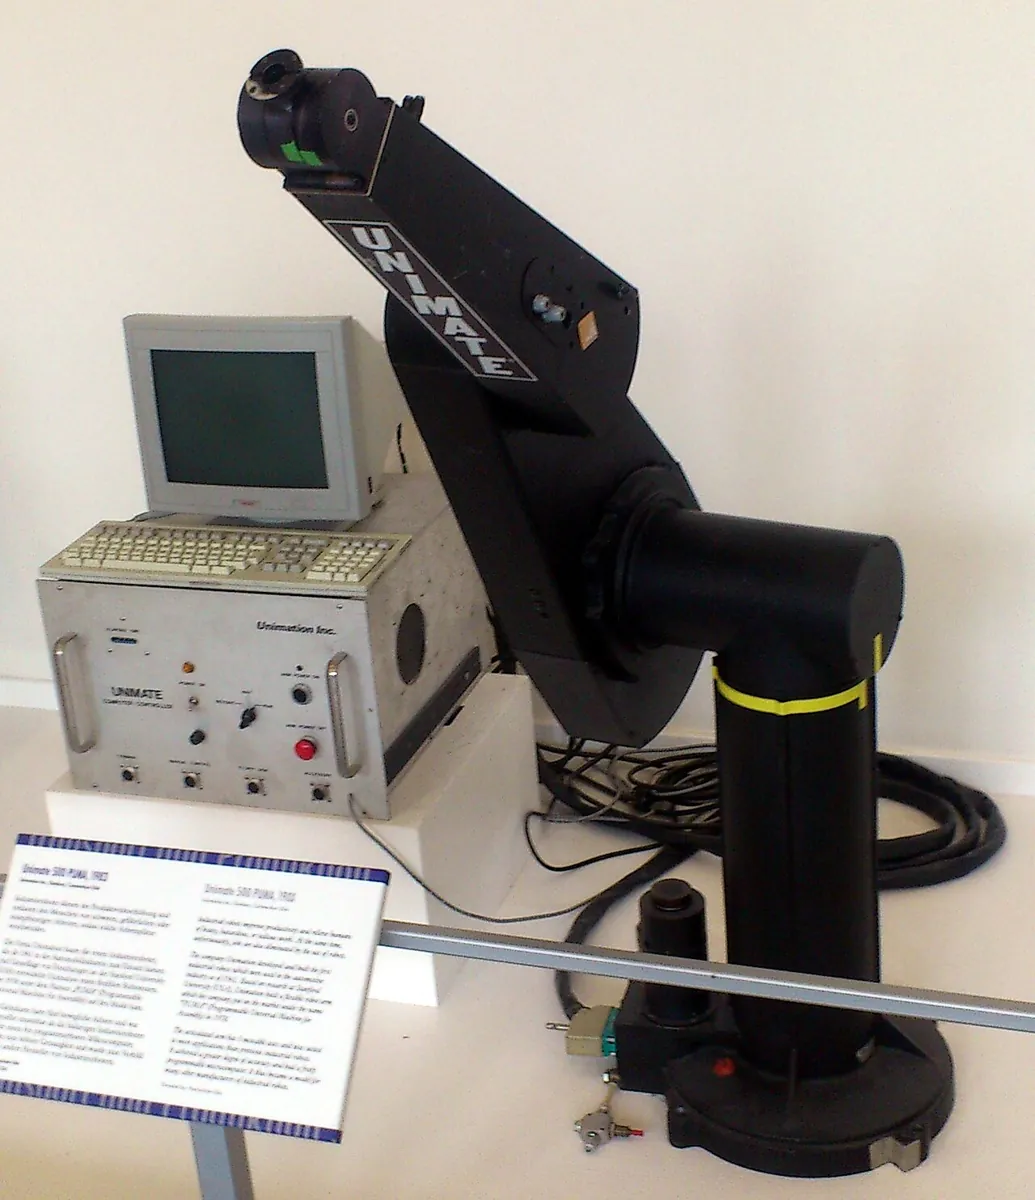
- Look at the KUKA, BMW, Curiosity and PUMA photos in this chapter. For each, list one part from each layer that you can see — and one you cannot see but know must exist.
- Run `stage_map.py` with your honest ratings. Copy your readiness score and your “Start with” list.
- Pick one robot from the photos and write two sentences: what its end-effector is, and what would change if you gave it a different one.
- Compare with a friend: did you place the same parts in the same layers? Discuss any differences.
Interactive · Robot architecture
Sensors — examples
- •Distance (ultrasonic / ToF)
- •Encoders / pots
- •IMU
- •Camera
- •Bump / limit switches
Every robot, from a sand-raking art arm to a Mars rover, decomposes into the same five layers. Once you see them, a new robot is no longer a mystery — it is a new combination of familiar parts.
Knowledge check
Check your understanding
Knowledge check
1. According to Modern Robotics, a robot is mechanically built from…
2. Which of these is NOT one of the five layers used in this stage?
3. OSHA’s description of an industrial robot system includes the robot plus…
4. The tool on the end of a robot arm (gripper, welding gun, rake) is called the…
5. In the cricket-fielder analogy, the fielder’s muscles and tendons correspond to…
6. A servo’s internal potentiometer tells the servo…
7. Which Stage 5 lessons cover the decision layer?
8. Why did Arjun’s gripper arrive 2 cm to the left of the chalk, even with perfect wiring?
9. A remote-control toy car becomes more of a robot when you add…
10. When should safety limits be designed into a robot?
Mini assignment
Hands-on assignment
Mini assignment
Your robot anatomy board and Stage 5 study plan
Pick one real machine you can touch, build a five-layer anatomy board for it, and turn the `stage_map.py` output into a personal study plan for this stage.
Deliverables
- A photo or scan of your anatomy board with all five layers filled in (write “missing” where a layer does not exist).
- One paragraph: is your machine a robot by the five-layer test? Why or why not?
- Your `stage_map.py` output with your honest ratings, and the three lessons you will give extra time.
- A labelled sketch of one robot photo from this chapter with at least one part from each layer marked.
Do this, step by step
- Pick one machine you can touch that has at least one motor (pedestal fan, toy car, hobby servo or your Stage 4 servo bench) and unplug it if it runs on mains.
- Draw a five-column anatomy board (body, actuation, sensing, decision, safety) on chart paper and fill each column; write “missing” where a layer does not exist.
- Open the robot-architecture visual, tap every block and write which of the five layers it belongs to.
- Run
python3 stage_map.py, then changeMY_RATINGto your honest 0/1/2 answers and run it again; copy the readiness score and the “Start with” list. - Choose one photo from this chapter, sketch it, and label at least one part from each layer. Finish with one paragraph: is your machine a robot by the five-layer test?
Stuck? Hints, one at a time
- Hint 1: Start with the body. Anything rigid that moves as one piece is a link; anywhere two links move relative to each other is a joint.
- Hint 2: For actuation, follow the motor’s shaft: what does it turn, and through what (gear, belt, crank, screw)?
- Hint 3: For sensing, ask “how does the machine know when to stop?” If the answer is “it doesn’t — a person decides”, the sensing layer is missing.
- Hint 4: For safety, look for guards, fuses, cut-off switches, rounded edges and speed limits. These are all safety layer parts.
Challenges (pick by level)
- 🟢 Easy: Write the OSHA list of what an industrial robot system includes, from memory, then check it against this chapter.
- 🟢 Easy: For the BMW welding photo, name the end-effector and one sensor you would expect inside each joint. *Hint:* Lesson 6 preview — encoders.
- 🟡 Medium: Add a
"Power"layer tostage_map.pyand decide which lessons belong there. *Hint:* torque and current (Lesson 5), supply sizing (Lesson 14). - 🟡 Medium: Pick a robot you have seen in the news. Draw its five layers and mark which ones the news article never mentioned.
- 🟠 Hard-ish: Compare the sand-raking KUKA arm and the welding arms: list what is identical and what is different across all five layers.
- 🔴 Hard: Read the introduction of the OSHA robot chapter and list three industries it mentions that historically did not use robots. Explain which layer made each possible. *Hint:* sensing and AI.
- ⚫ Expert: Write a one-page “robot system specification” for a chalk-picking desk arm: list every component in each layer, the supply voltage, and the one safety rule you consider non-negotiable.
Next step
You have the map. In Lesson 2 — Robot Systems Recap you will connect it to everything you built in Stage 4: trace the full chain from power to the moving joint, and learn to find a fault by breaking one link at a time.
Next: Lesson 2: Robot Systems Recap. Related: Stage 0 — Orientation and Stage 4 — Electronics and Stage 6 — 6DOF Arm.
Sources
- Modern Robotics: Mechanics, Planning, and Control — K. M. Lynch & F. C. Park (preprint PDF) — Ch. 2 opening: links, joints, actuators and end-effector; preface: the same principles apply to a thermostat or fly-ball governor, and the heart of robotics is controlled programmable motion. Book site: modernrobotics.northwestern.edu.
- OSHA Technical Manual, Section IV Chapter 4: Industrial Robot Systems and Industrial Robot System Safety — what an industrial robot system includes; uses of industrial robots; mobile robots that navigate autonomously.
- Photos: Wikimedia Commons (credits under each image).
Self-attested for now — keep artifacts in your lab notebook.
Complete
Today's goal
0 of 1 done today
Mark this lesson complete when you have worked the experiment, knowledge check, and assignment (even roughly).